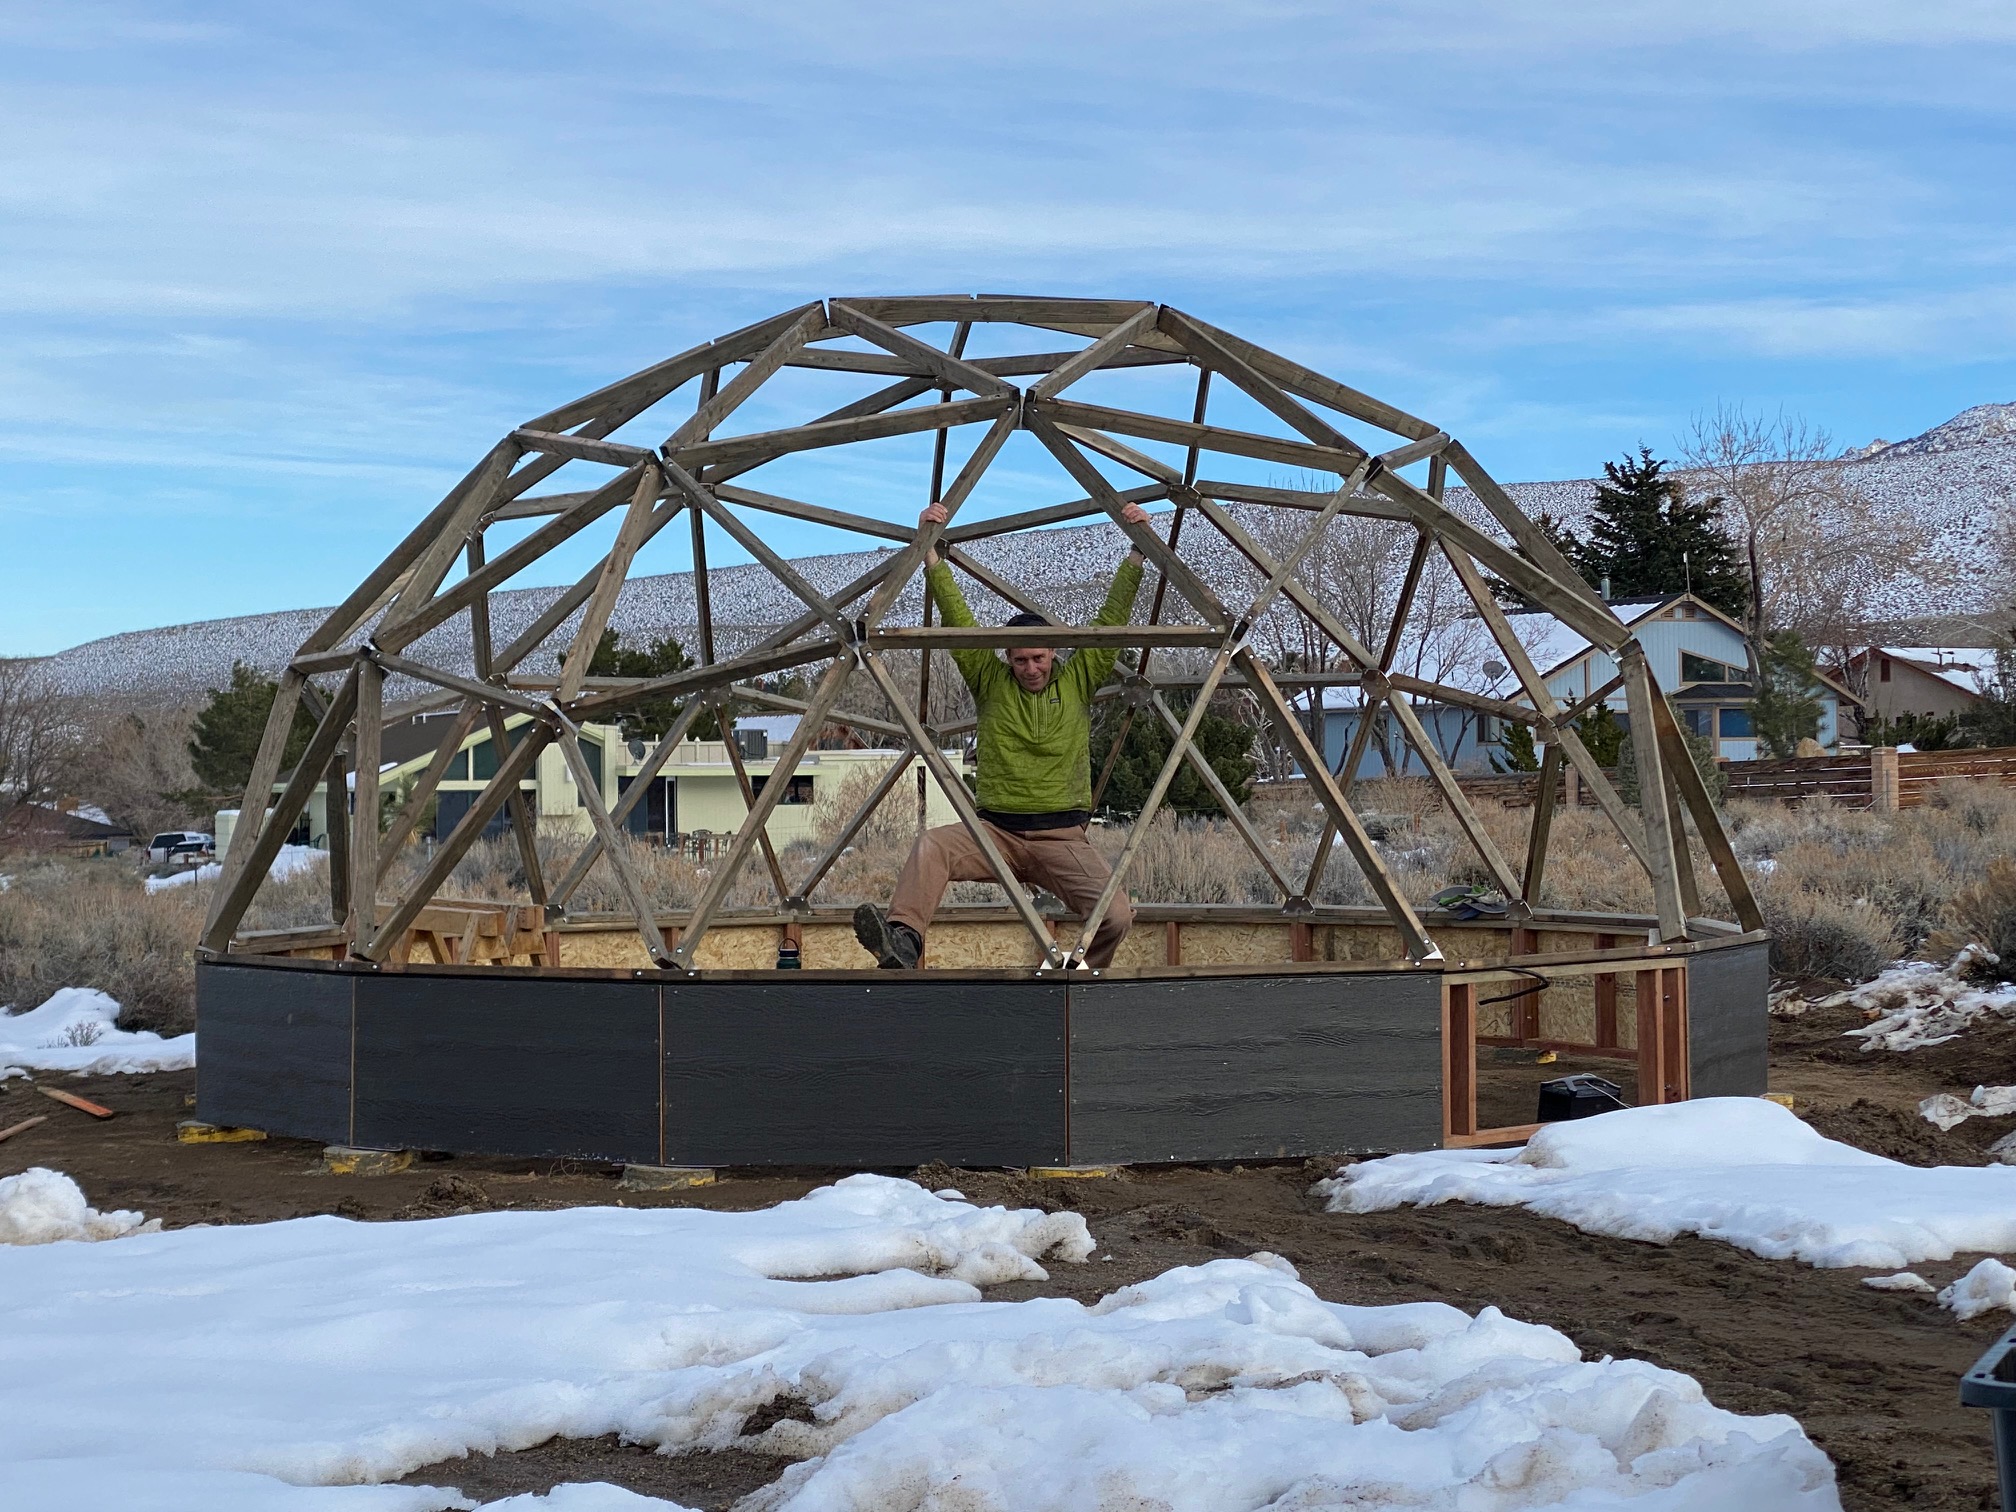
The logical next step after assembling the dome struts is to nail on the triangles of plywood sheathing. However, I got gardening fever and a craving for “minutes old” (as my Mom says) vegetables and fruits. So after the snowstorm, we began construction on the Garden Dome, another kit, but this time from Growing Spaces Domes. It took us 3 months!
We assembled the riser walls first. The directions recommended straddling the frames like ponies and I enjoyed that quite a bit.
After assembling all the riser wall frames, we attached the exterior sheathing and pink sill padding to the corners. Then we bolted the riser walls together.
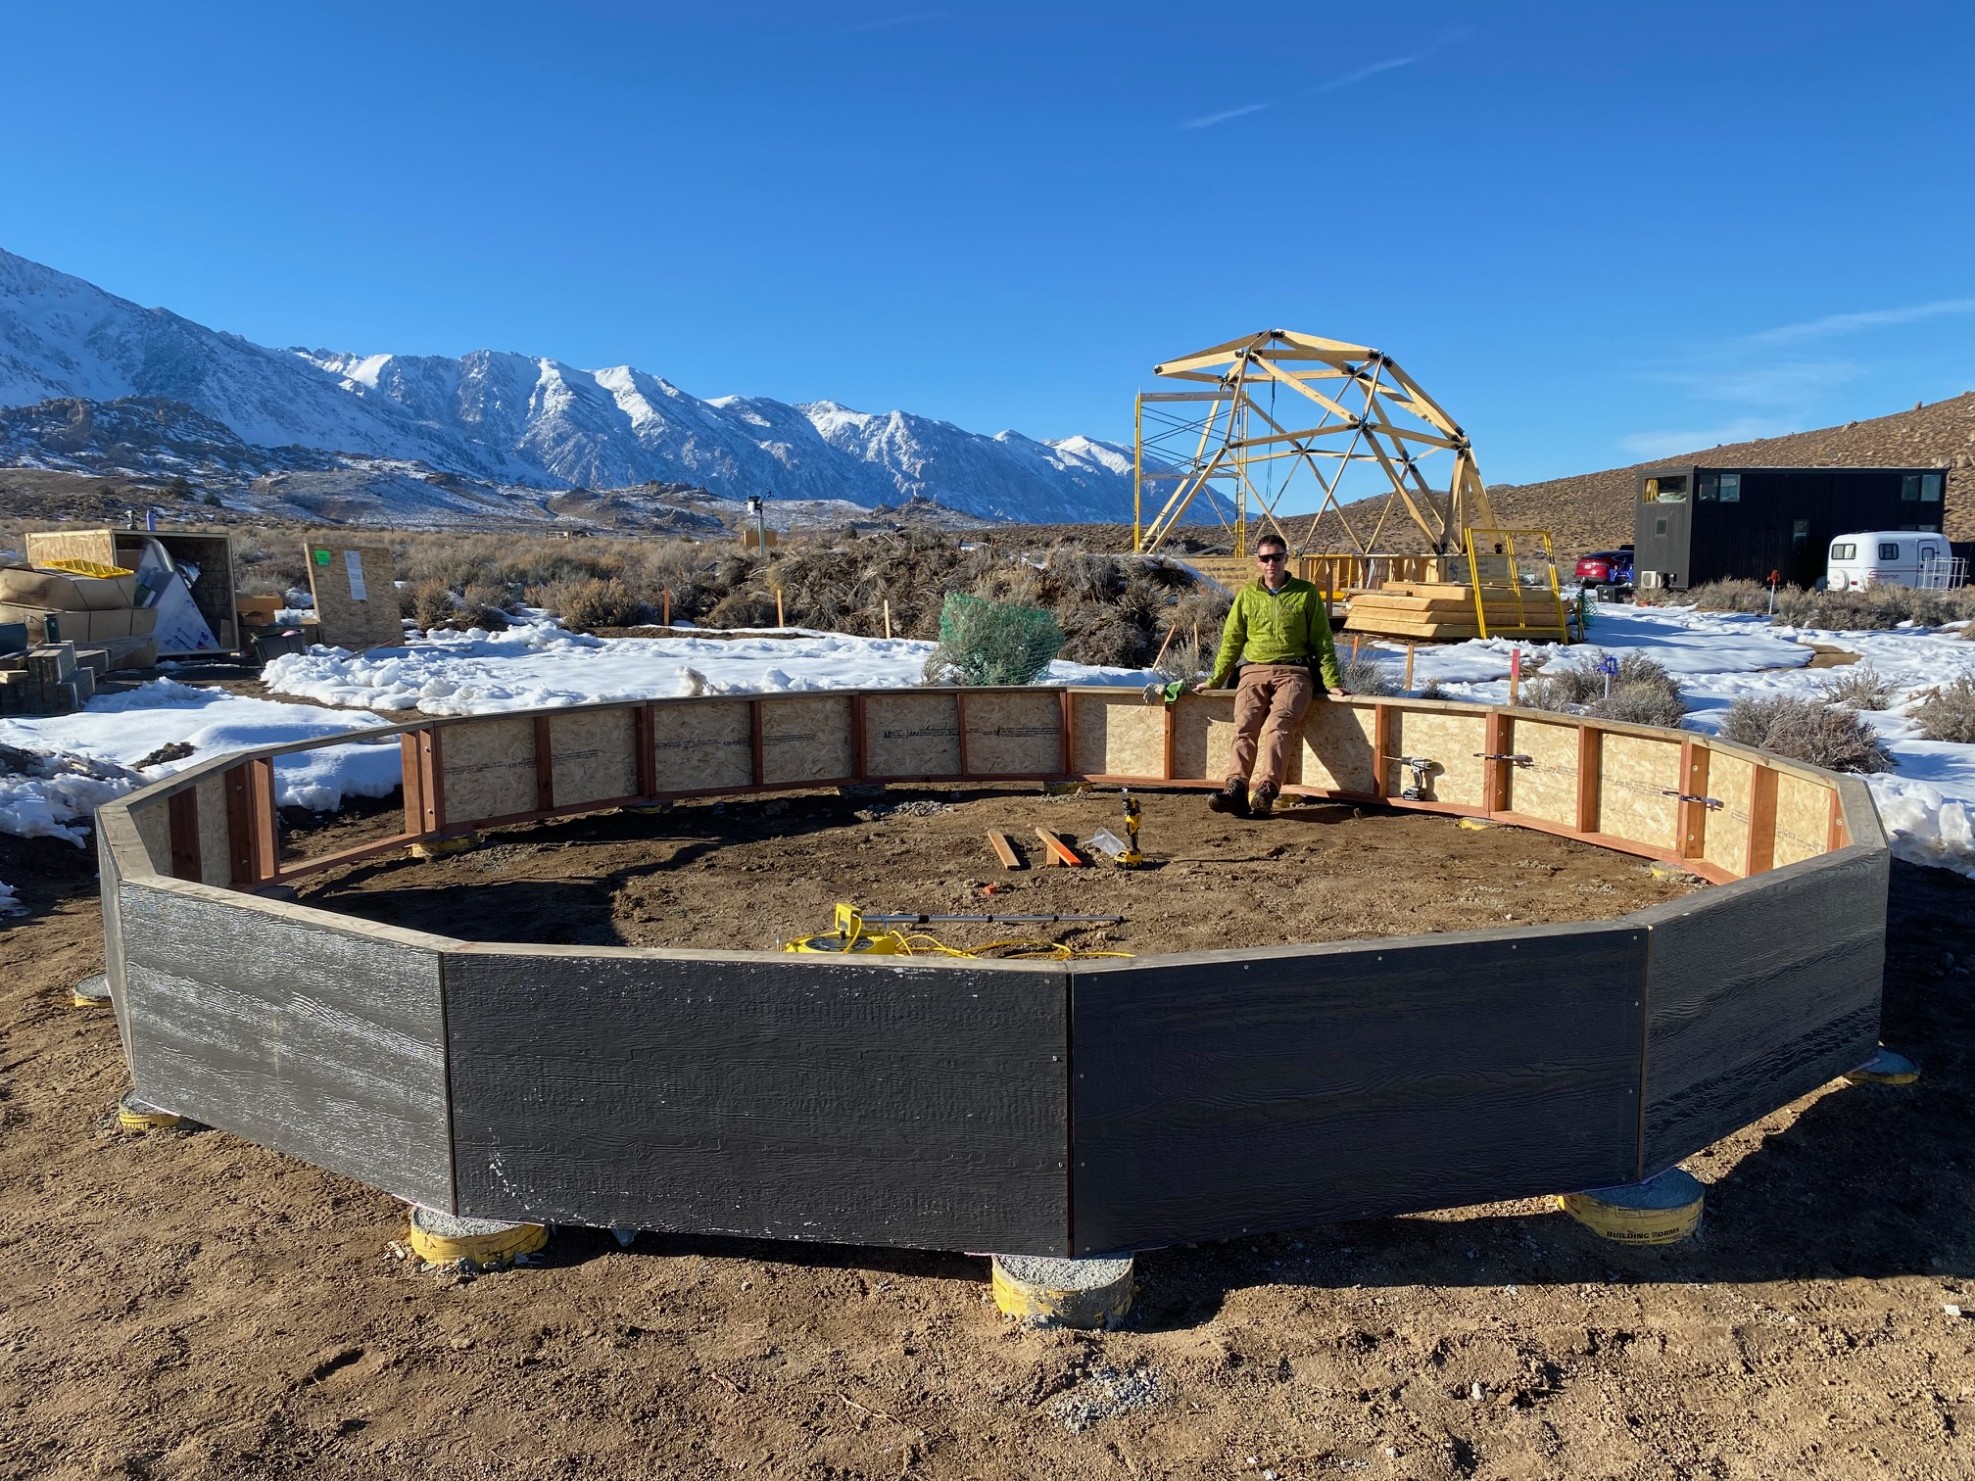
This dome has 2×4 struts of shorter lengths than Natural Spaces’ long 2x8s, so it was much easier to put together. The hubs are metal plates that are connected to the struts with carriage bolts, which aren’t as solid as our larger domes’ aluminum hubs with pins, but are very quick to put together.
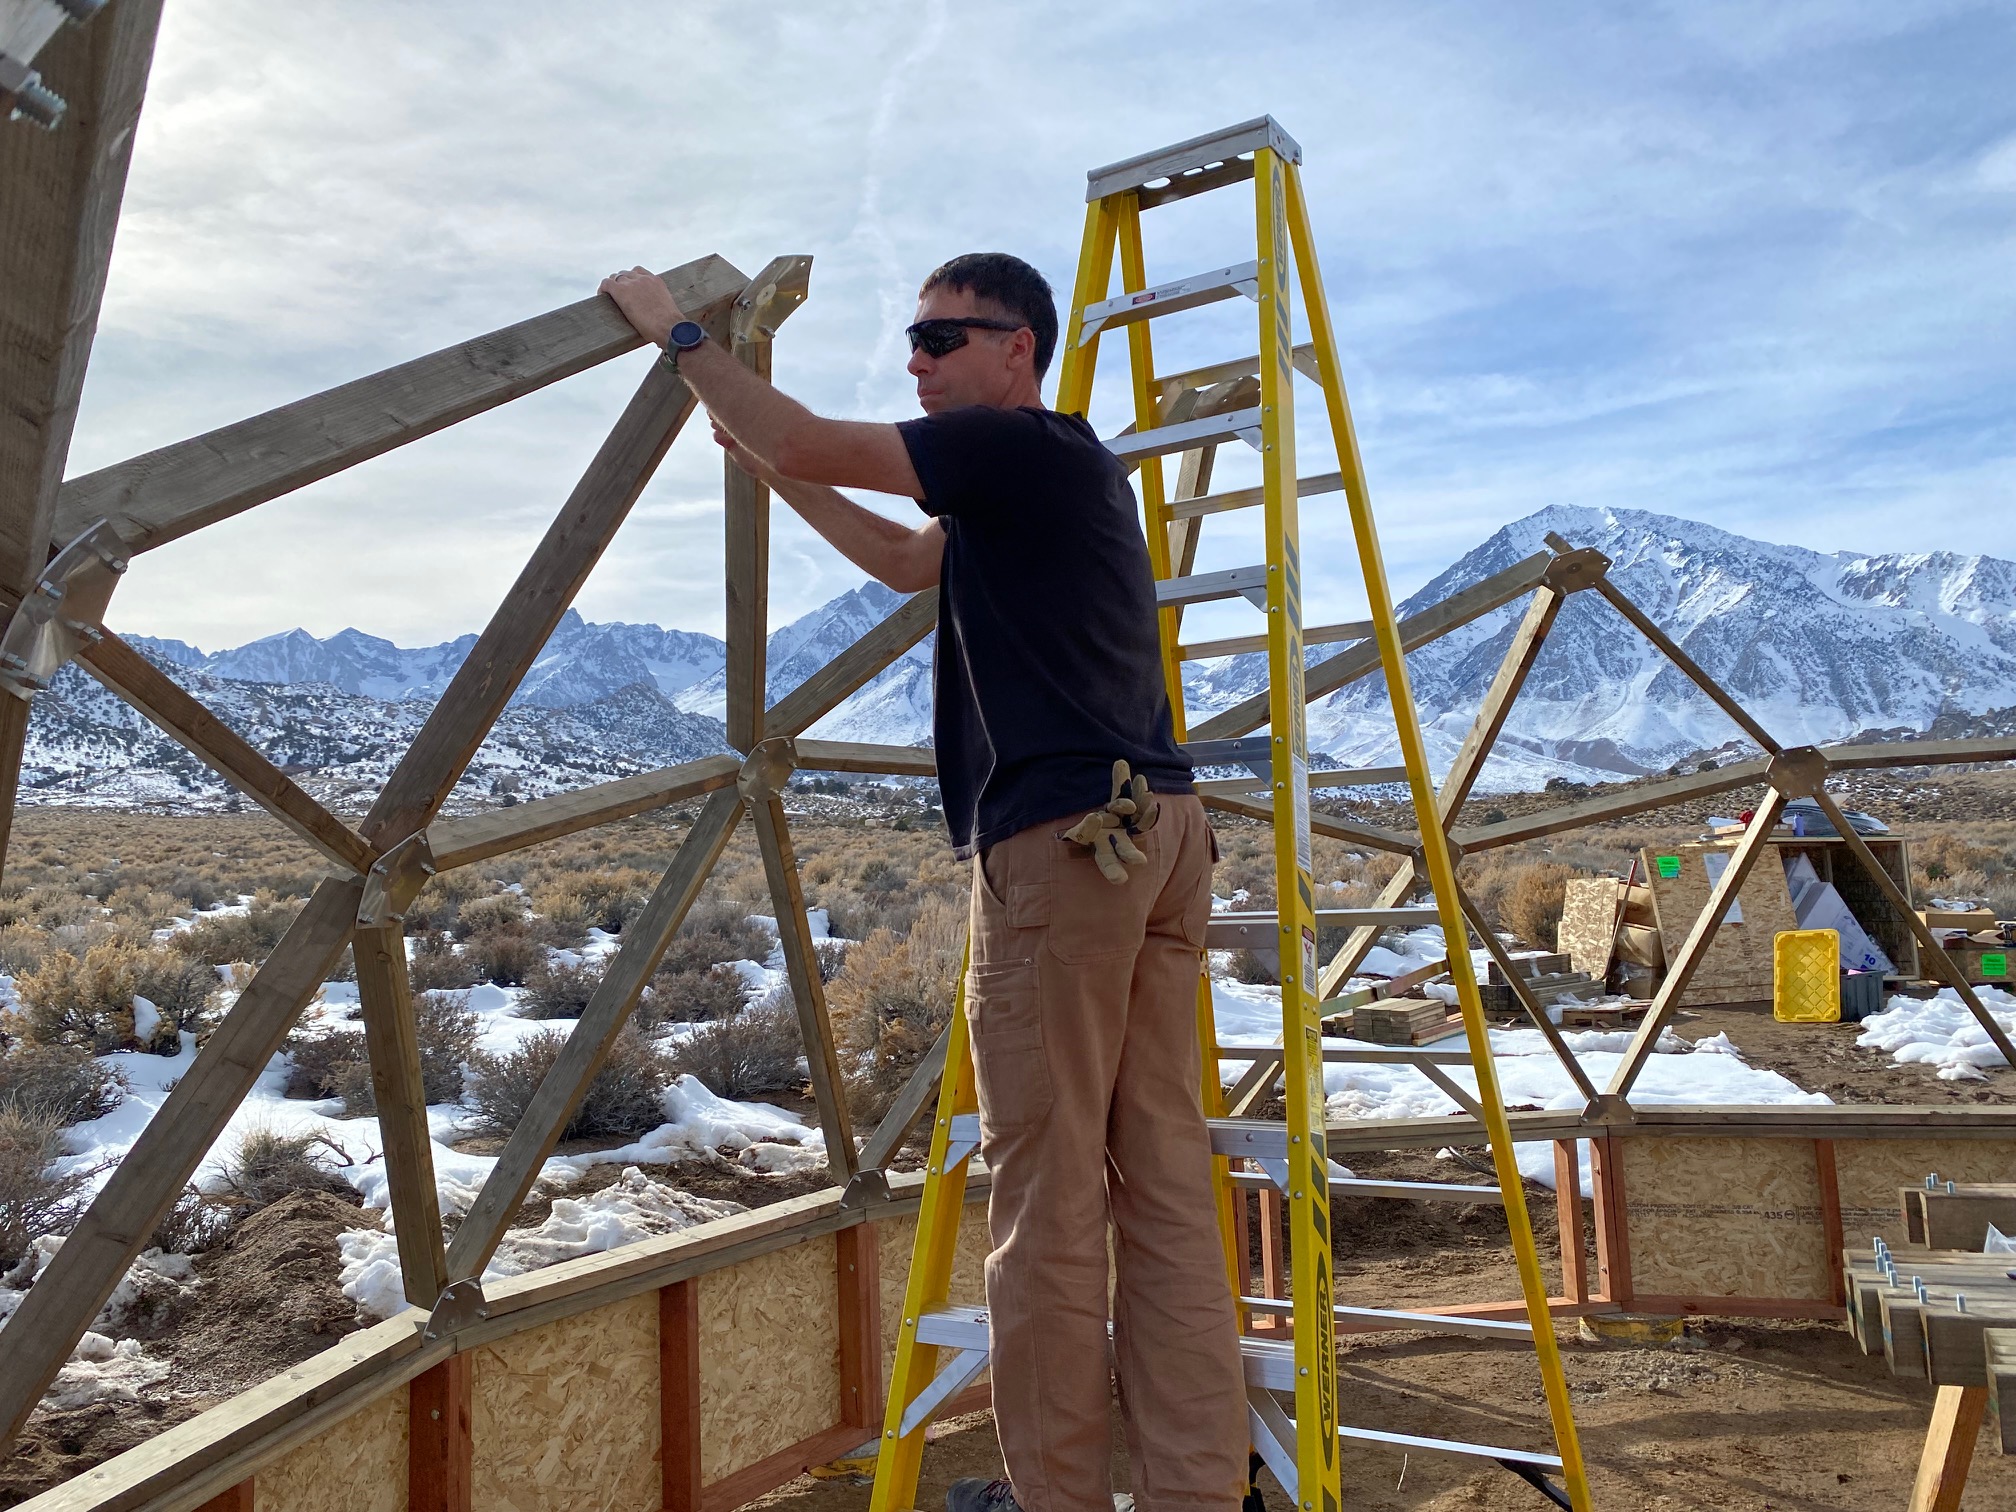
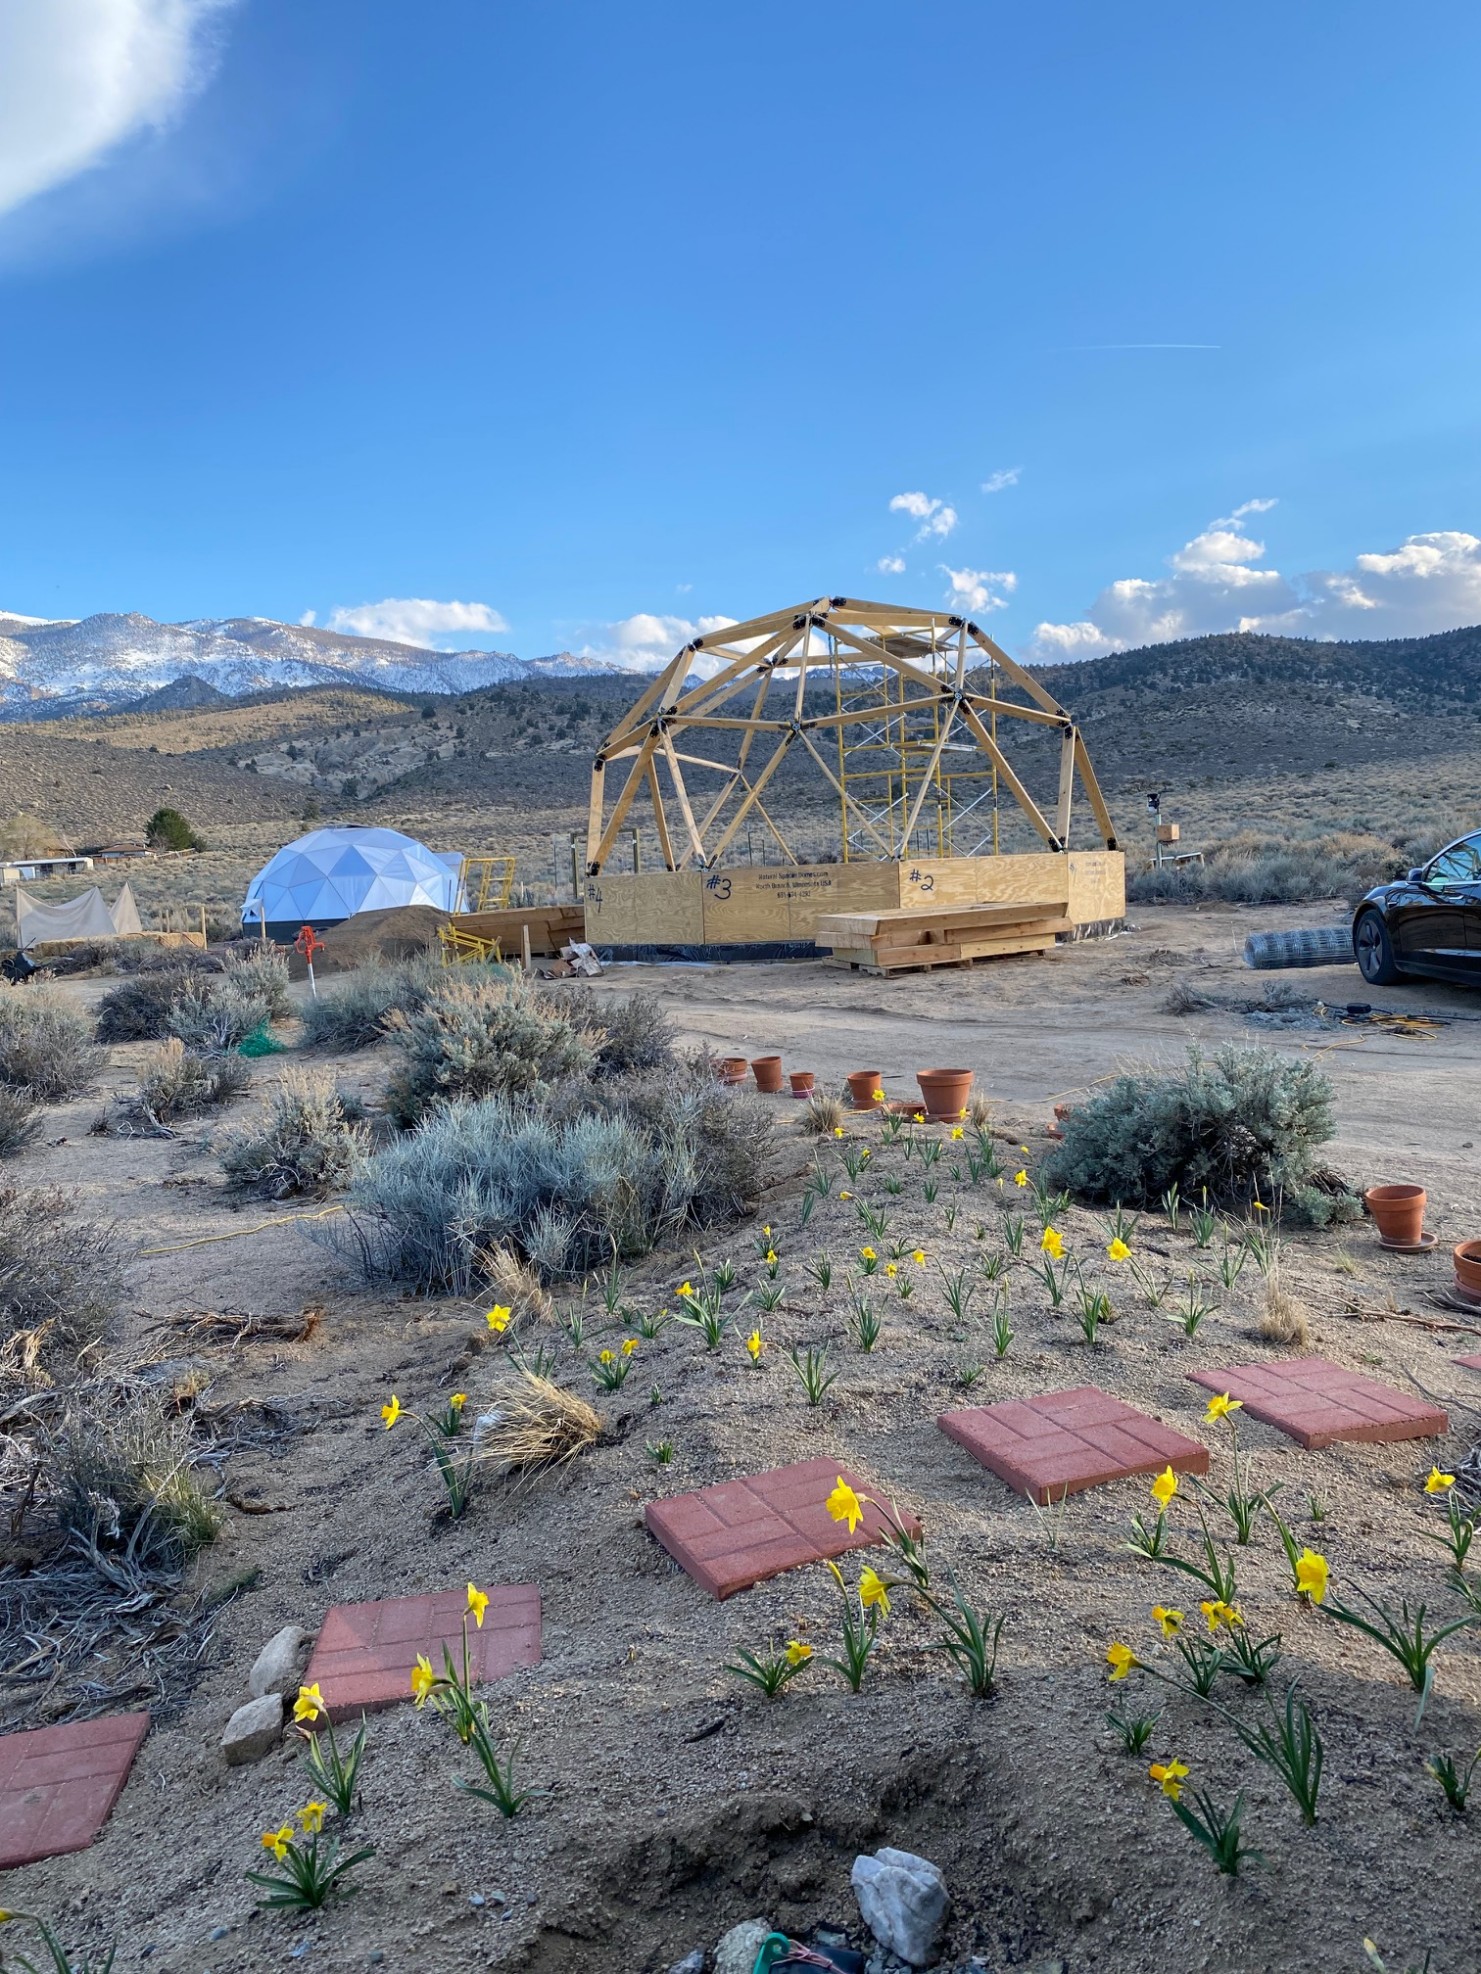
We got as far as installing the four wax-filled self-venting panels before a windy storm moved in, so we decided to switch to working on the garden, rather than have all our polycarbonate triangles blow away.
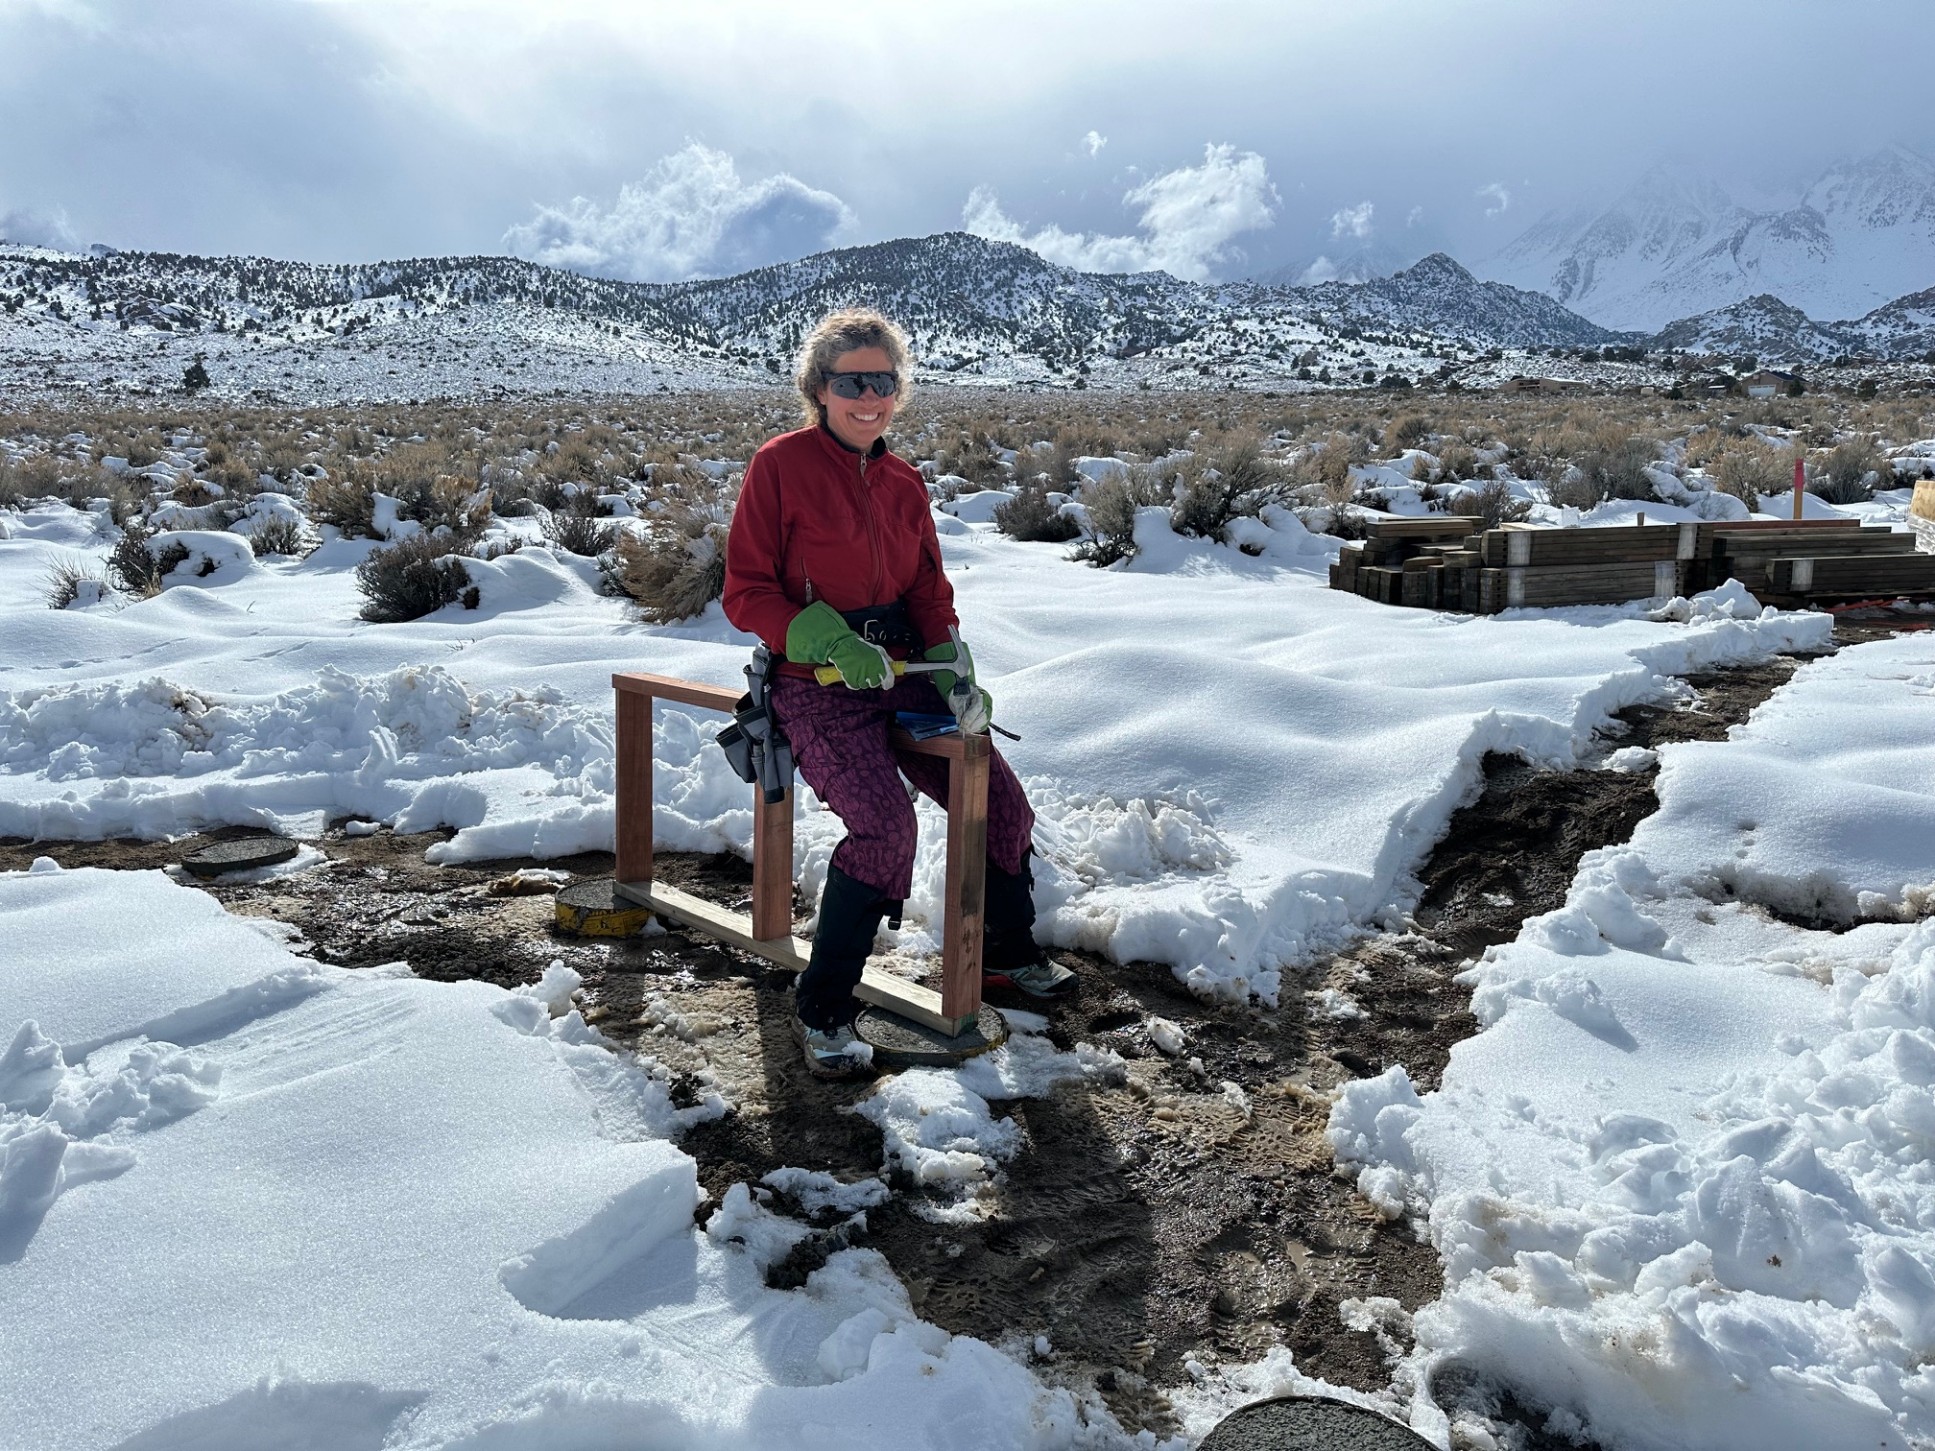
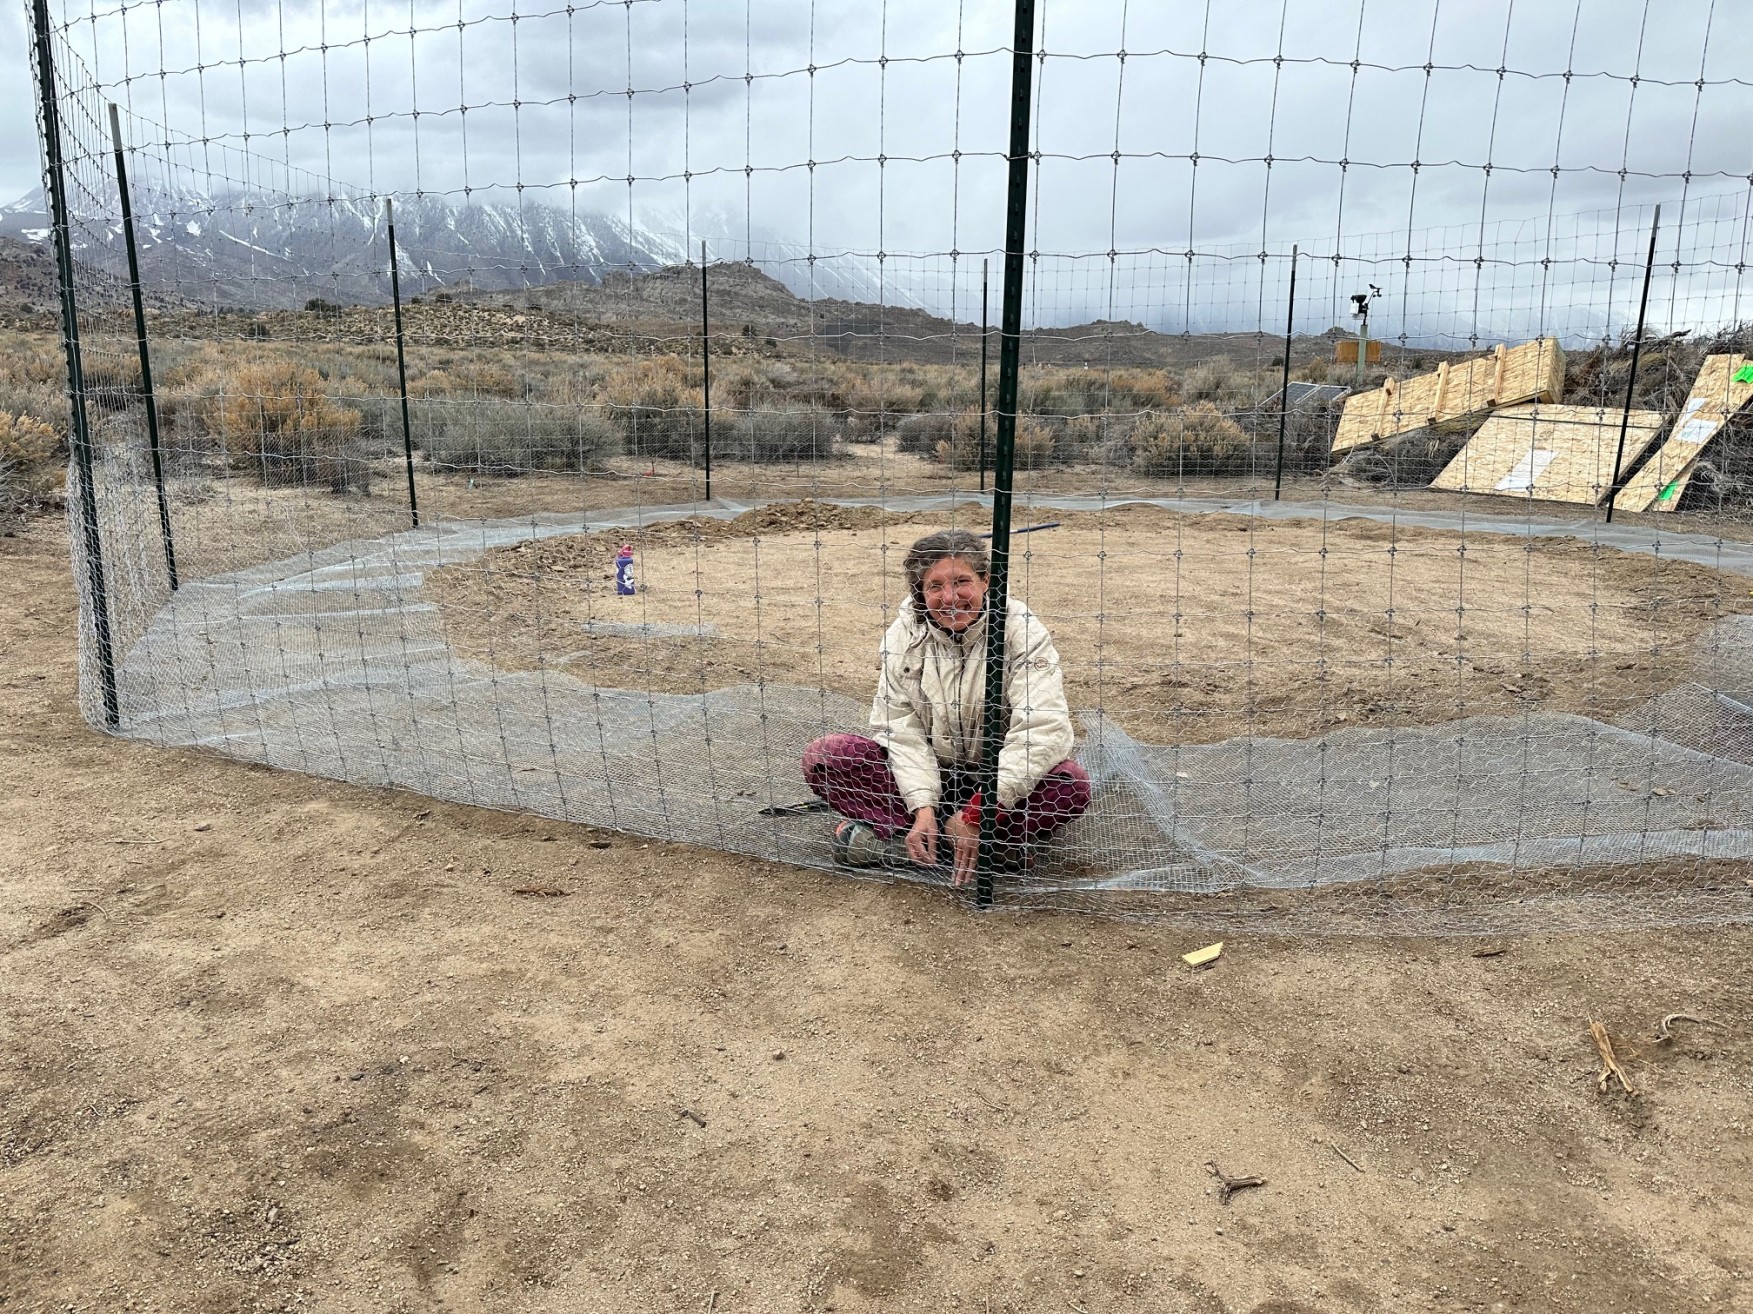
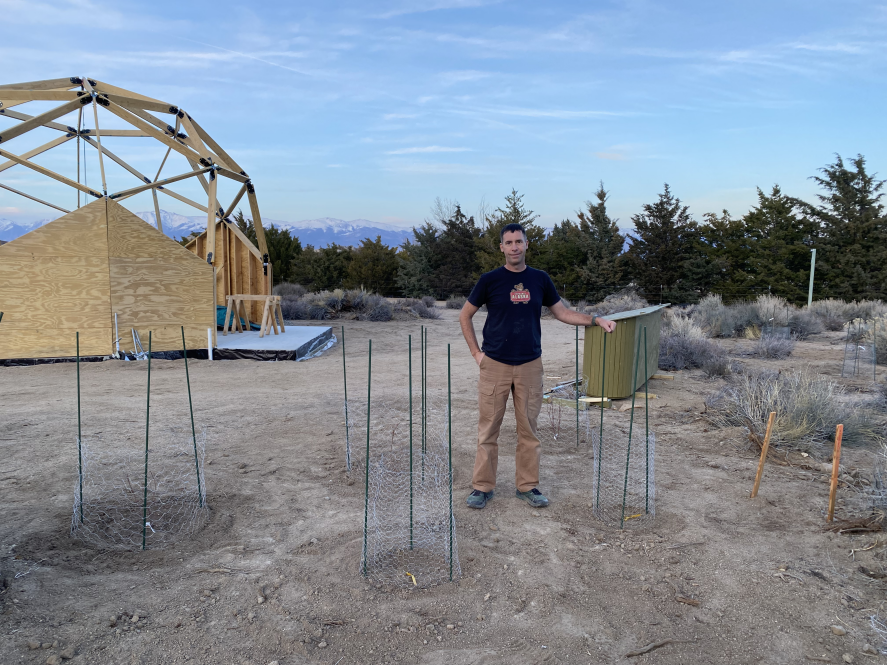
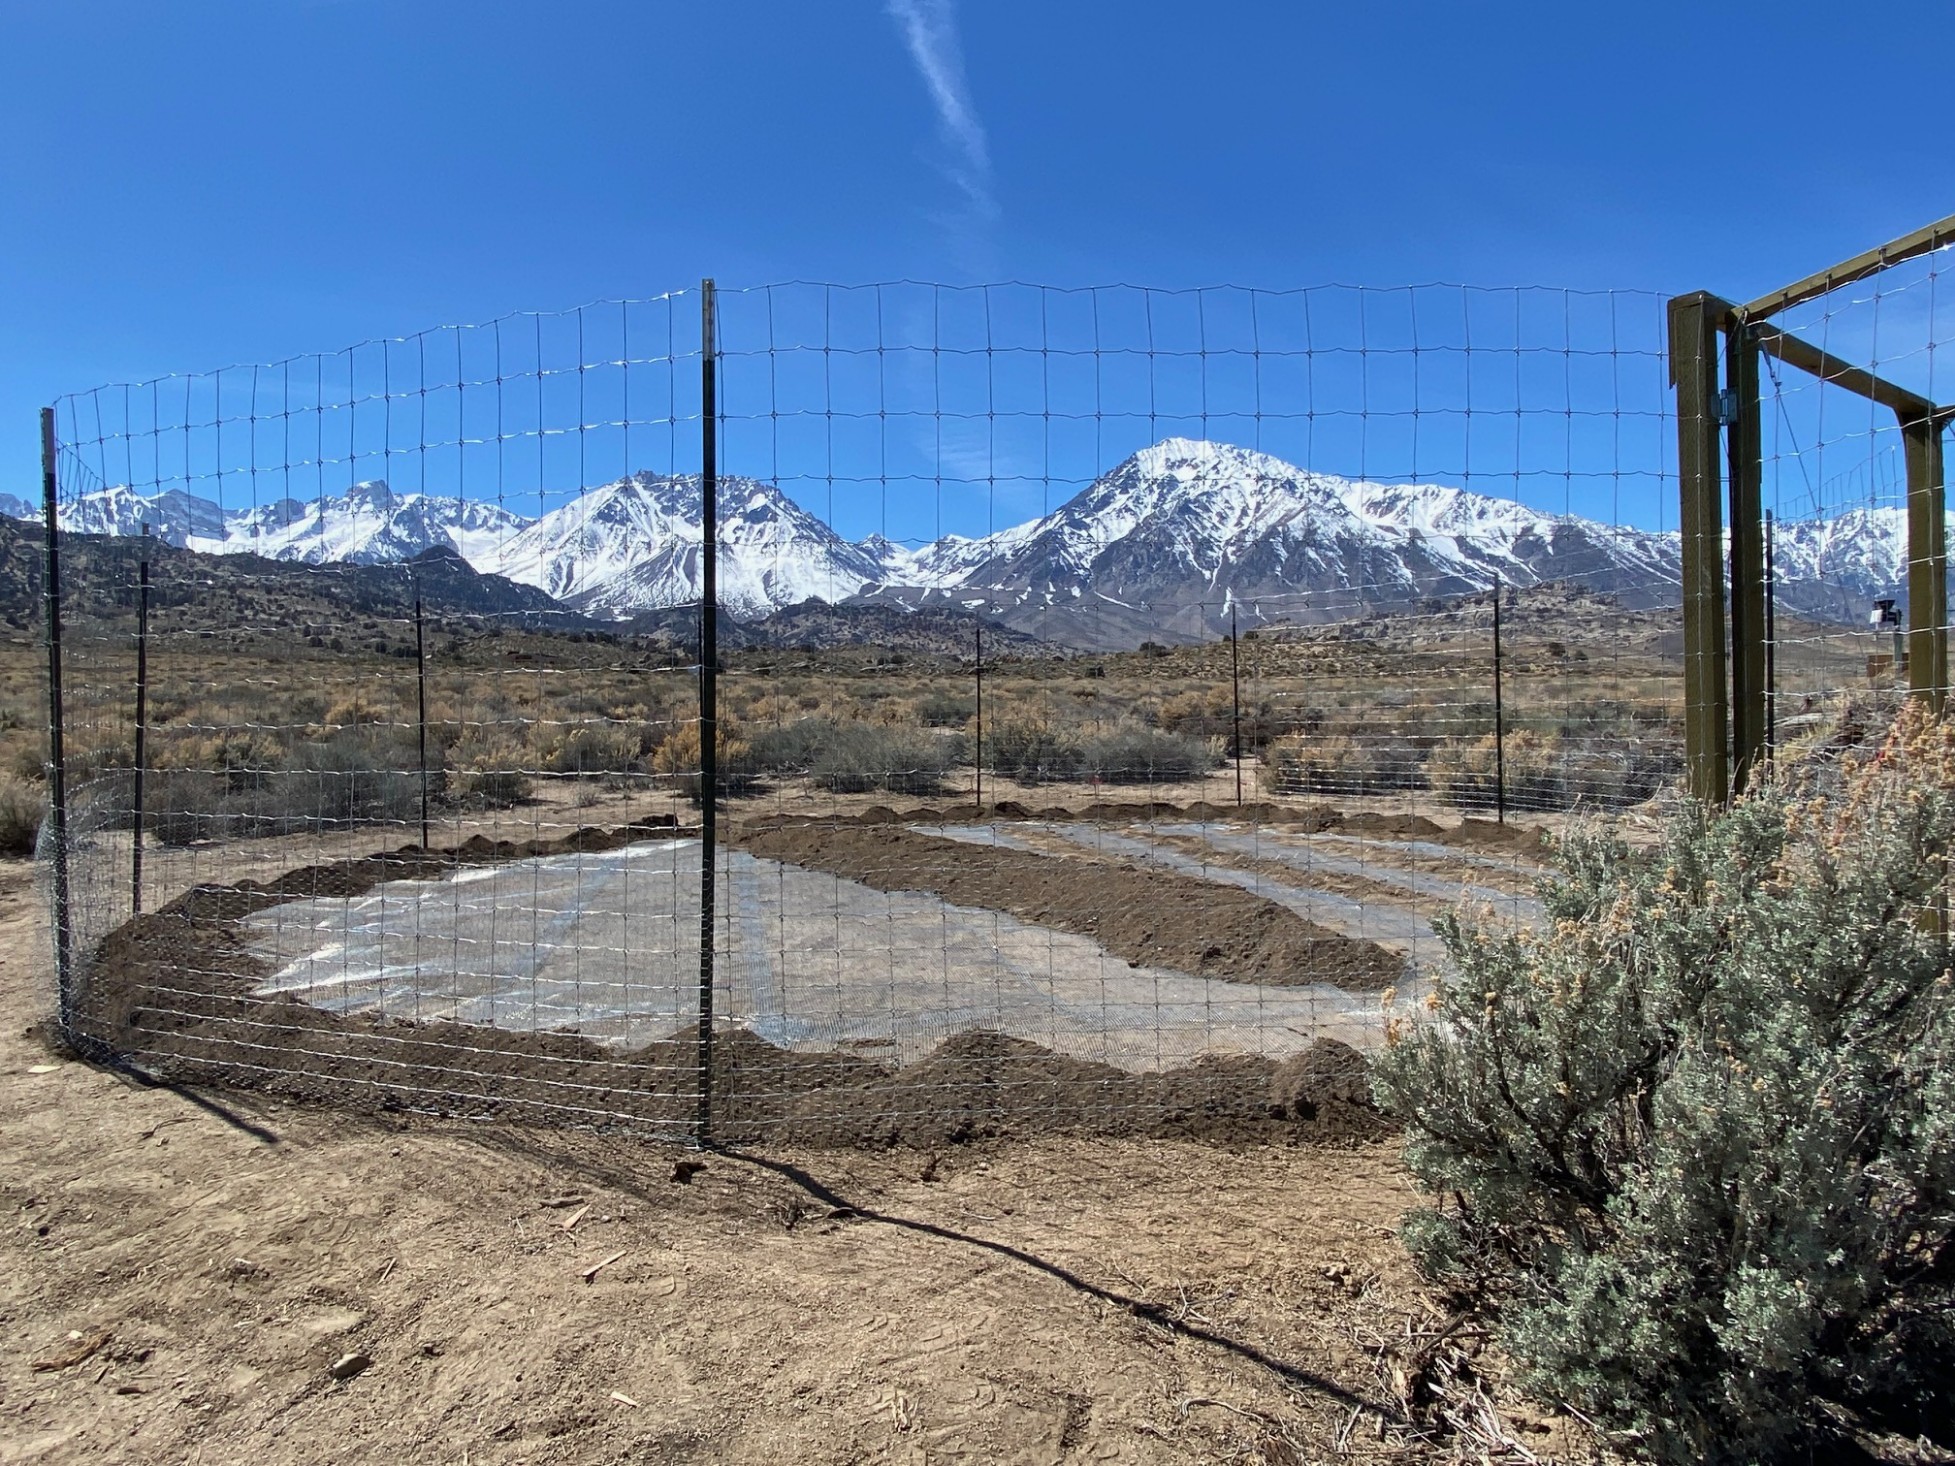
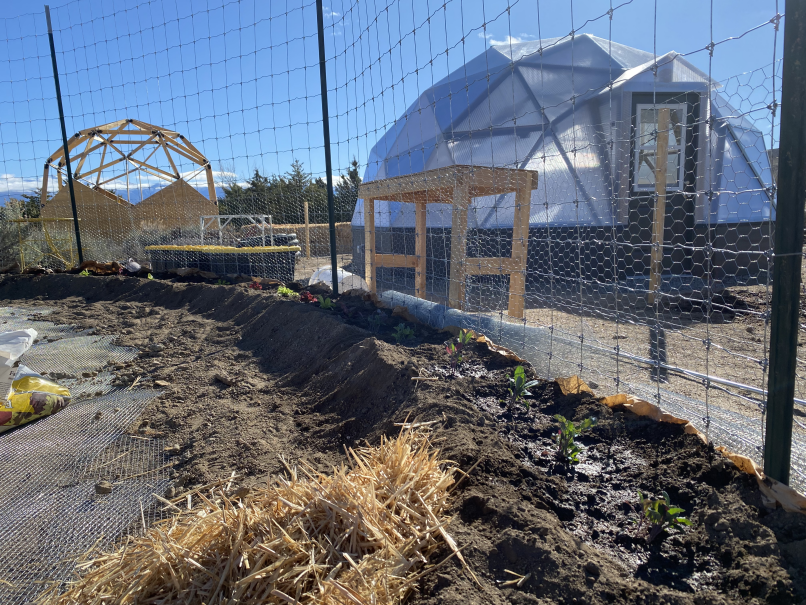
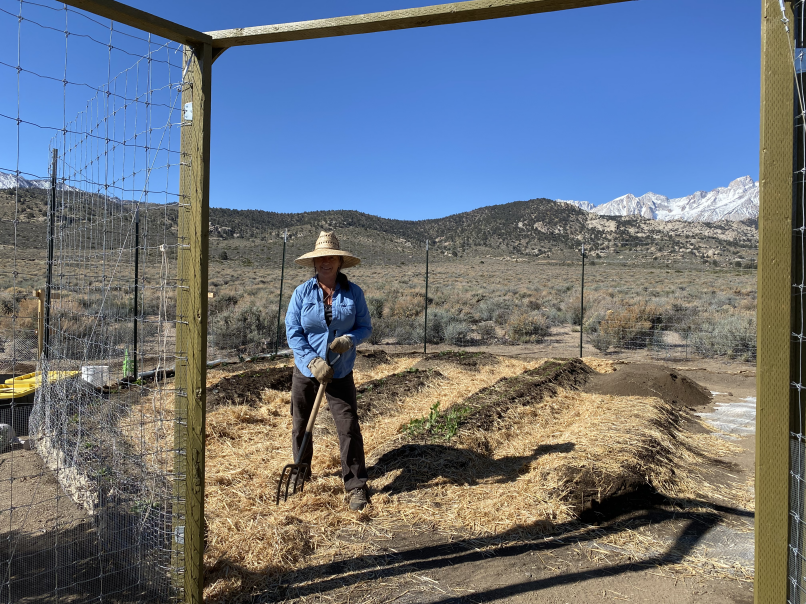
For the garden, we pounded the t-posts in the ground to delineate the boundary so we could plant the grapes, which will be a future wind block for the veggies. It is a lot easier to dig holes and pound posts in our soil when it is on the wetter side.
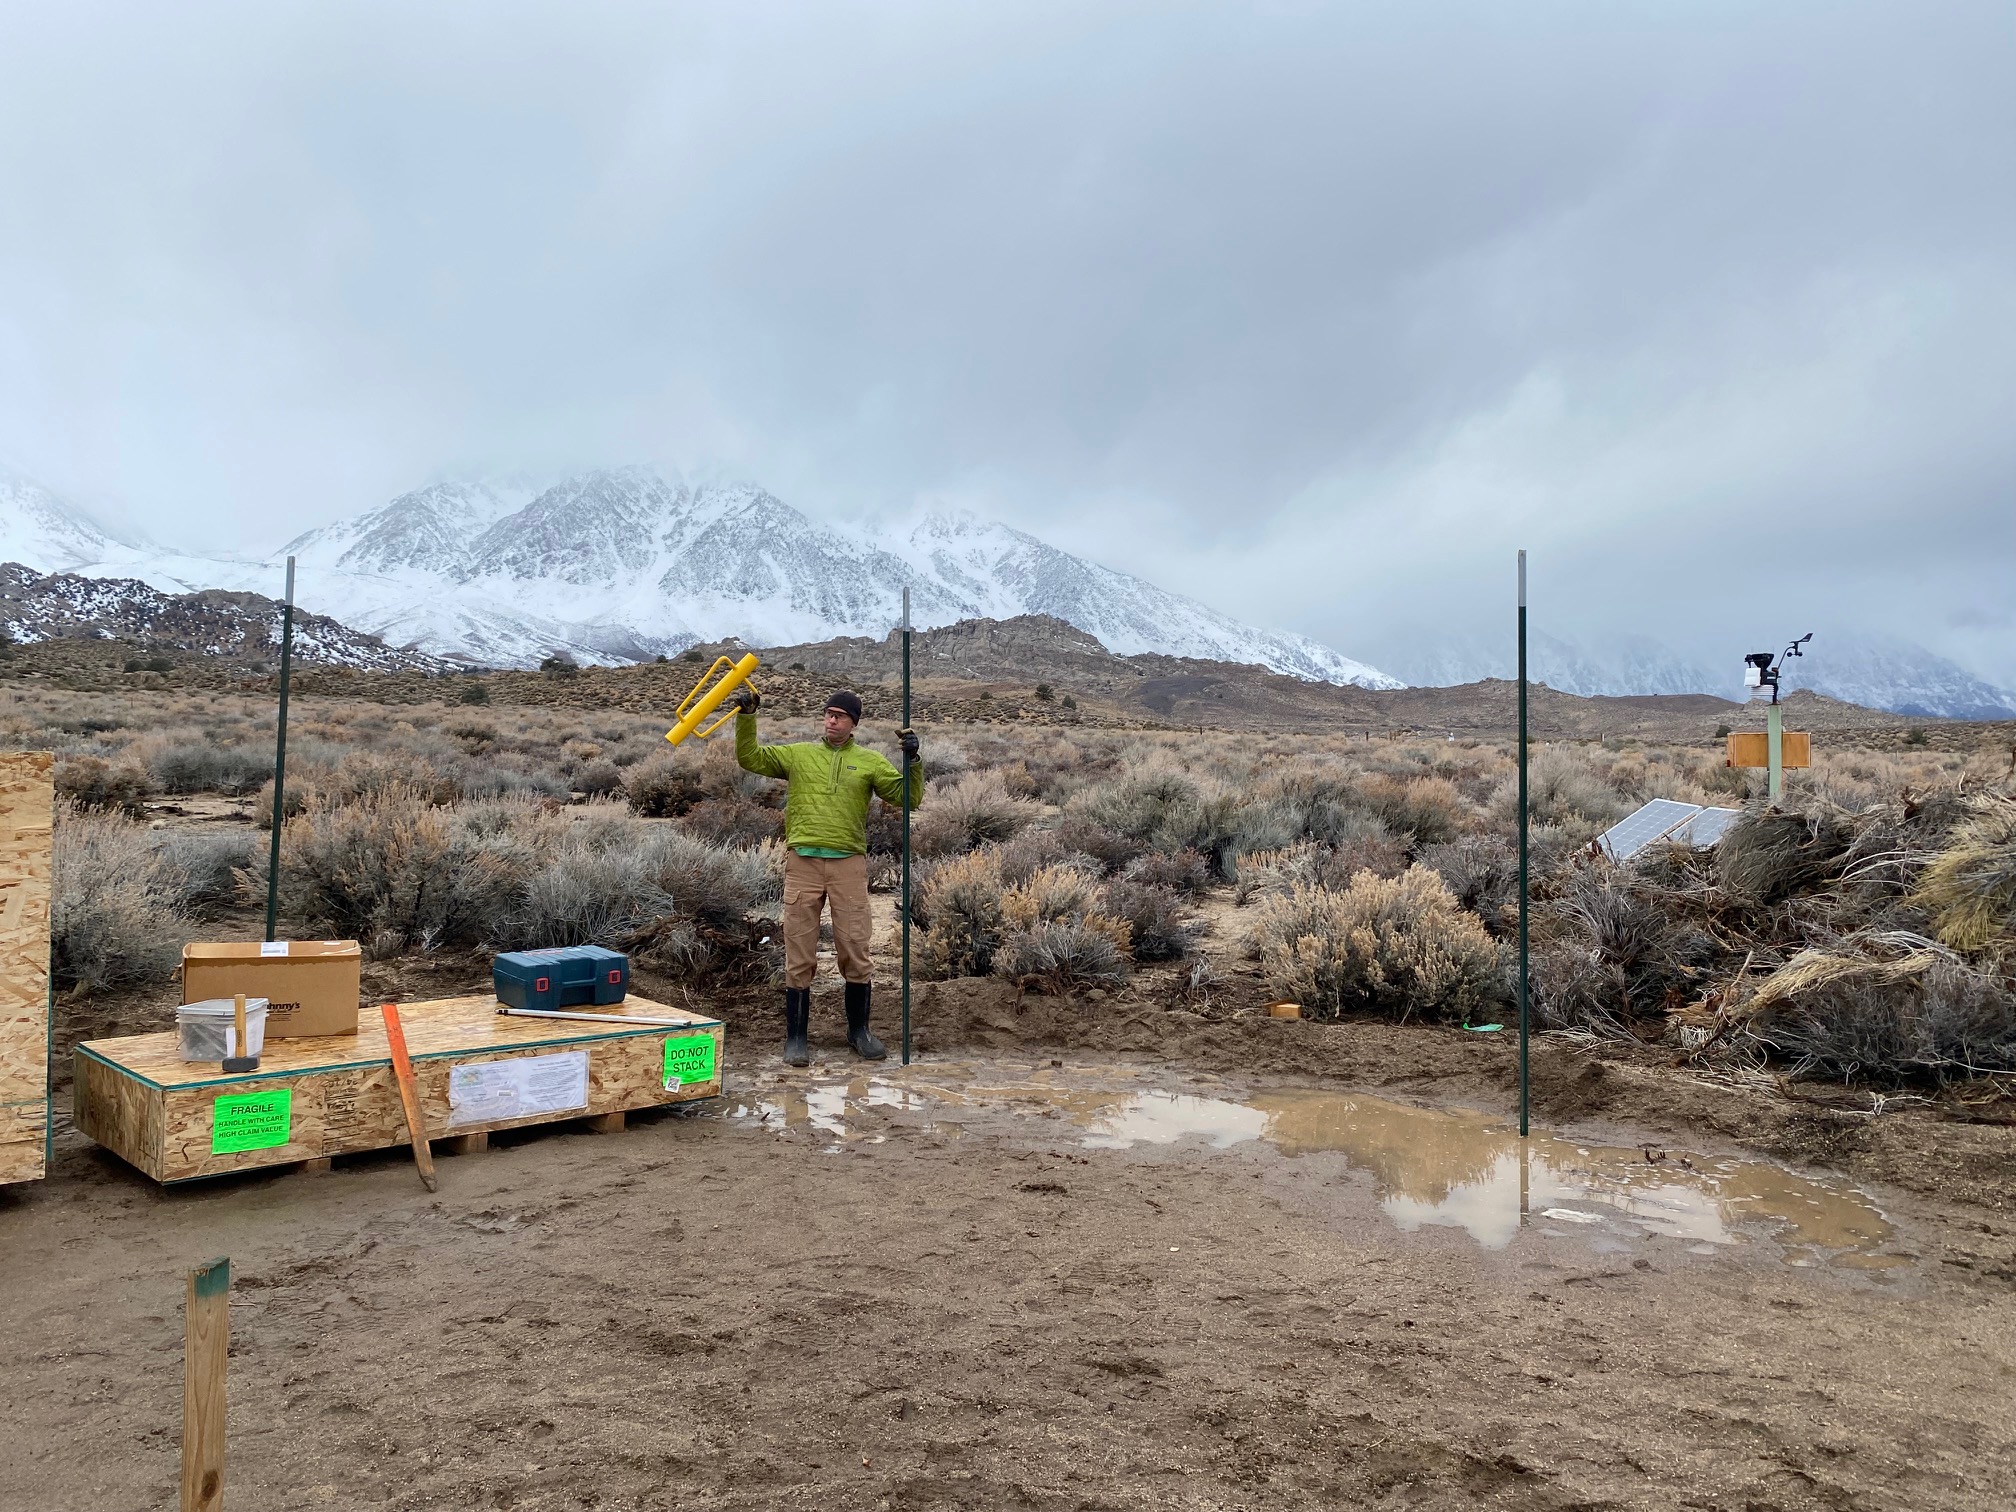
We also made a double gate. The larger side will stay shut most of the time, but I wanted to be able to drive a tractor in, if the need arises.
We put a tall livestock/deer fence around the perimeter and hardware cloth along the ground. Around that time, I witnessed adorable antelope ground squirrels digging up my tulip bulbs. The livestock fence gets gradually smaller near the bottom, but the ground squirrels could still squeeze through. I installed 3 foot high chicken wire to the base of the livestock fence and wired it to the hardware cloth. Update: Baby ground squirrels can fit through chicken wire, so I replaced it with 3′ high hardware cloth. Update to the Update: Ground squirrels of all ages can climb hardware cloth, so I bent the cloth over at the top for a Chris Sharma power move.
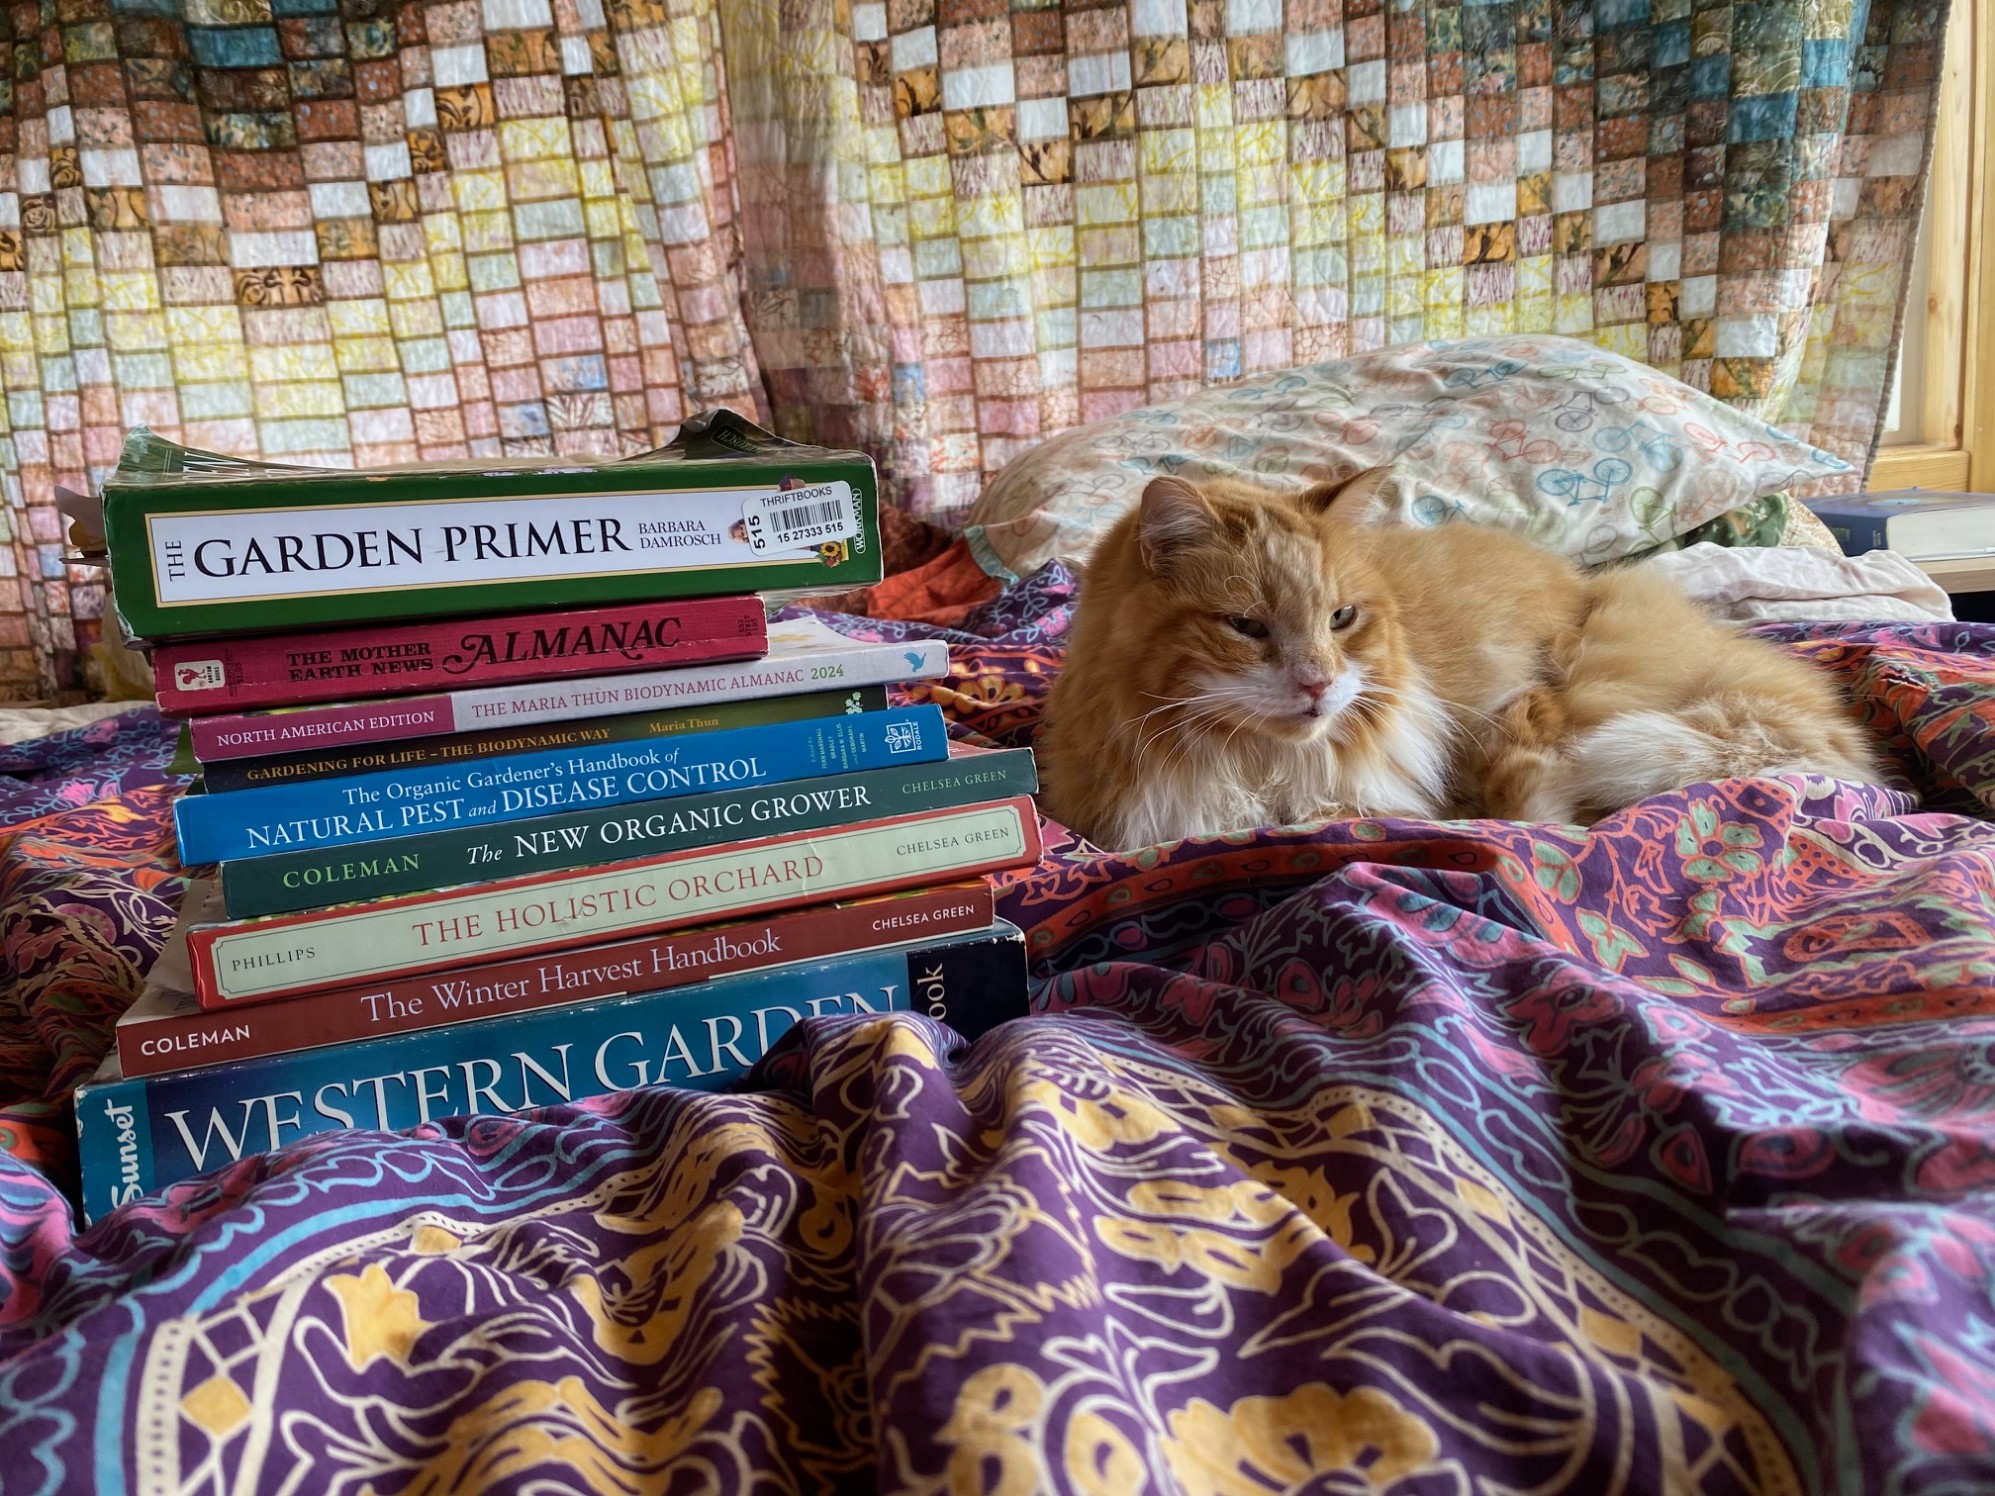
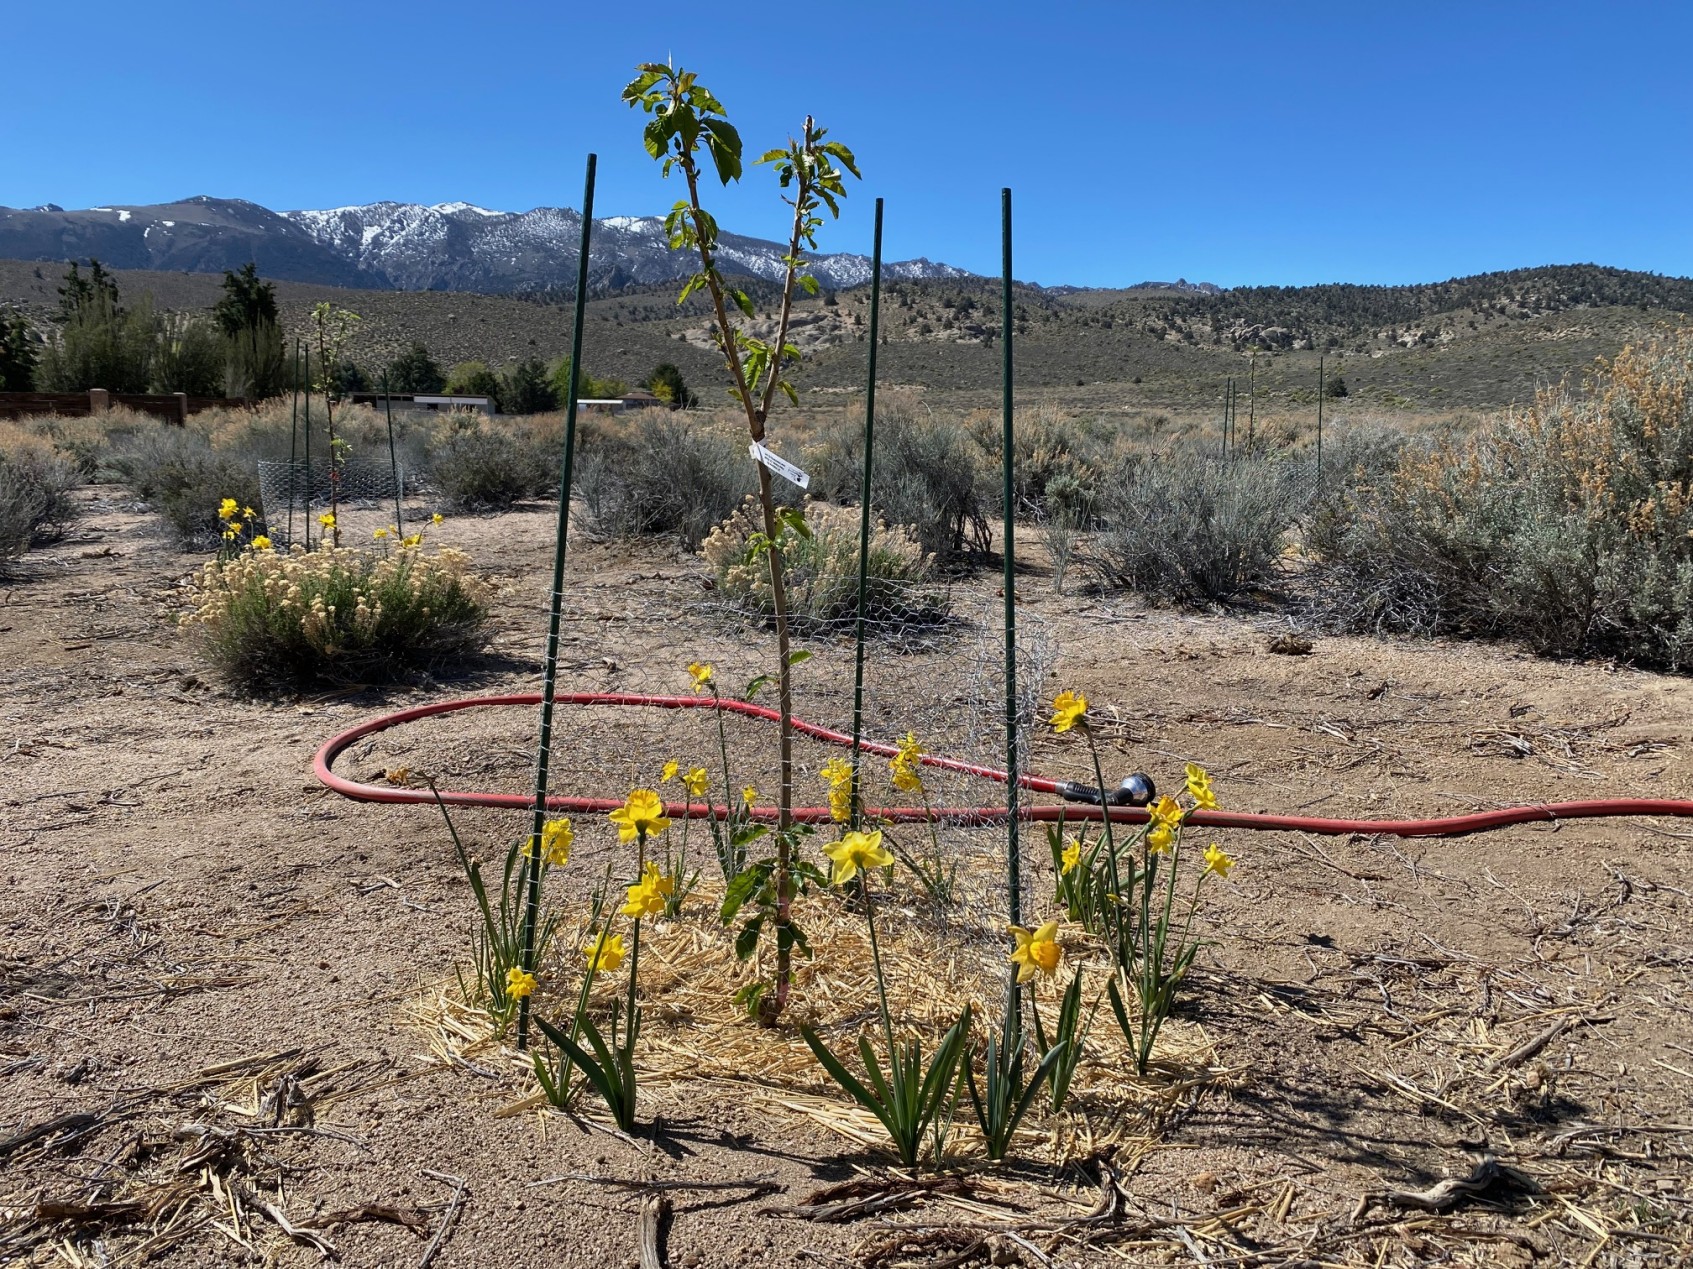
As I excitedly read books and researched veggies, bought seeds, and made an spreadsheet to determine when to start or direct sow said seeds, Jon researched fruit trees and berries. He bought a few of each last year when the ship date was ambiguously far in the future. Then one day the bare root plants arrived!
We spent some time pondering where to put all these perennial bare roots because they mostly stay in one place, opposed to my mostly annual veggies.
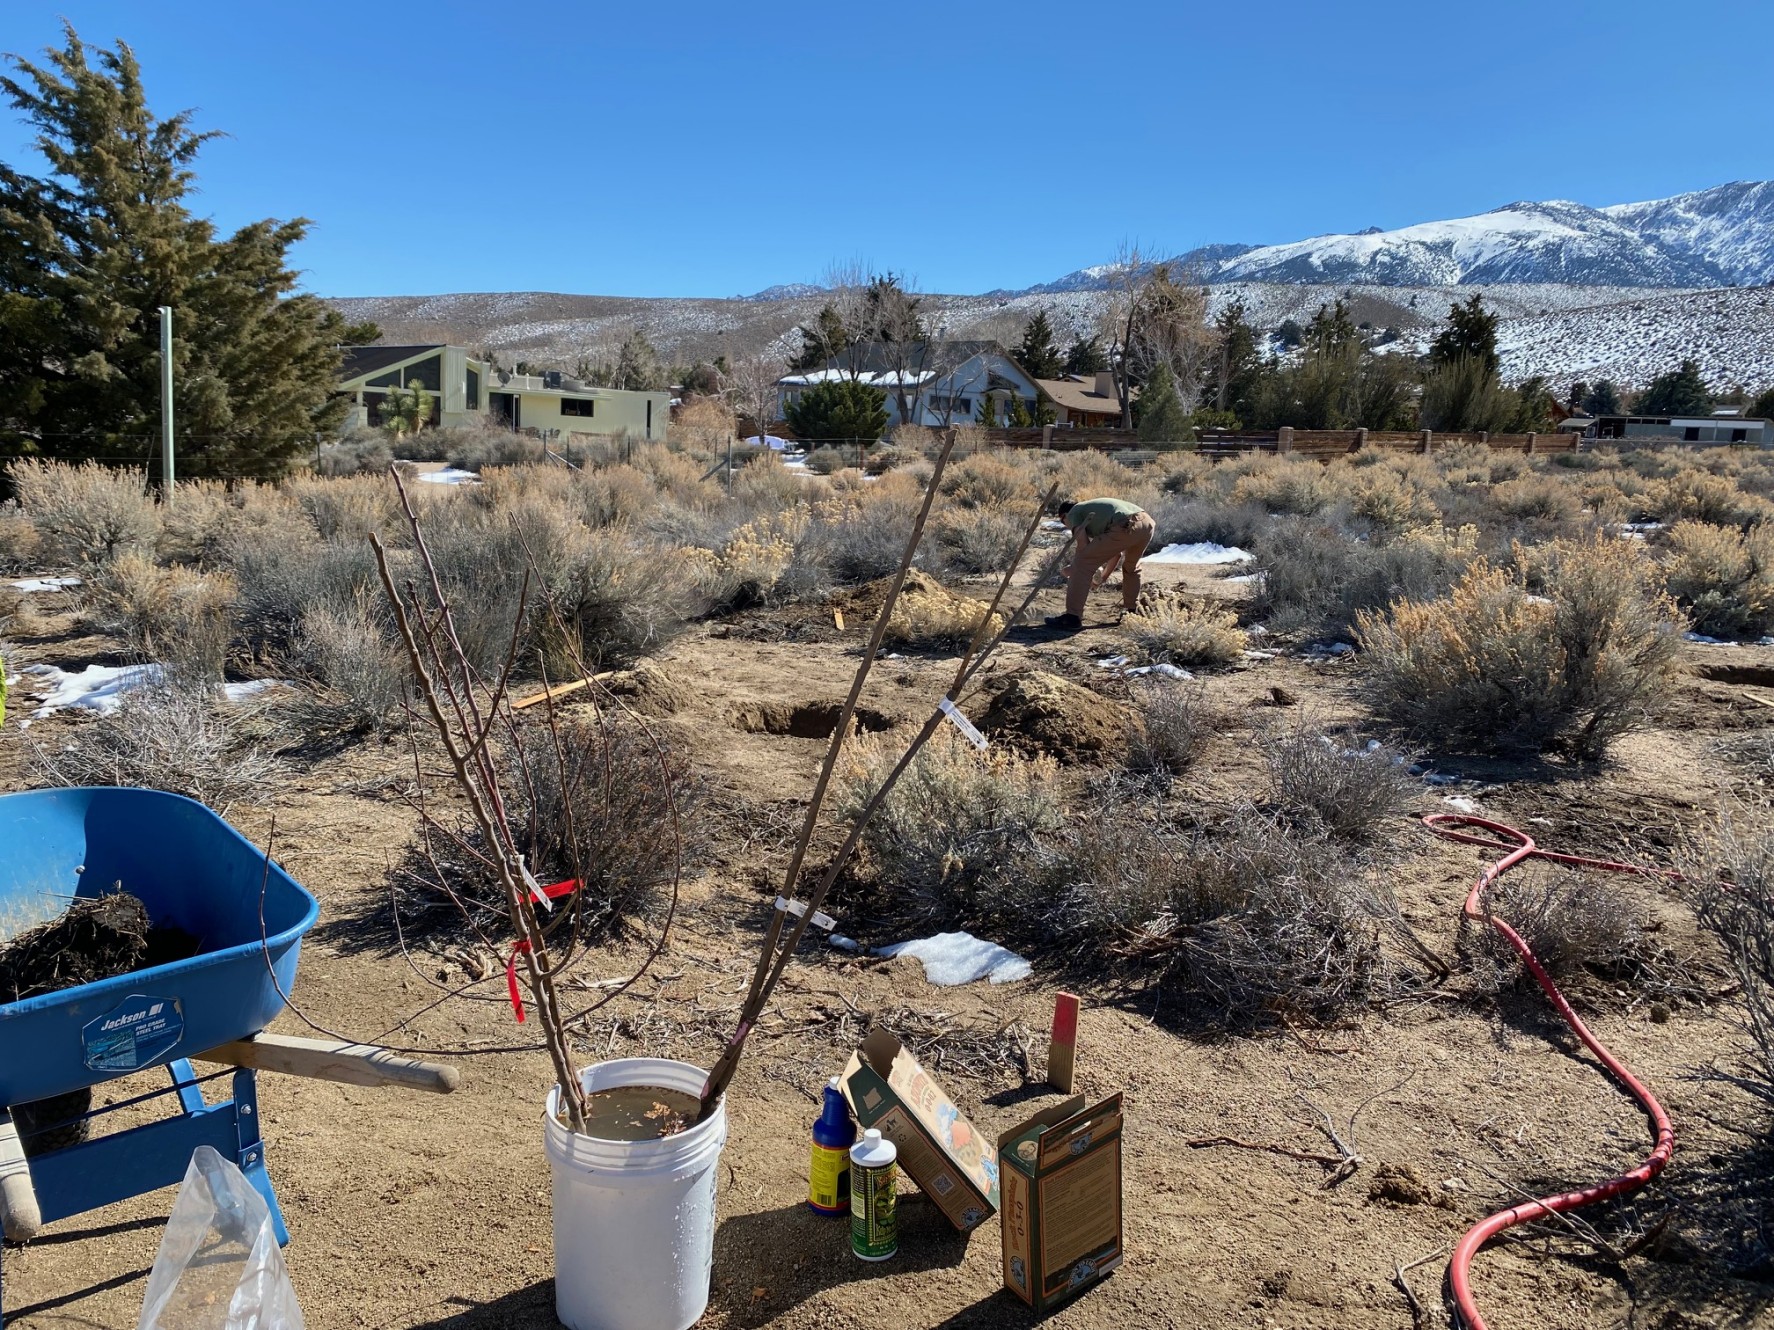
When we decided on the locations, we dug big holes, amended the soil with a variety of methods, and planted the roots. Here’s where is pays to have patience and why Jon is doing the orchard and I’m doing the veggies.
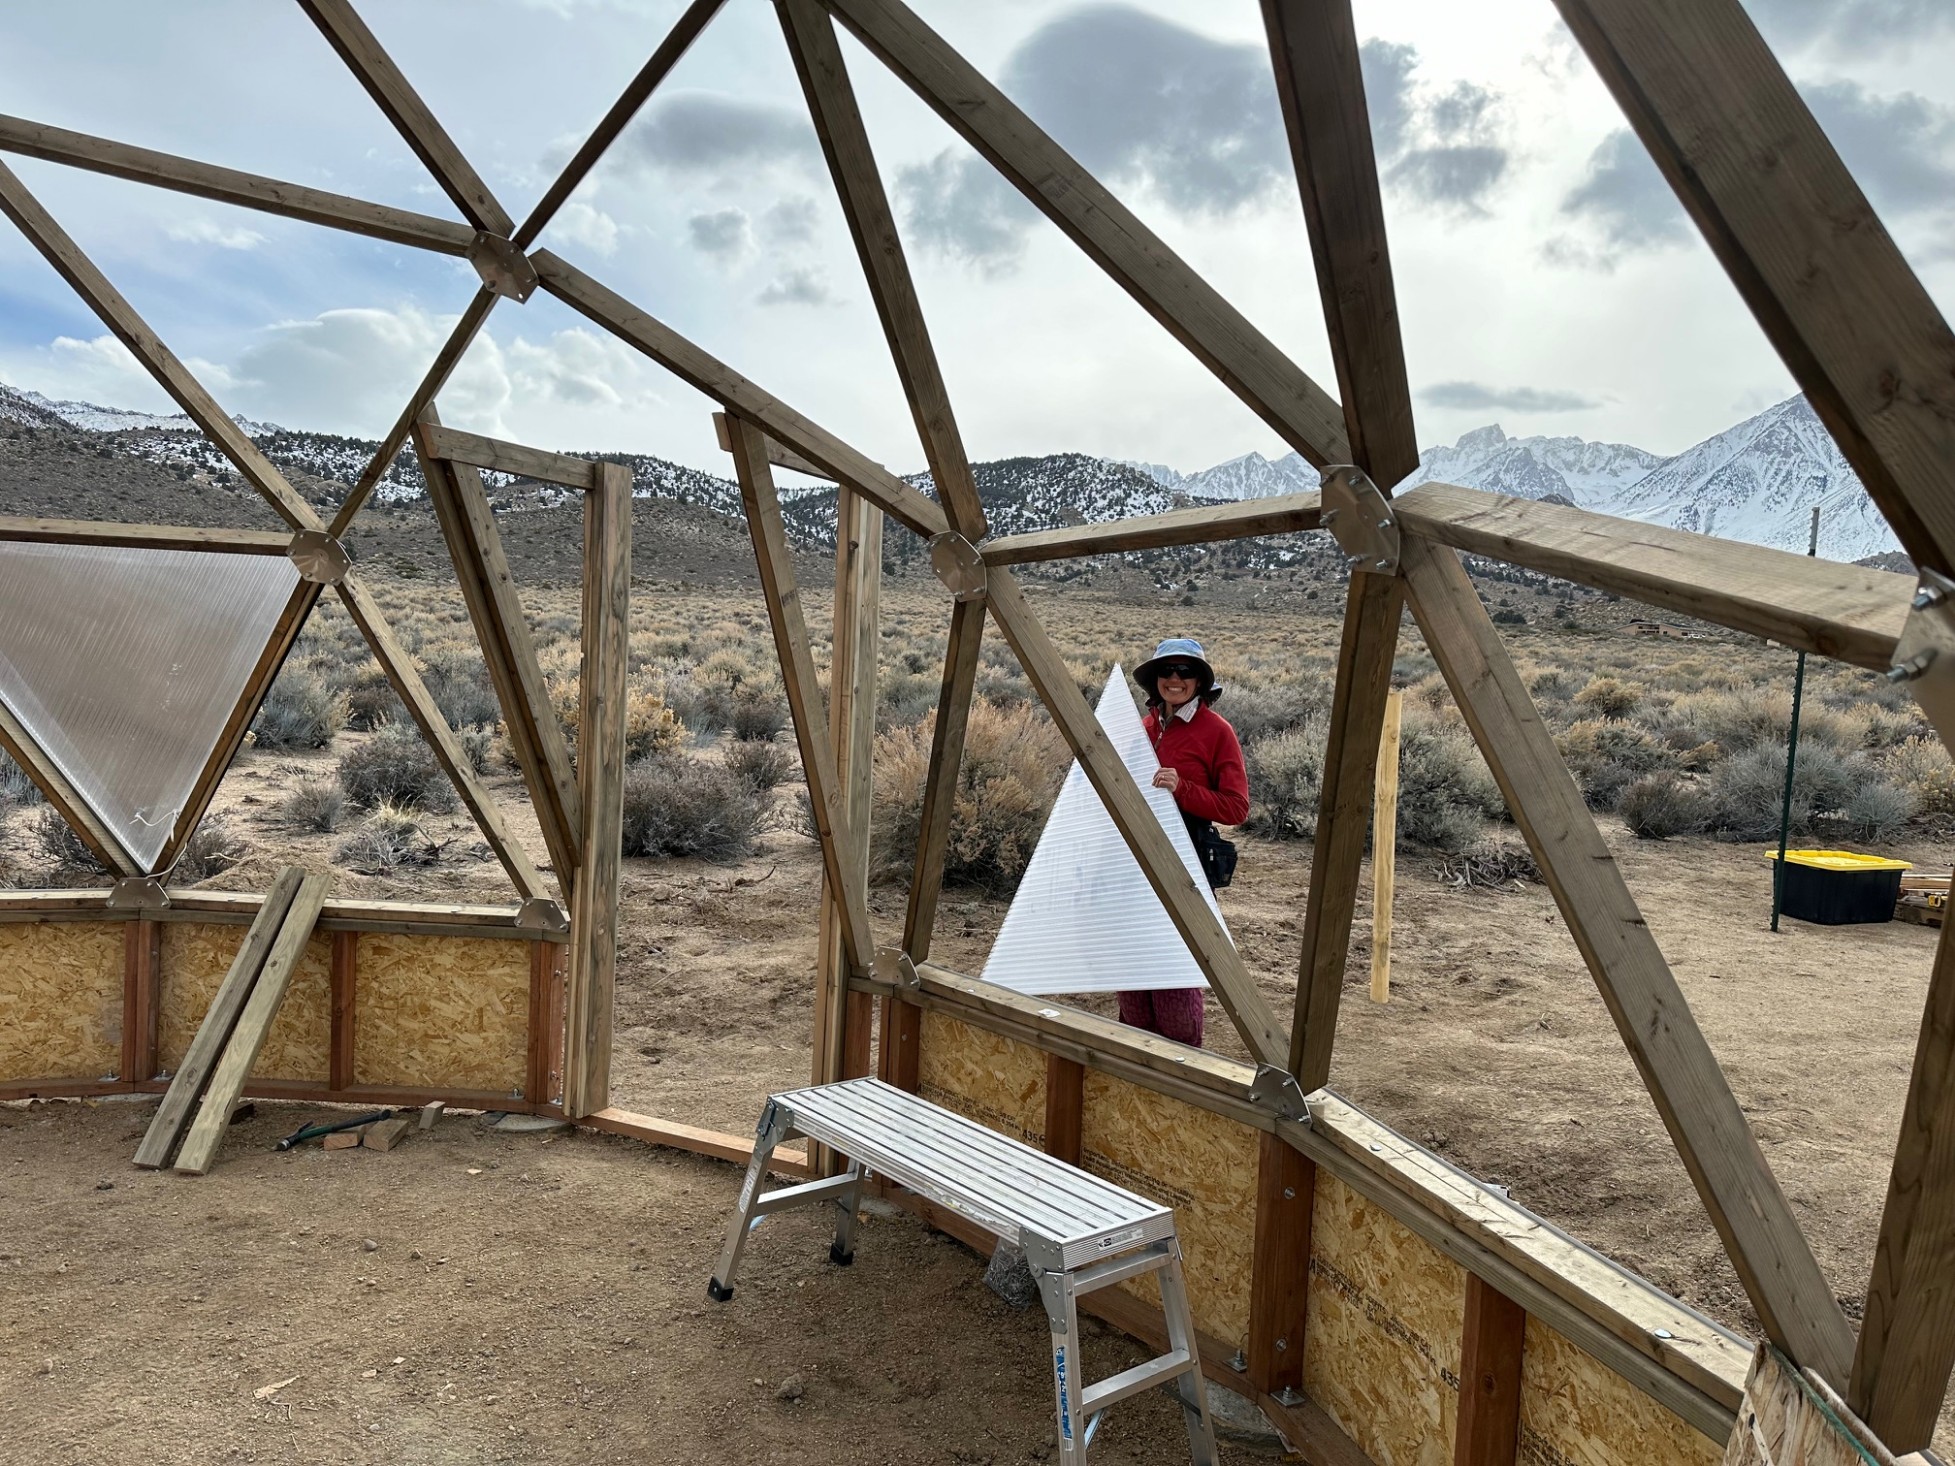
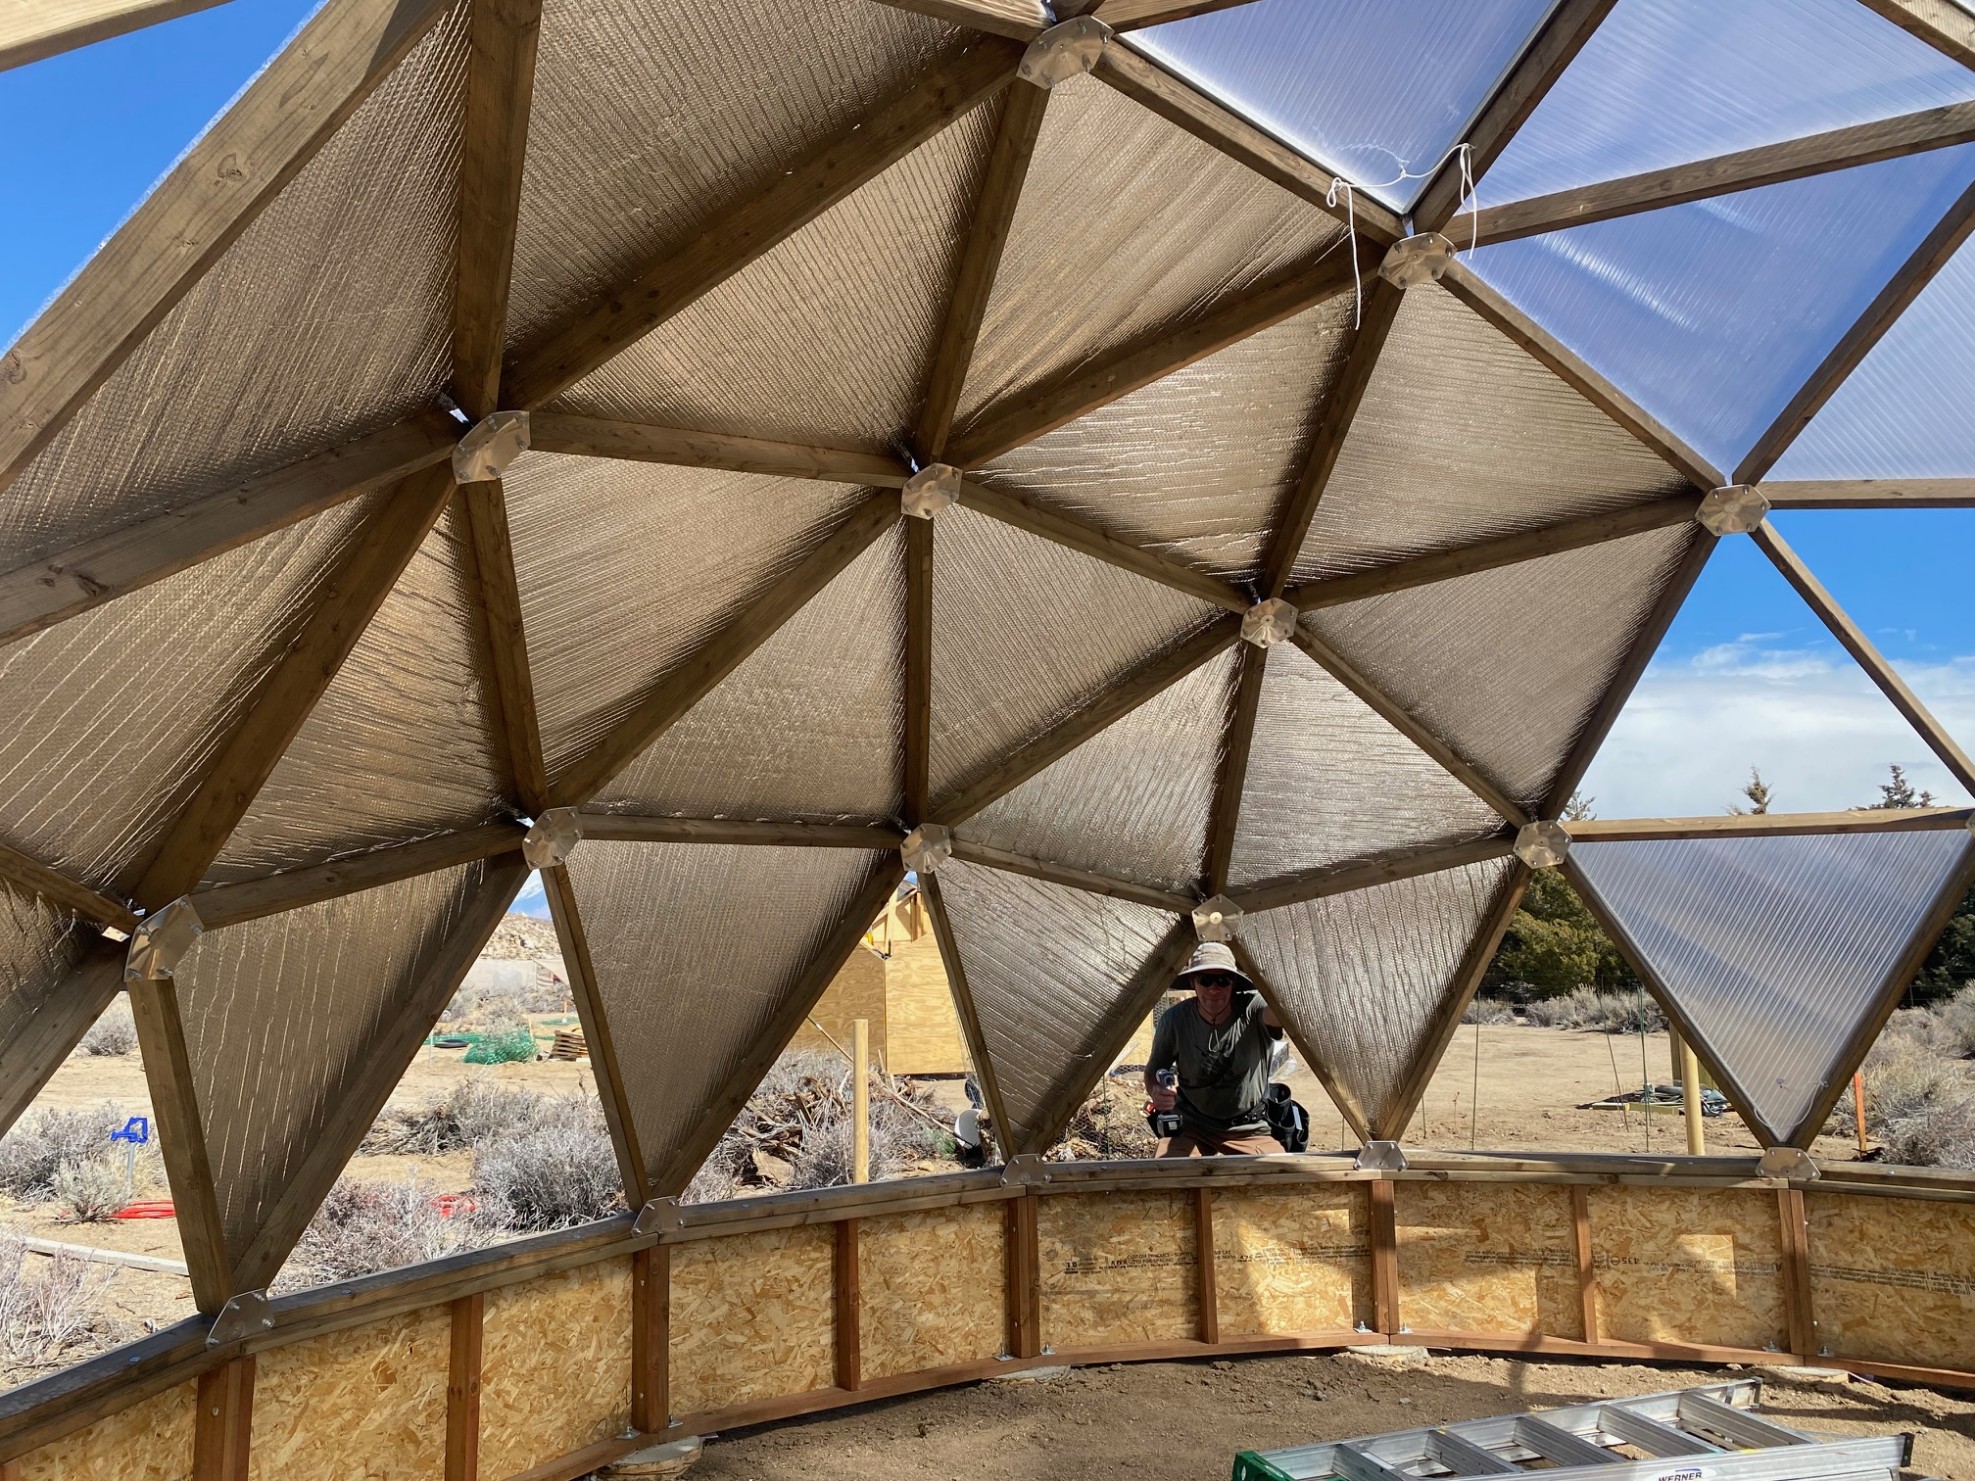
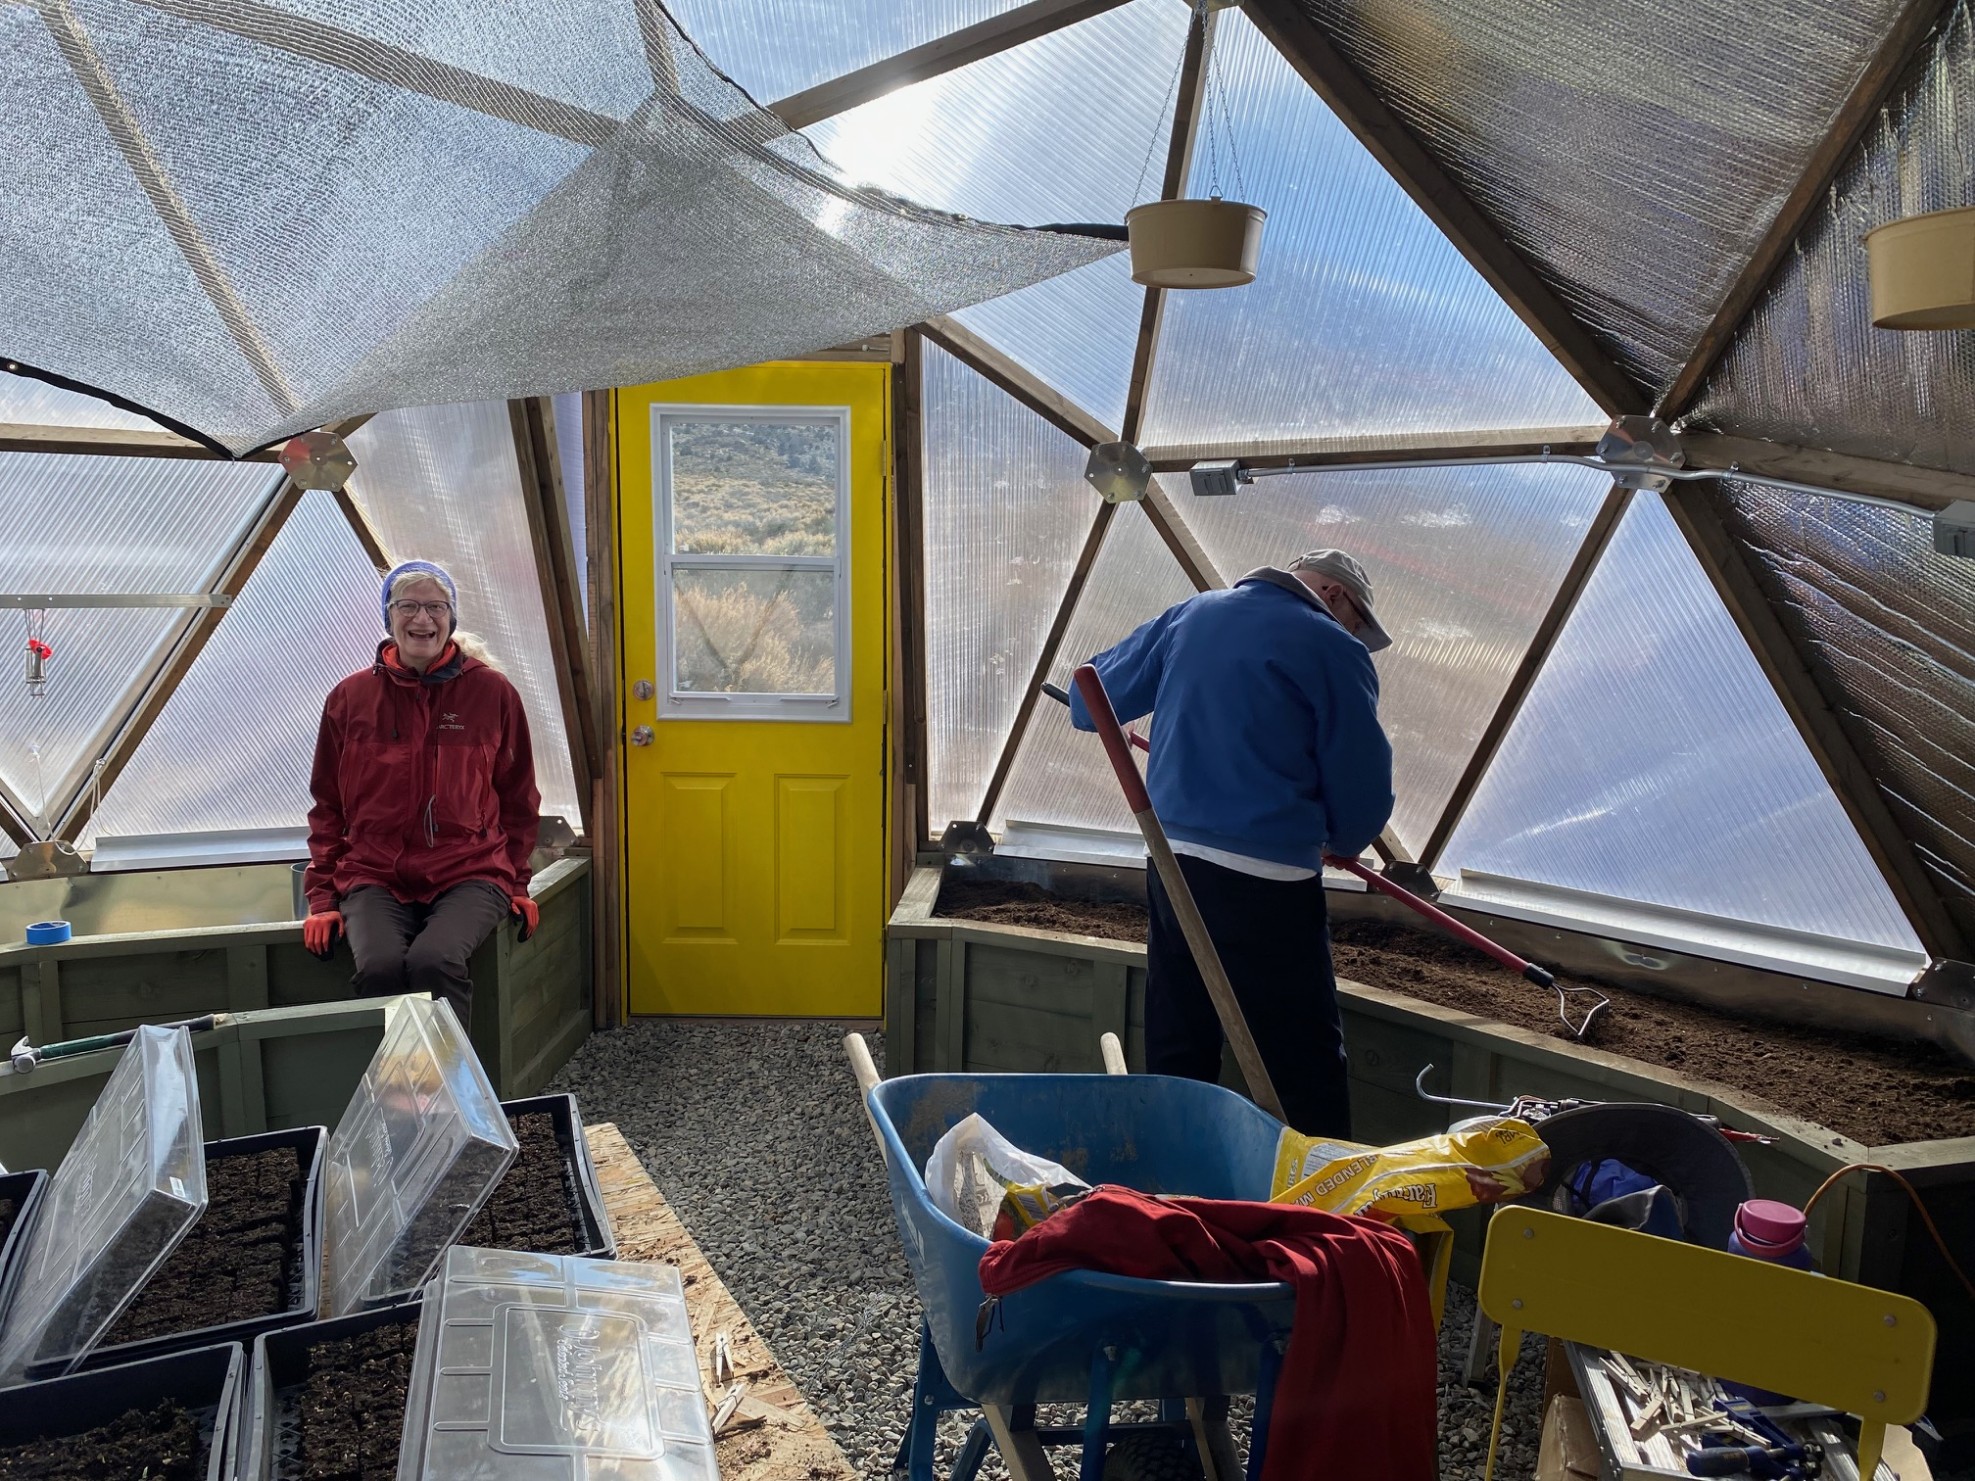
After taking care of those plants, we finished installing the polycarb triangles by screwing them to the struts. I almost forgot to install the eyebolts for hanging plants before I covered the locations!
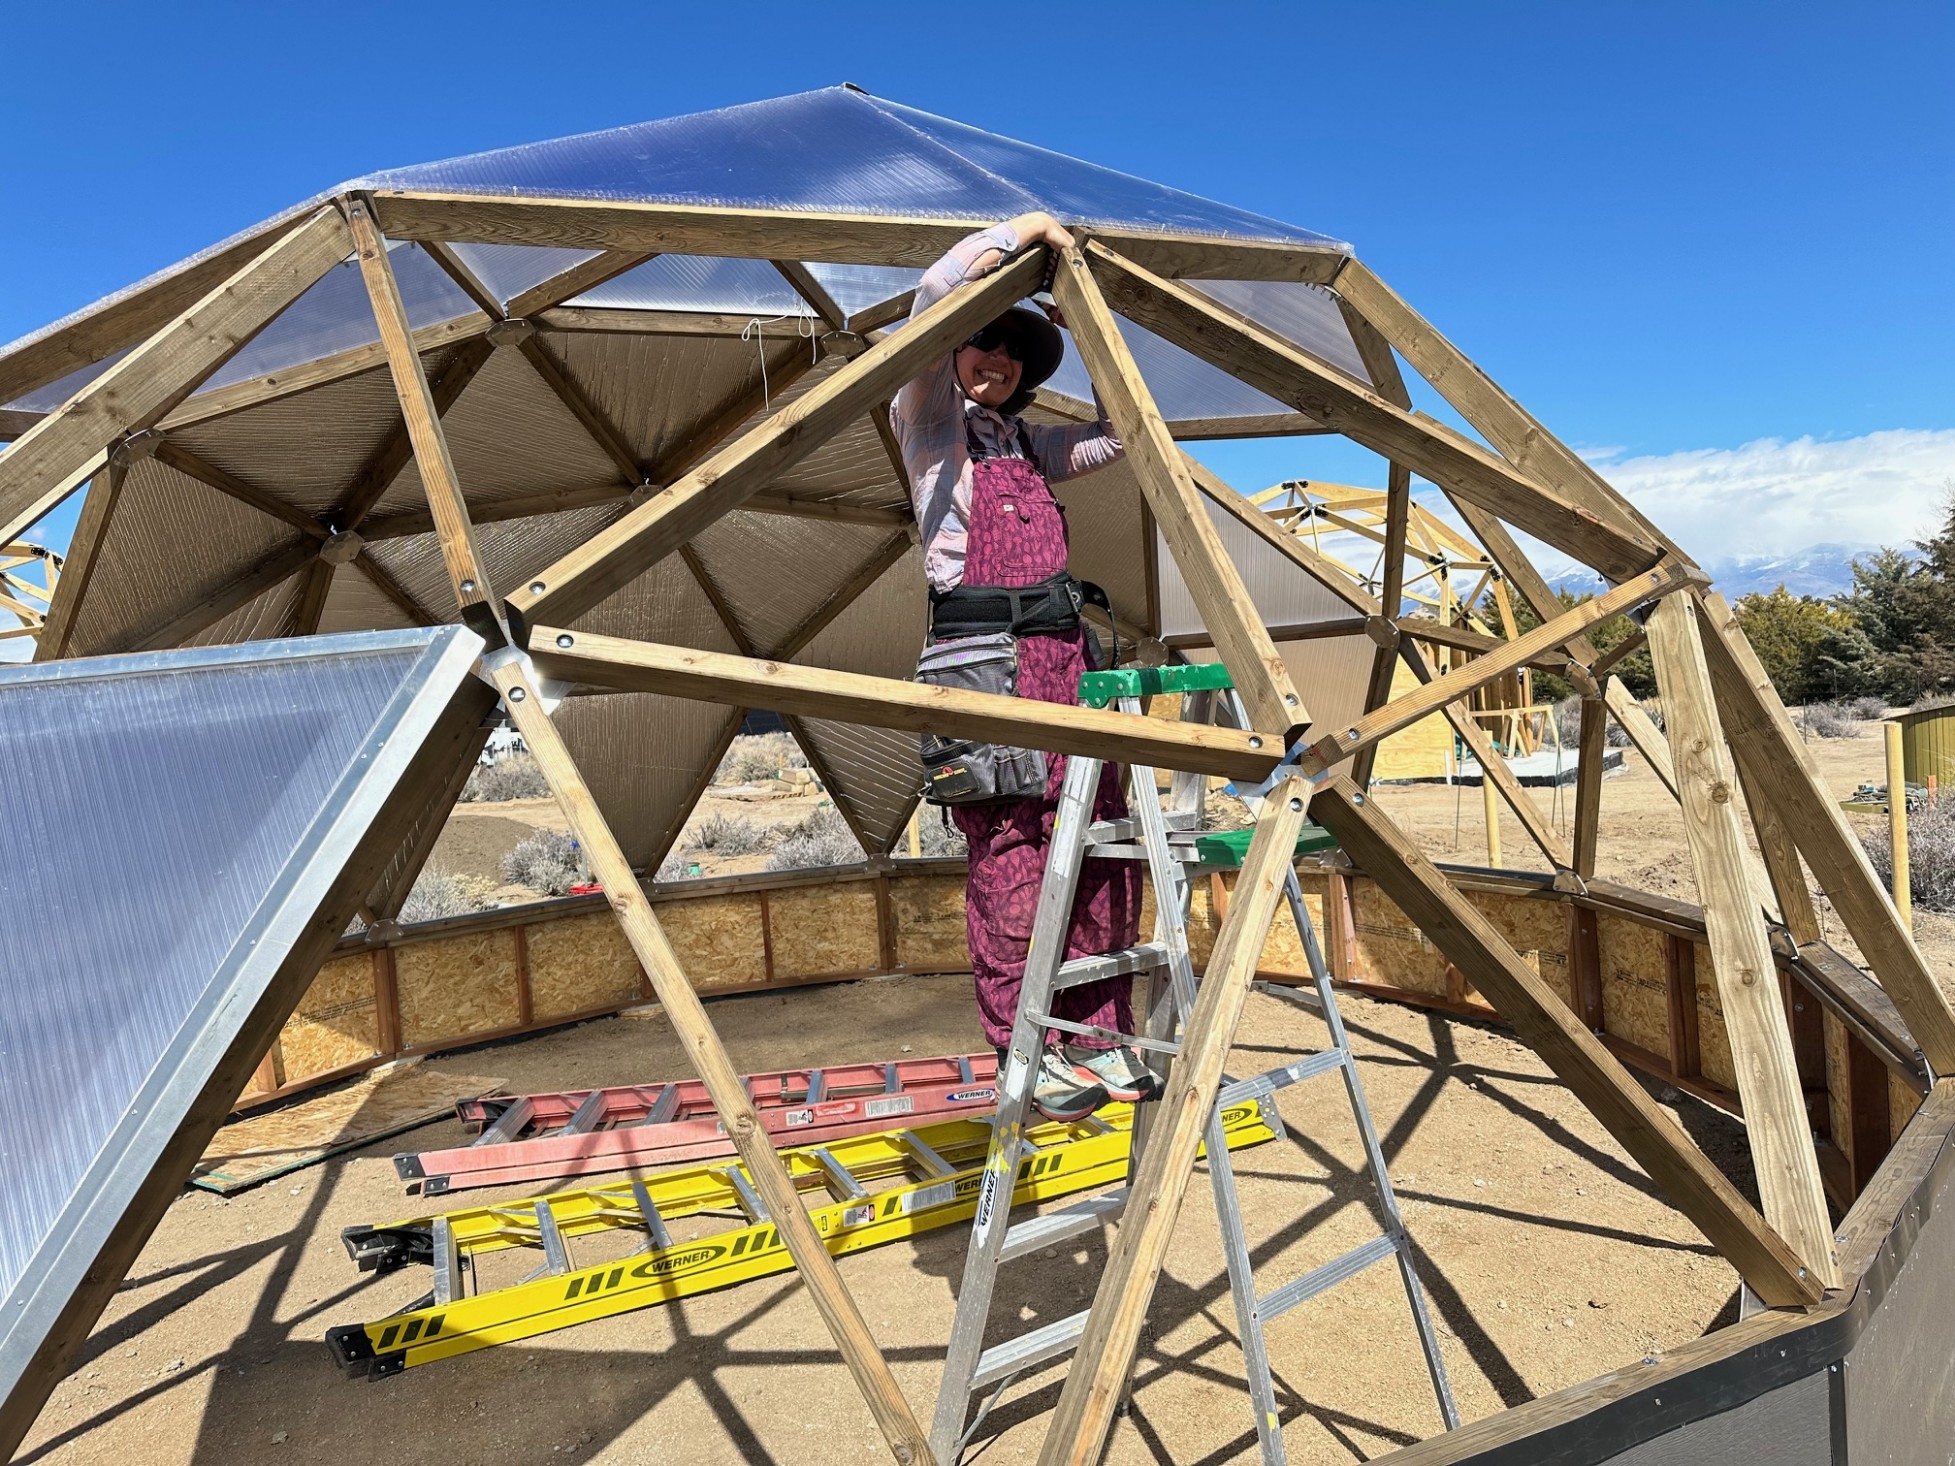
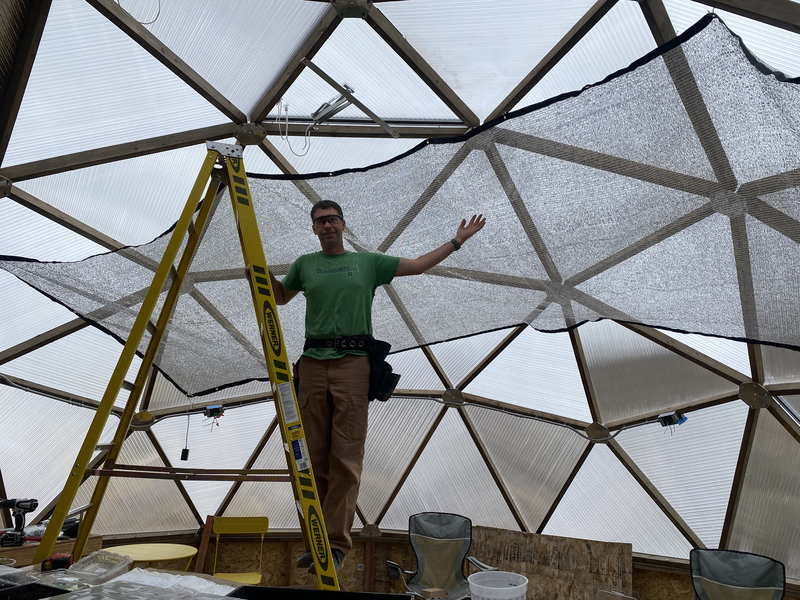
We stapled Reflectix bubble insulation to the triangles on the north side of the dome, per the instructions. This reflects the sunlight from the south, down to warm the pond.
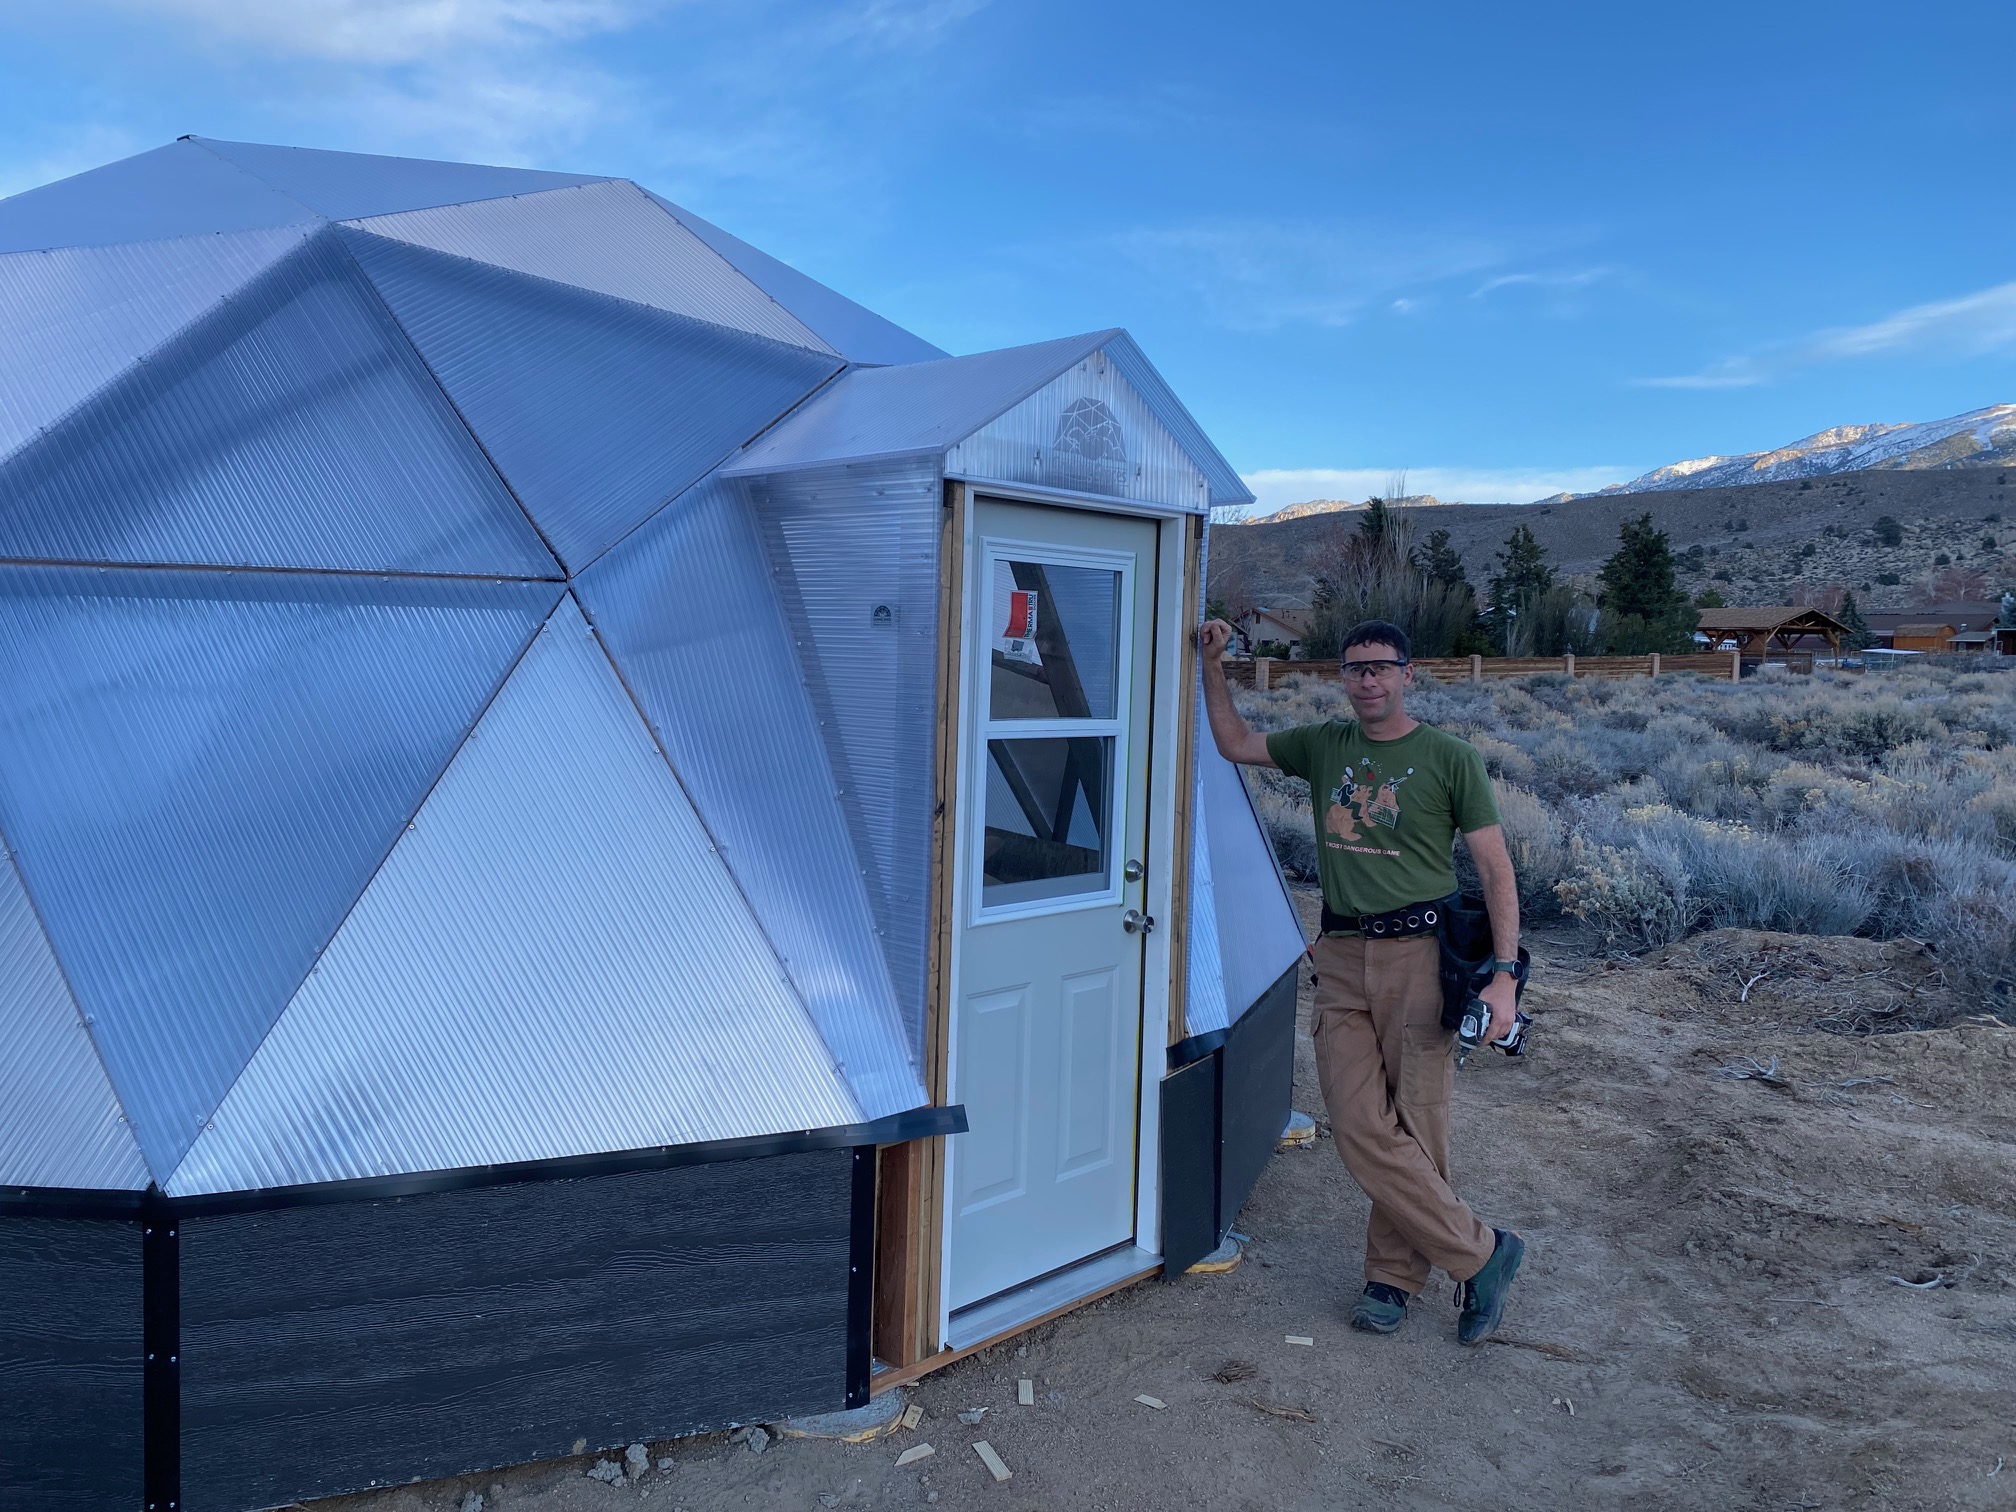
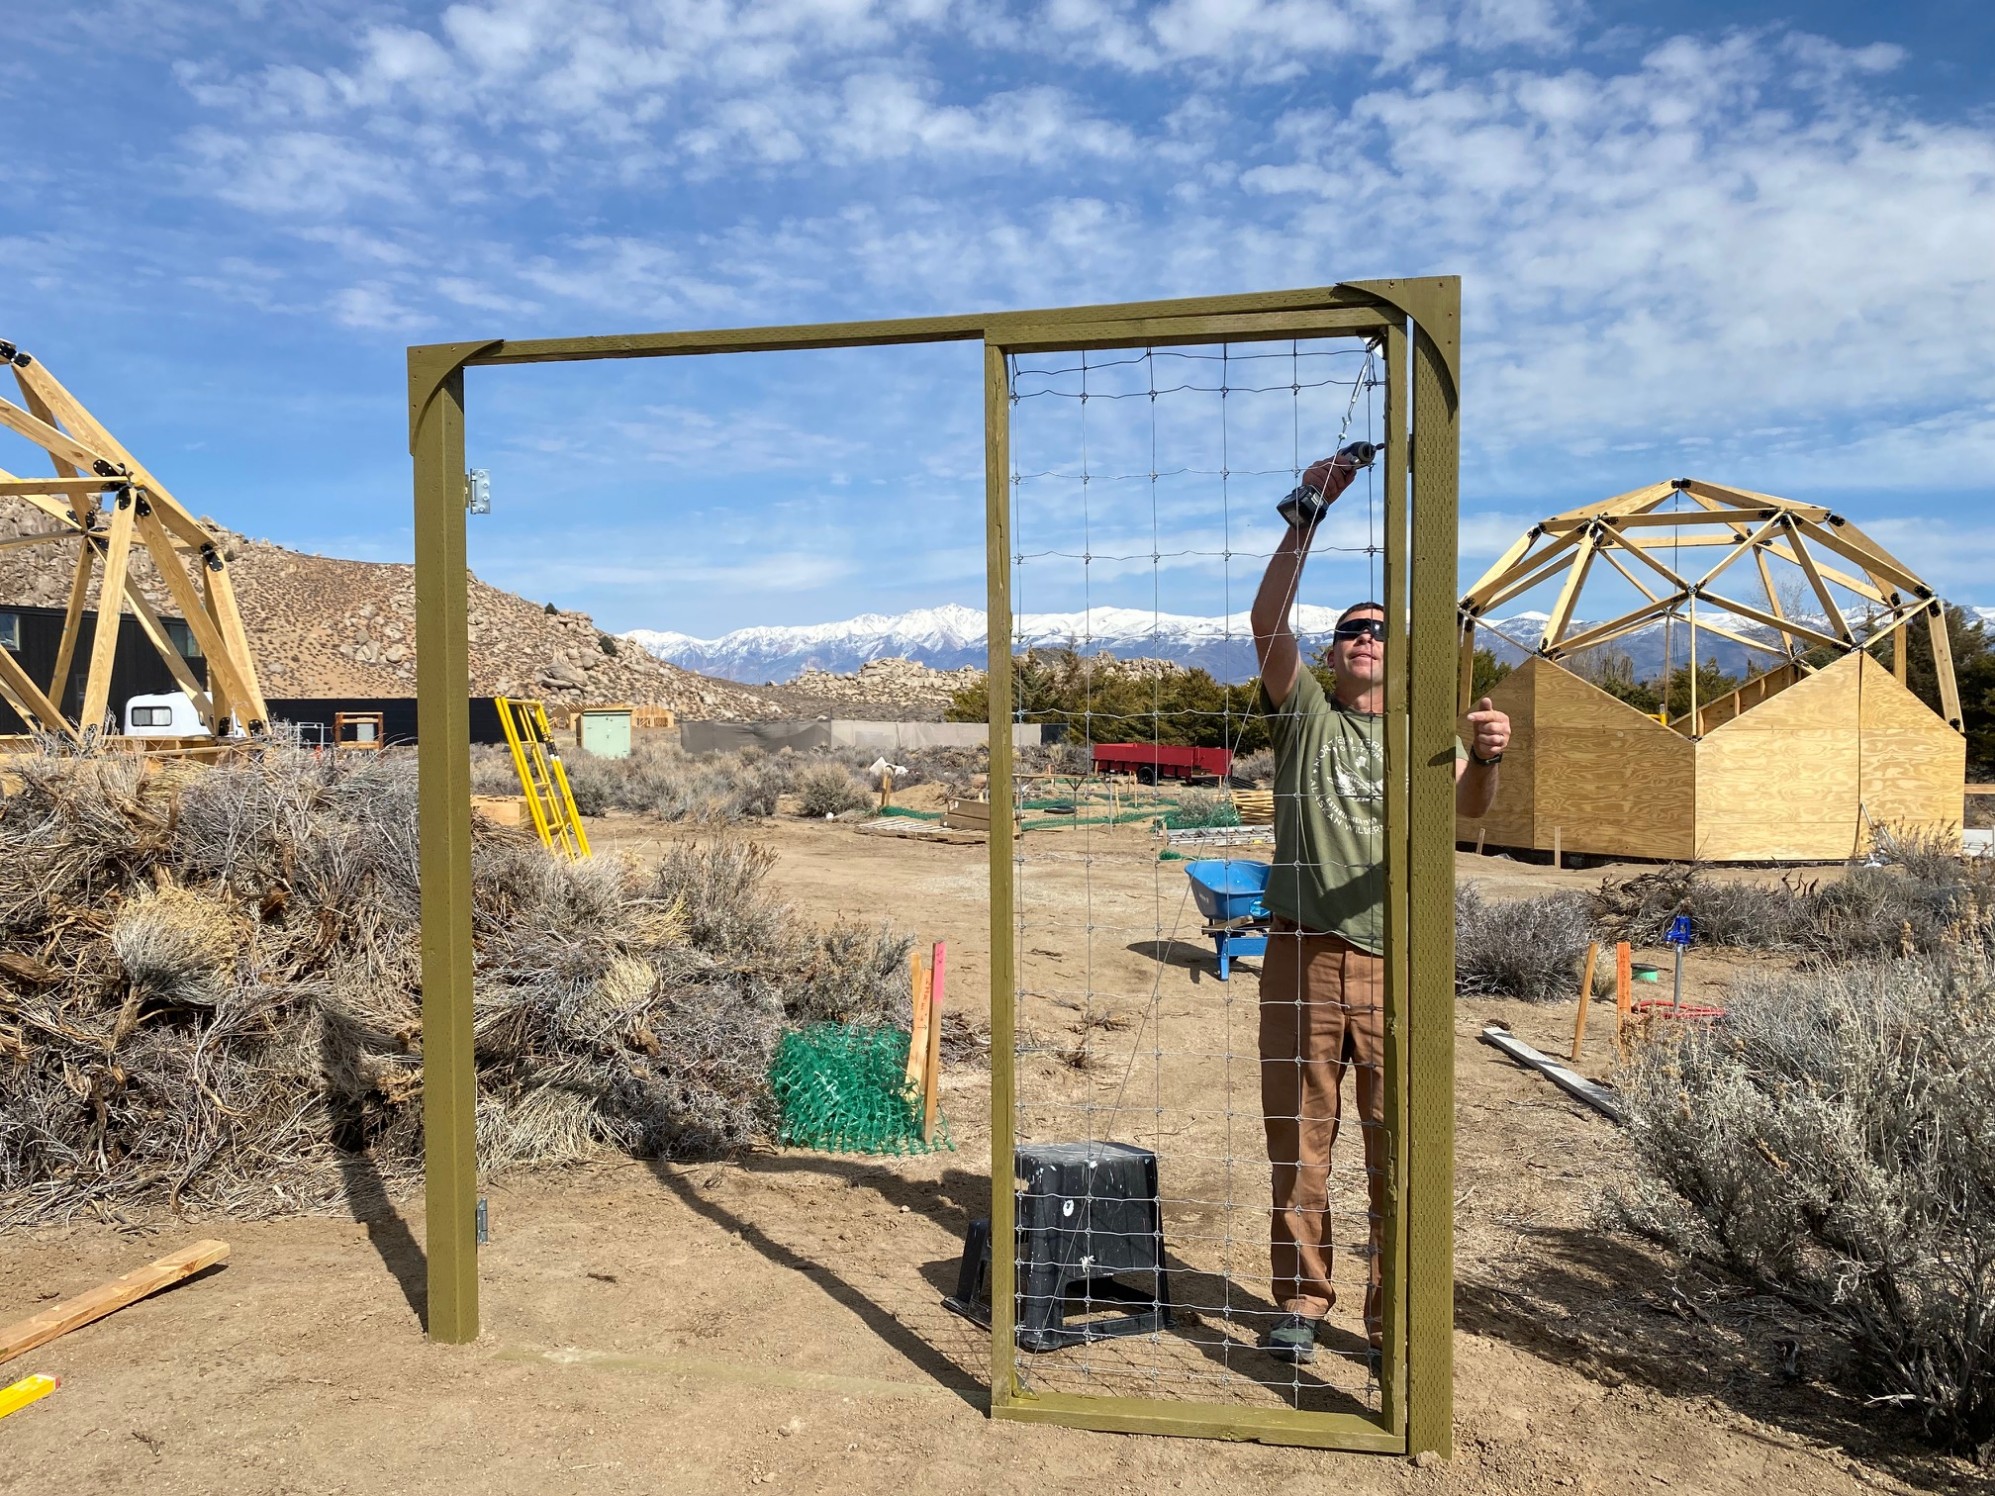
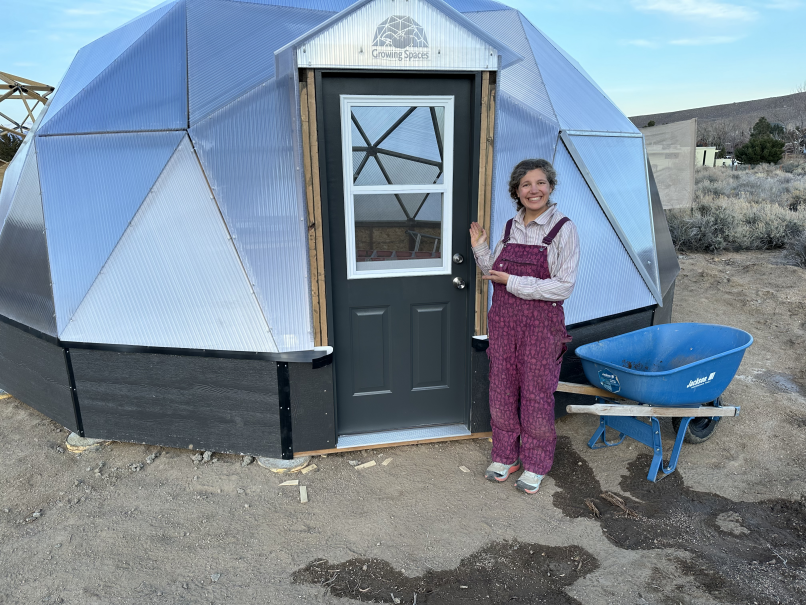
We finished framing out the door, painted the door, and installed it.
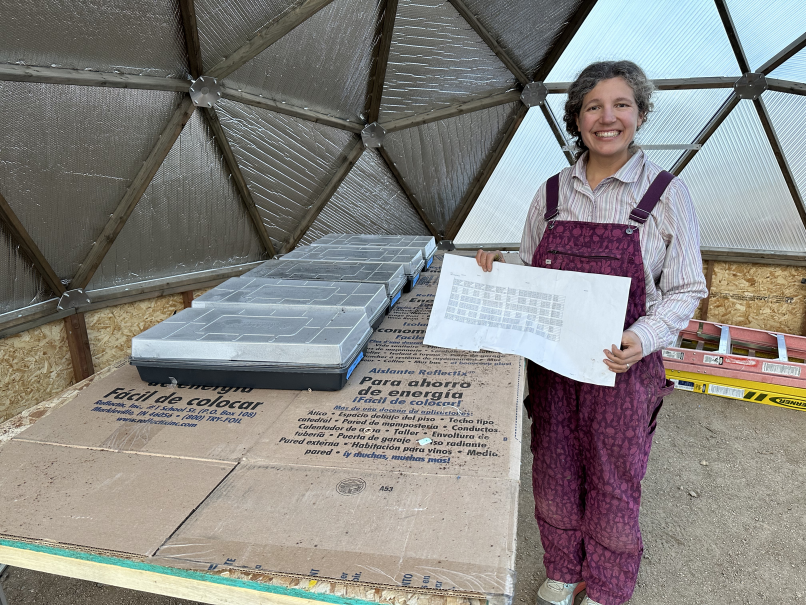
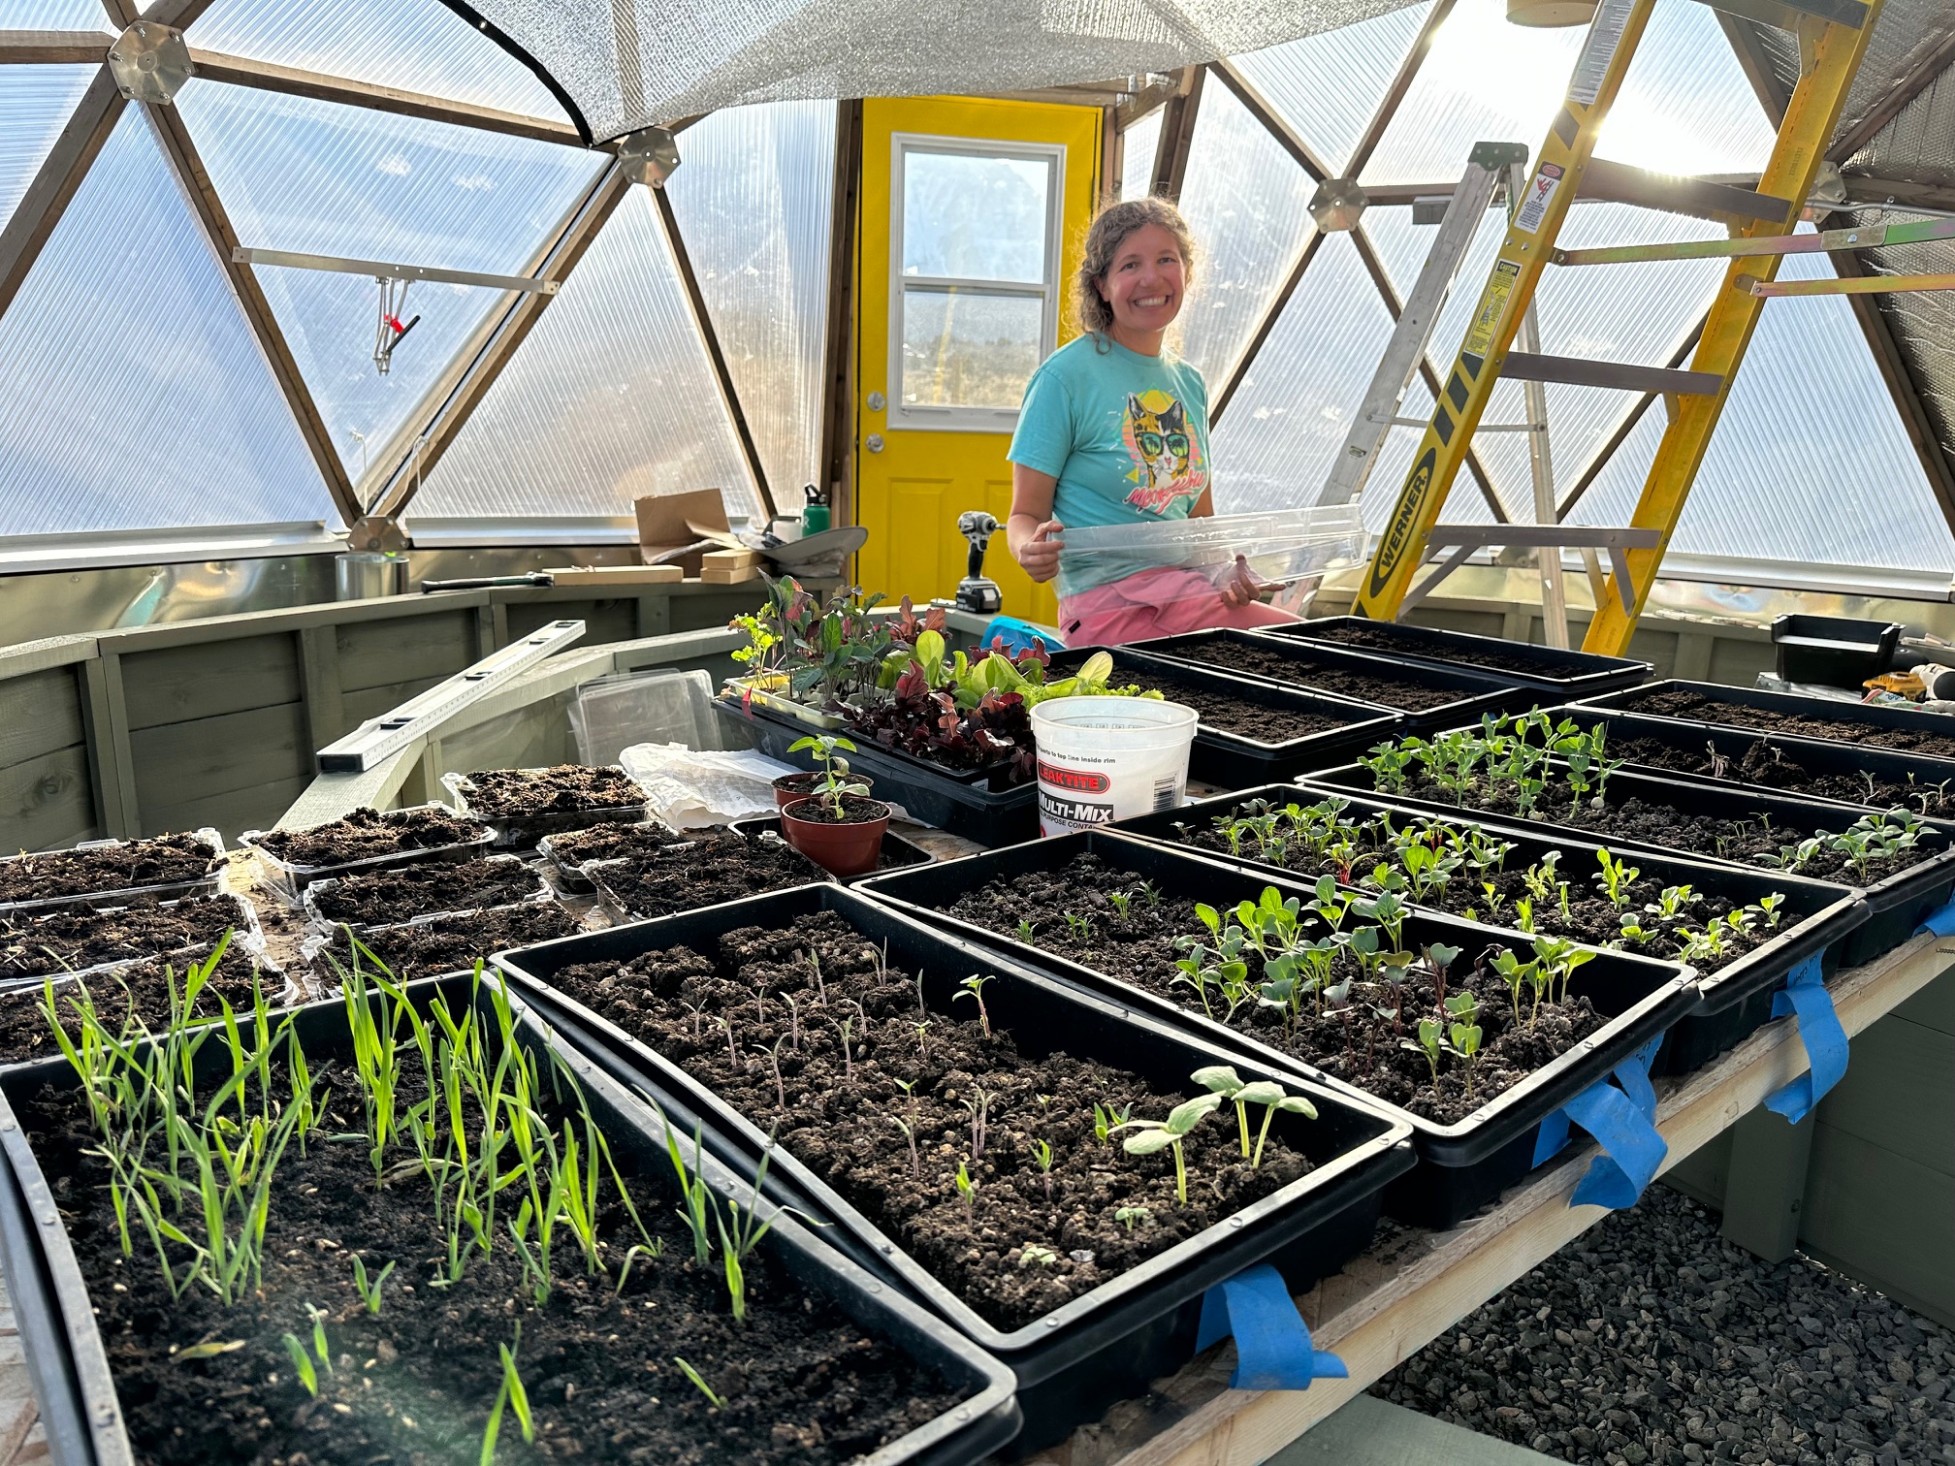
After about a month of work, the greenhouse looked fairly complete from the outside, but there was so much still to do! I wasted no time starting a bunch of seeds on a temporary table inside. There were still many thoughtful details to complete that make this kit work really well to regulate the temperature in the hot desert summer and the cold winter.
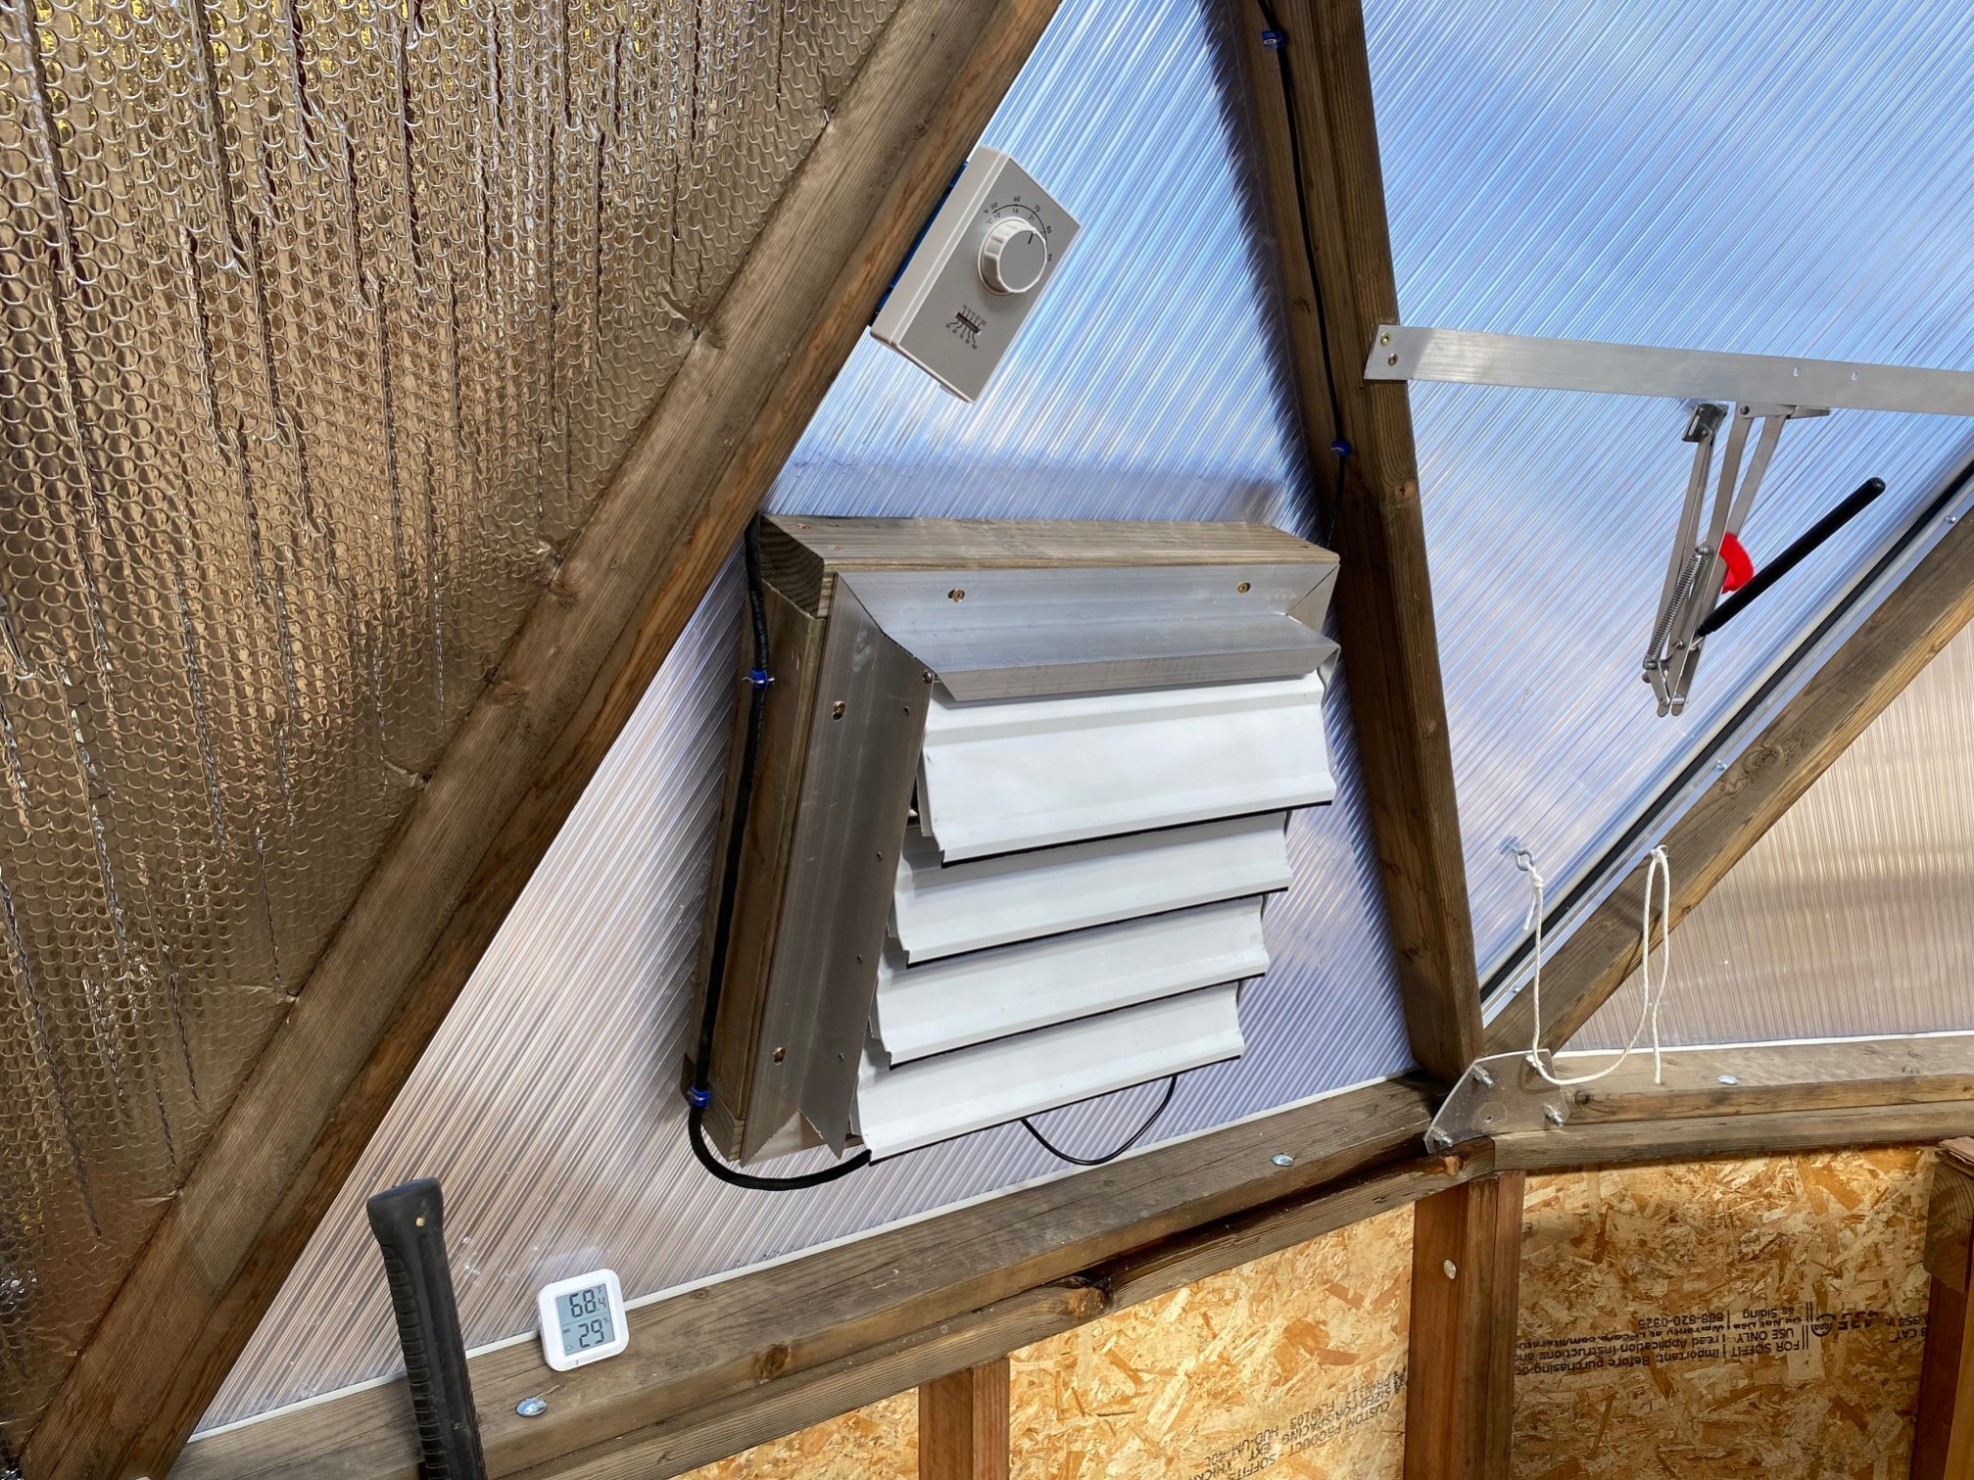
One of the many fancy details in this kit is the solar powered fan that is on a thermostat. I love it! When I feel overheated, I sit next to the fan and it cools me down quickly. It has mostly been on during the day since it was installed, except for a couple stormy, cooler days.
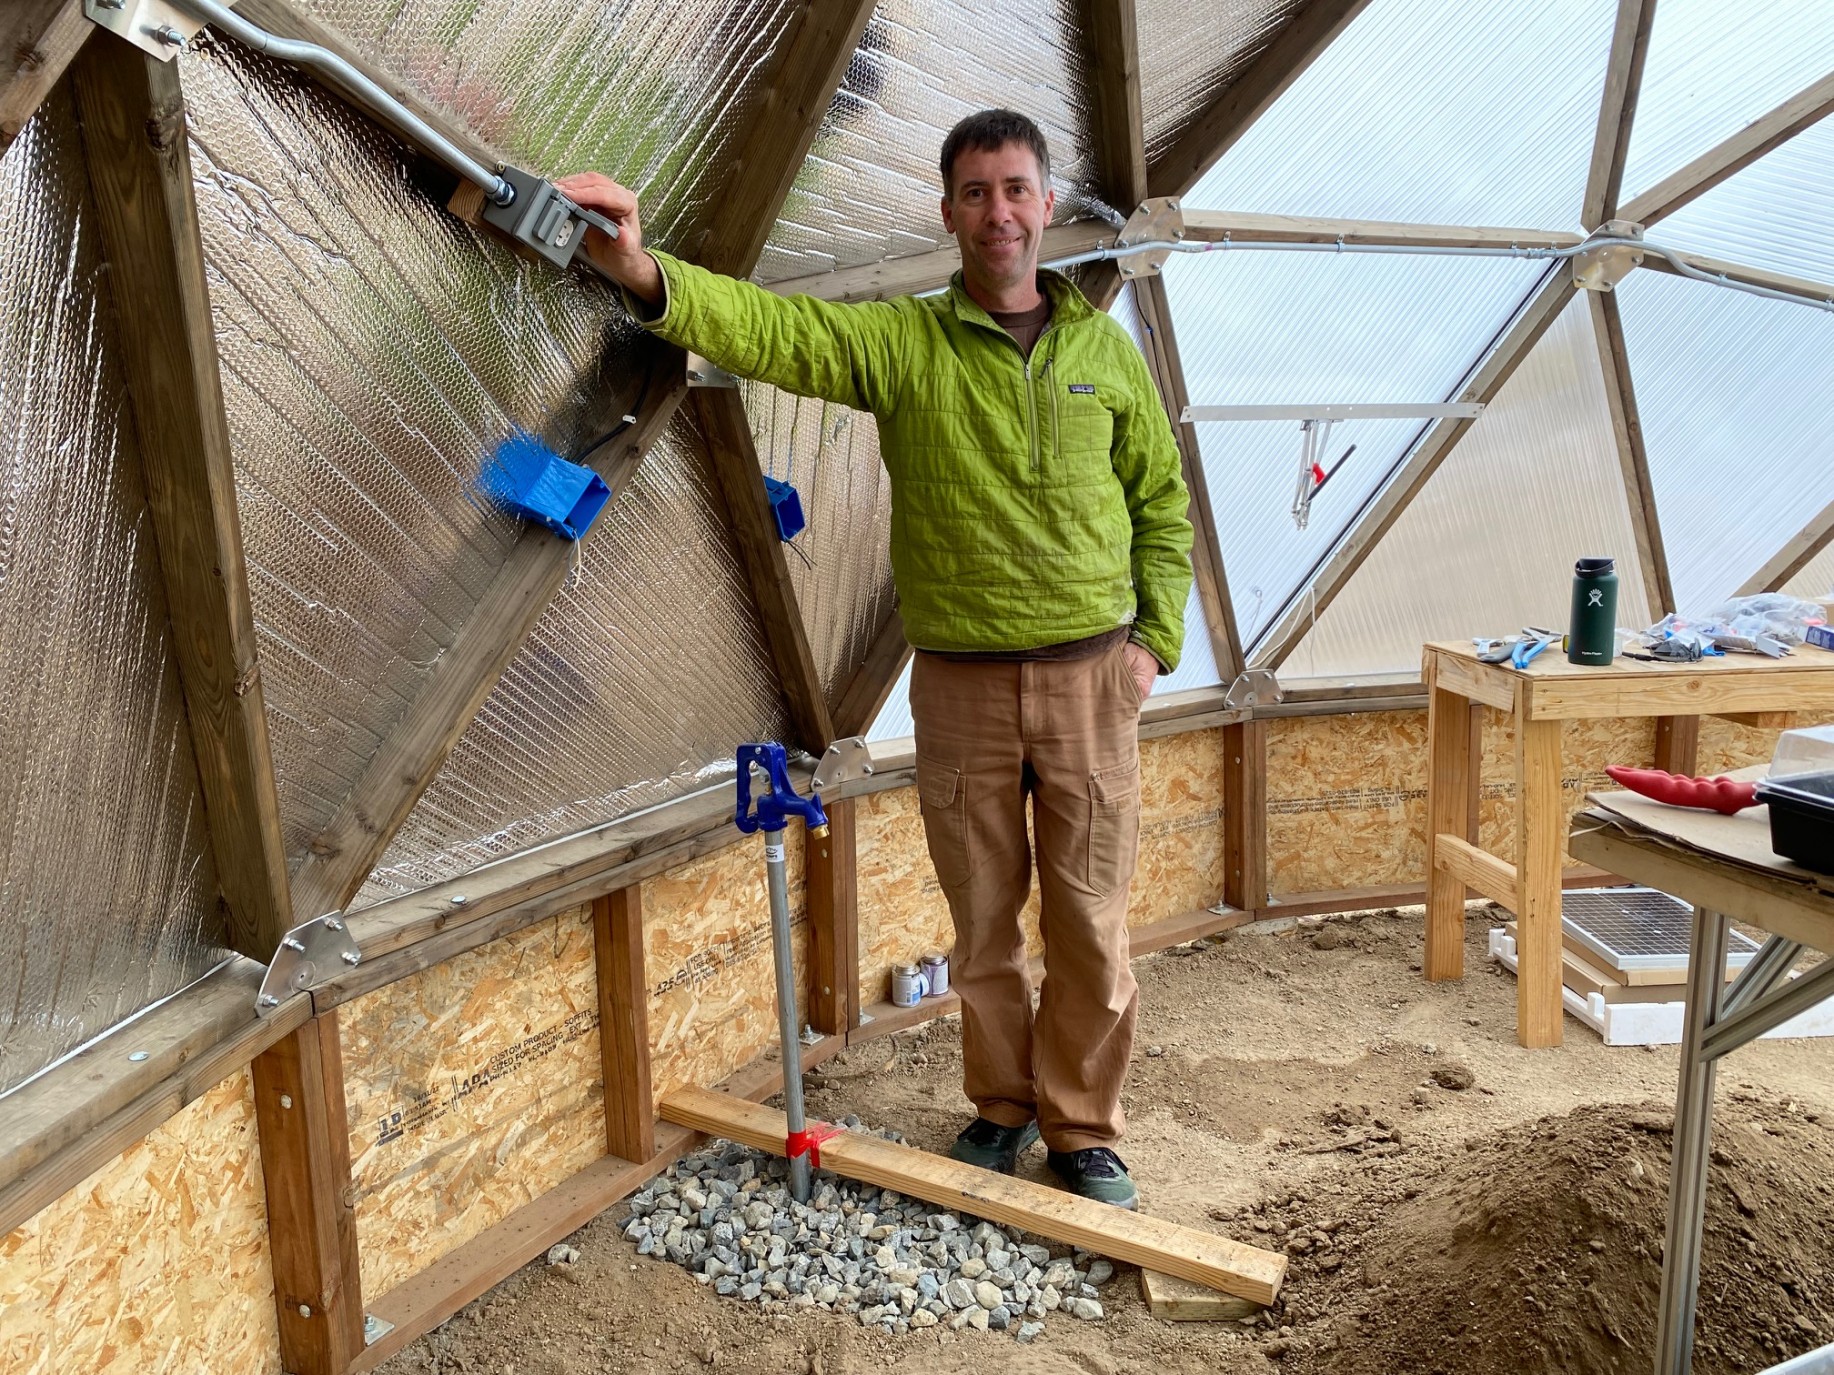
I dug a trench outside to continue the water line inside the dome to another frost free hydrant.

Jon installed the electrical conduit, boxes, and wiring. Then we passed our Rough All inspection (framing, electrical, plumbing), so we could begin covering up the riser walls.
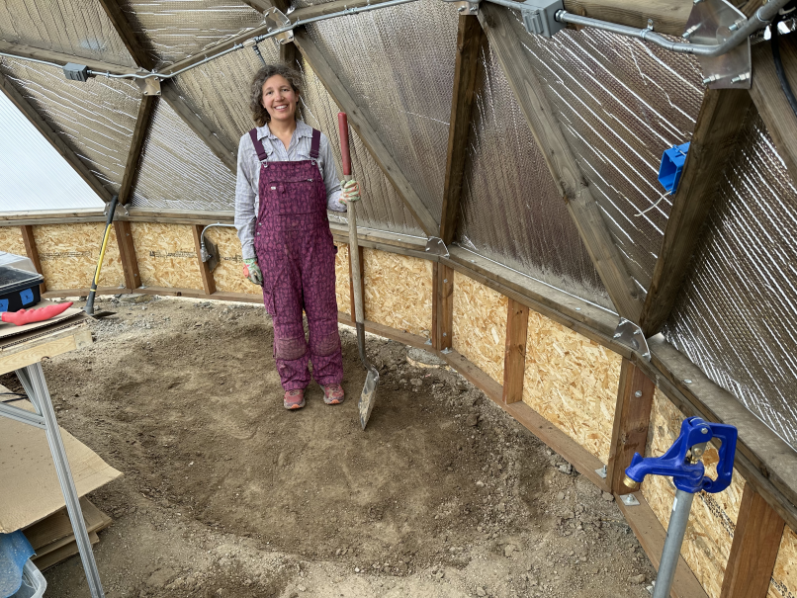
We dug out the oval indentation where the base of the pond will go.
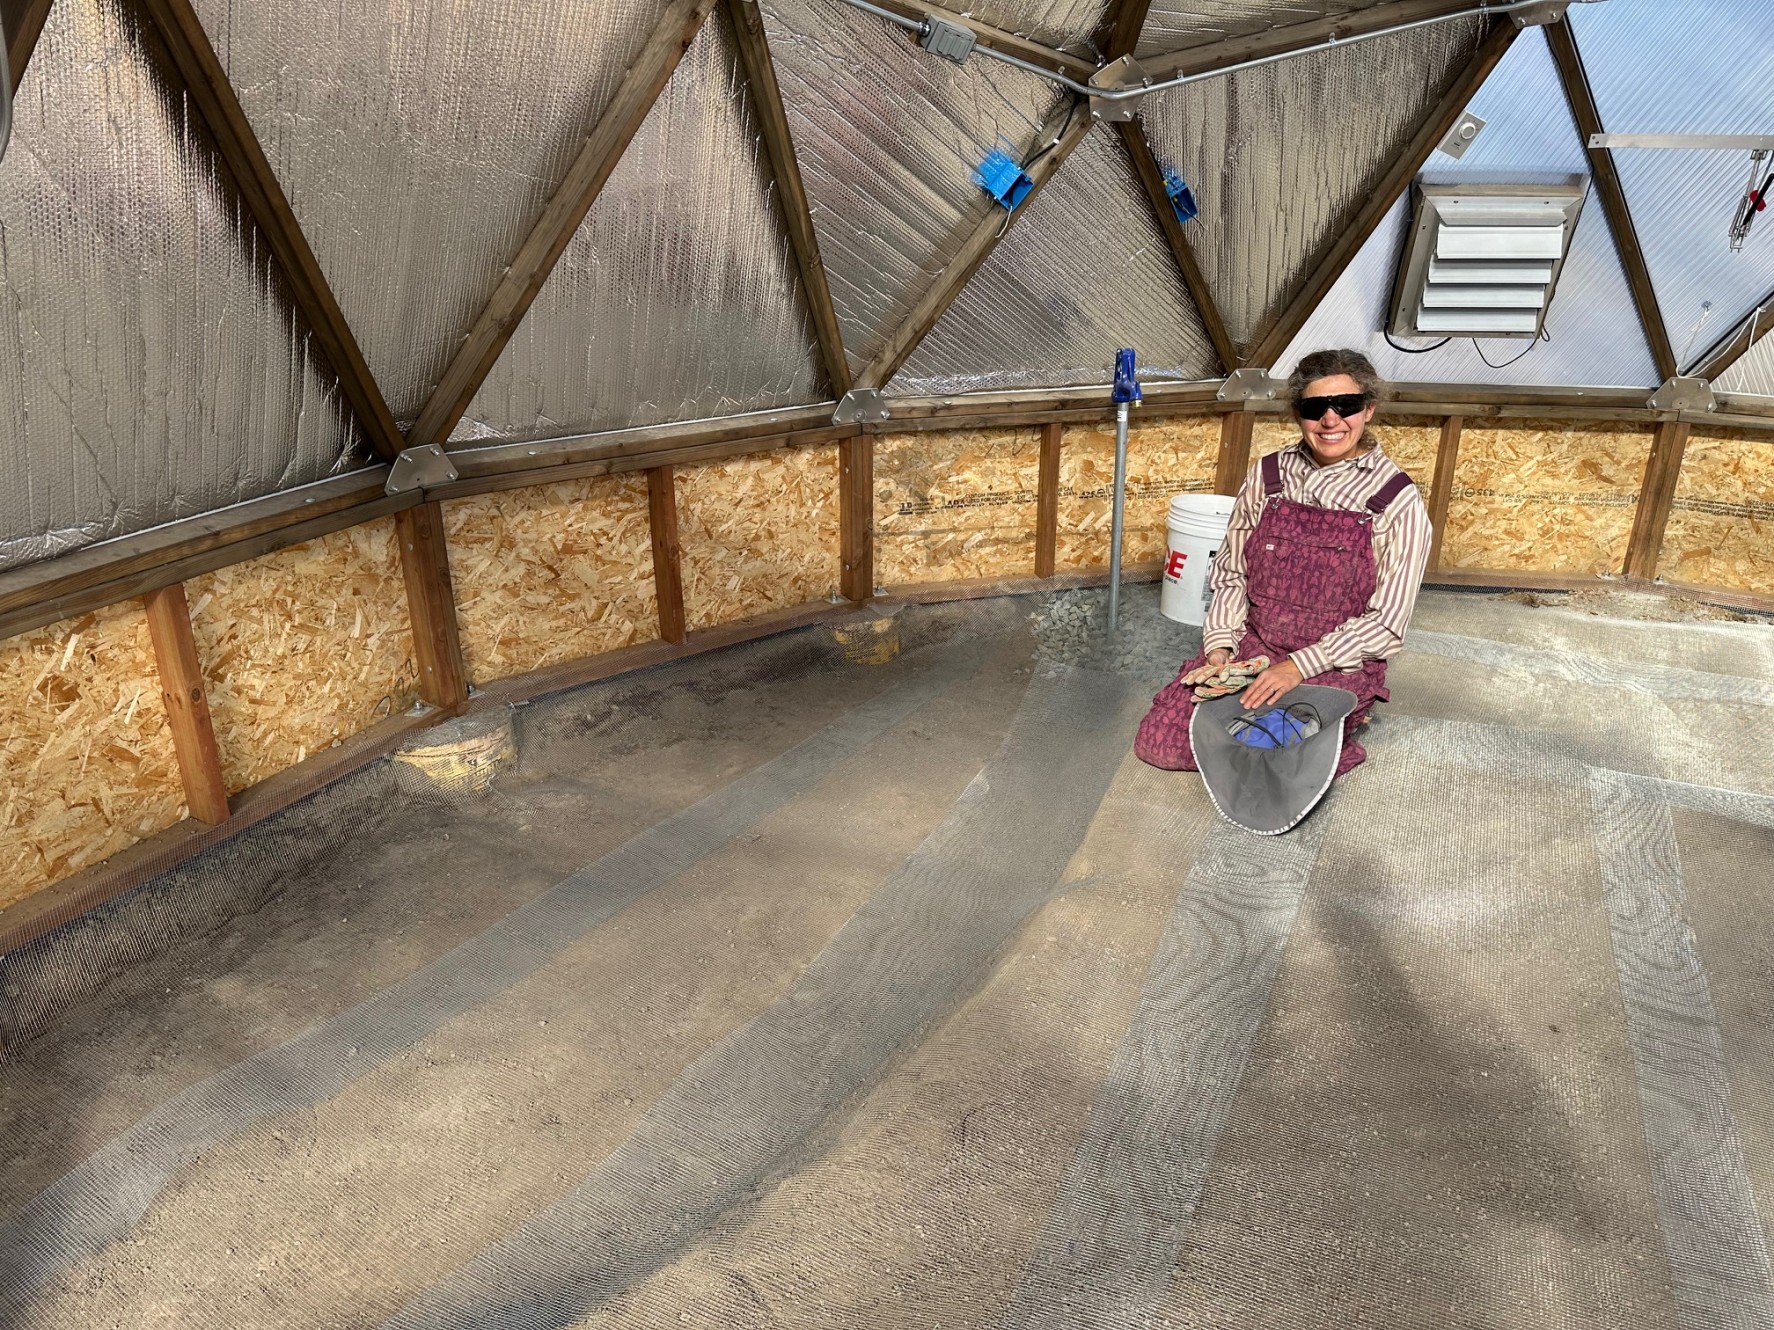
To deter burrowing rodents, we put hardware cloth down on the entire floor, contouring down for the base of the pond, and stapled it to the riser wall.
We put 2 layers of rockwool insulation in the riser wall cavities.
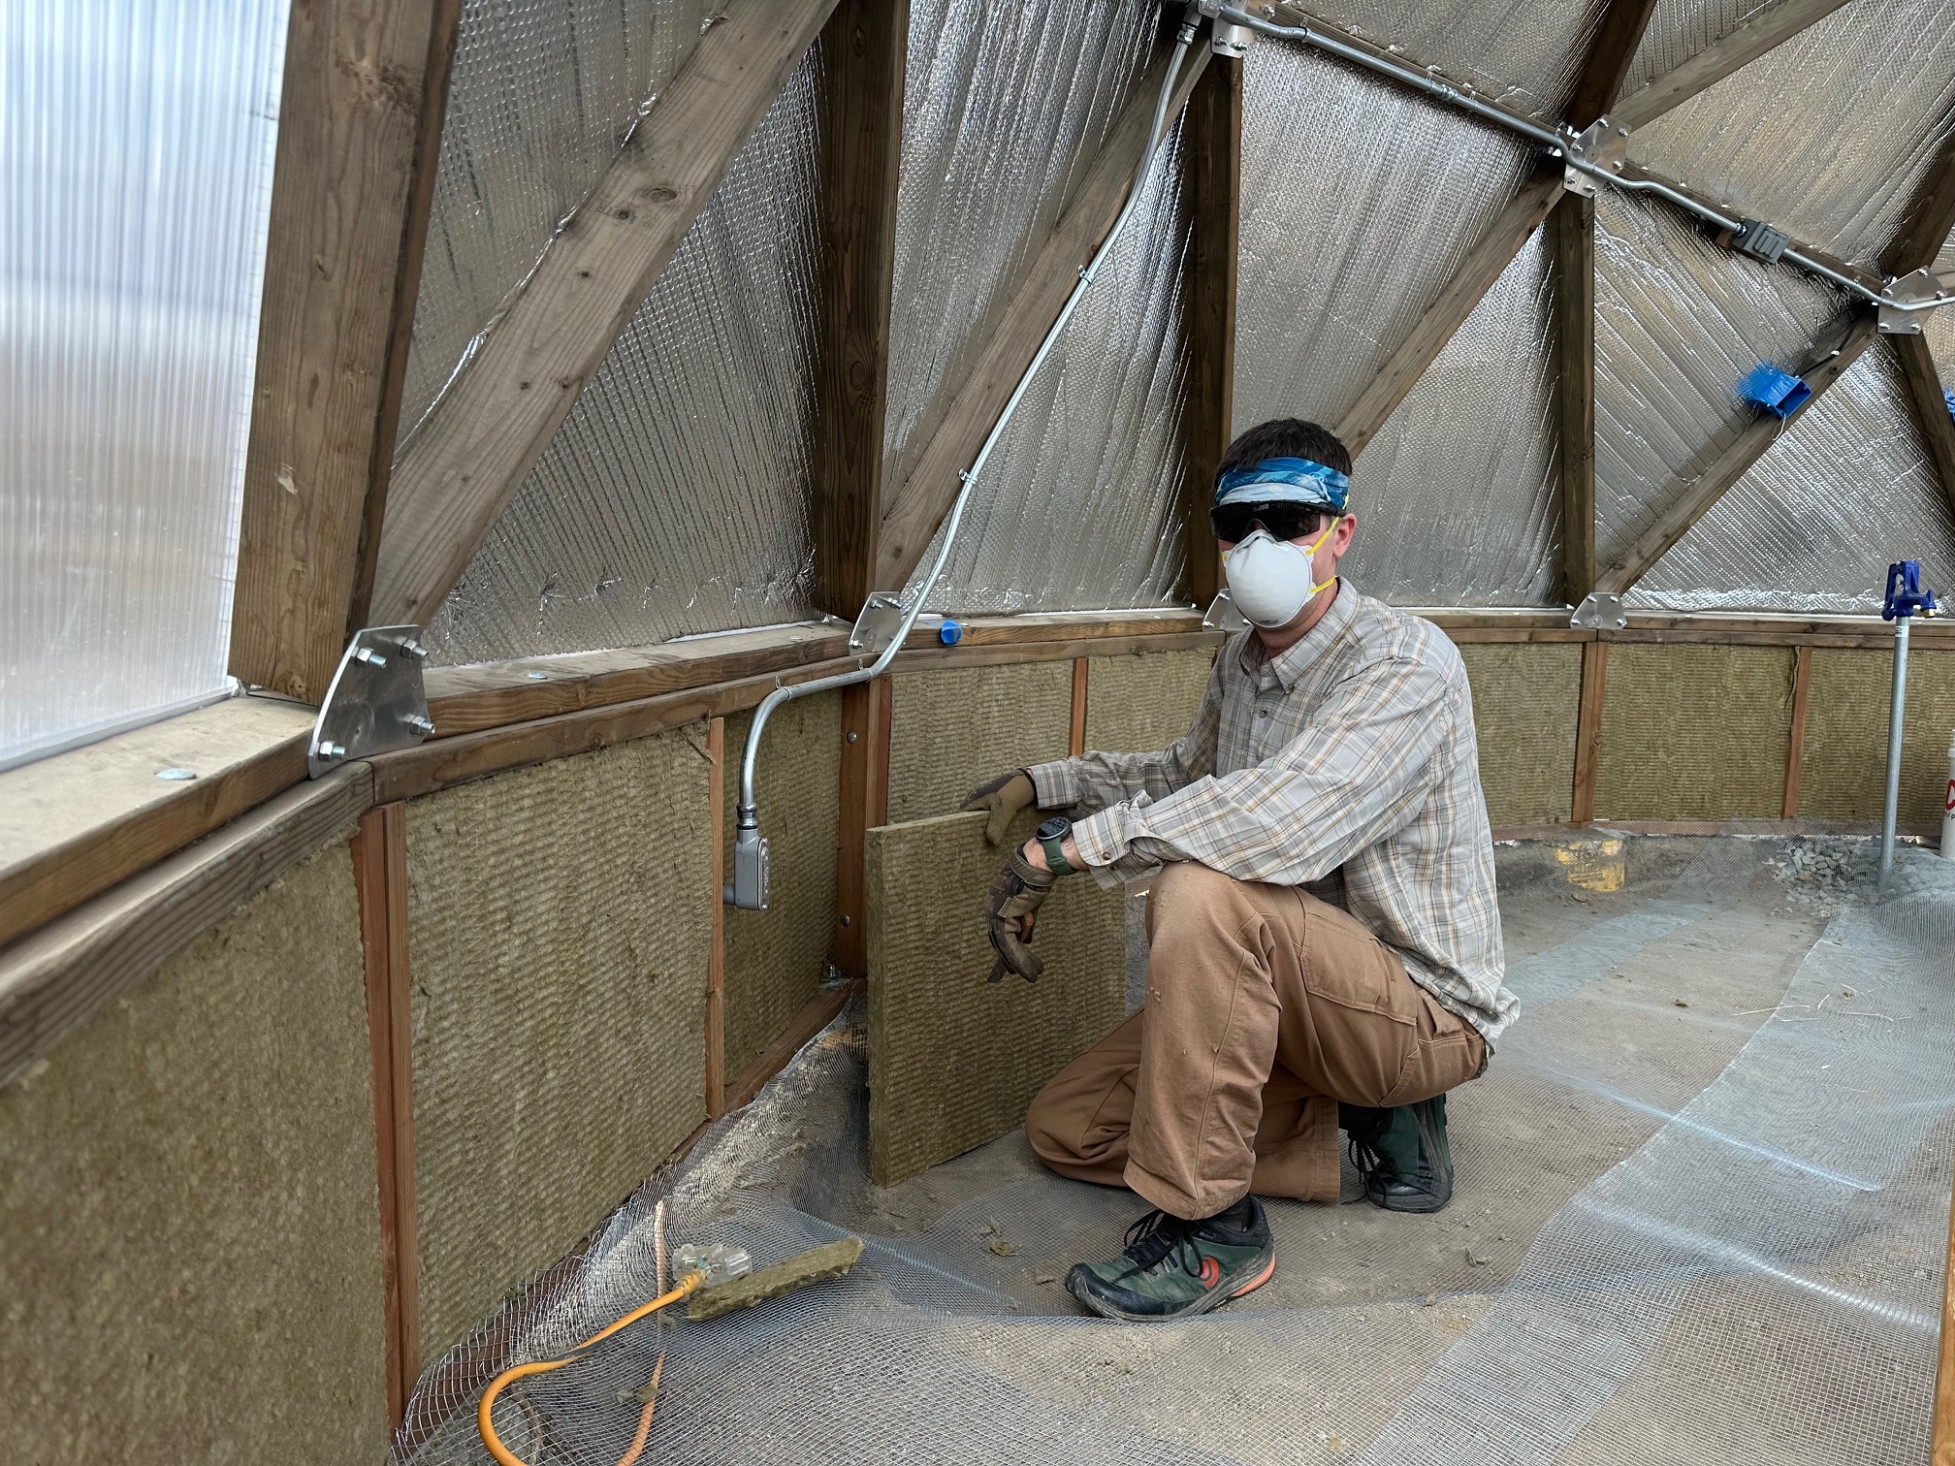
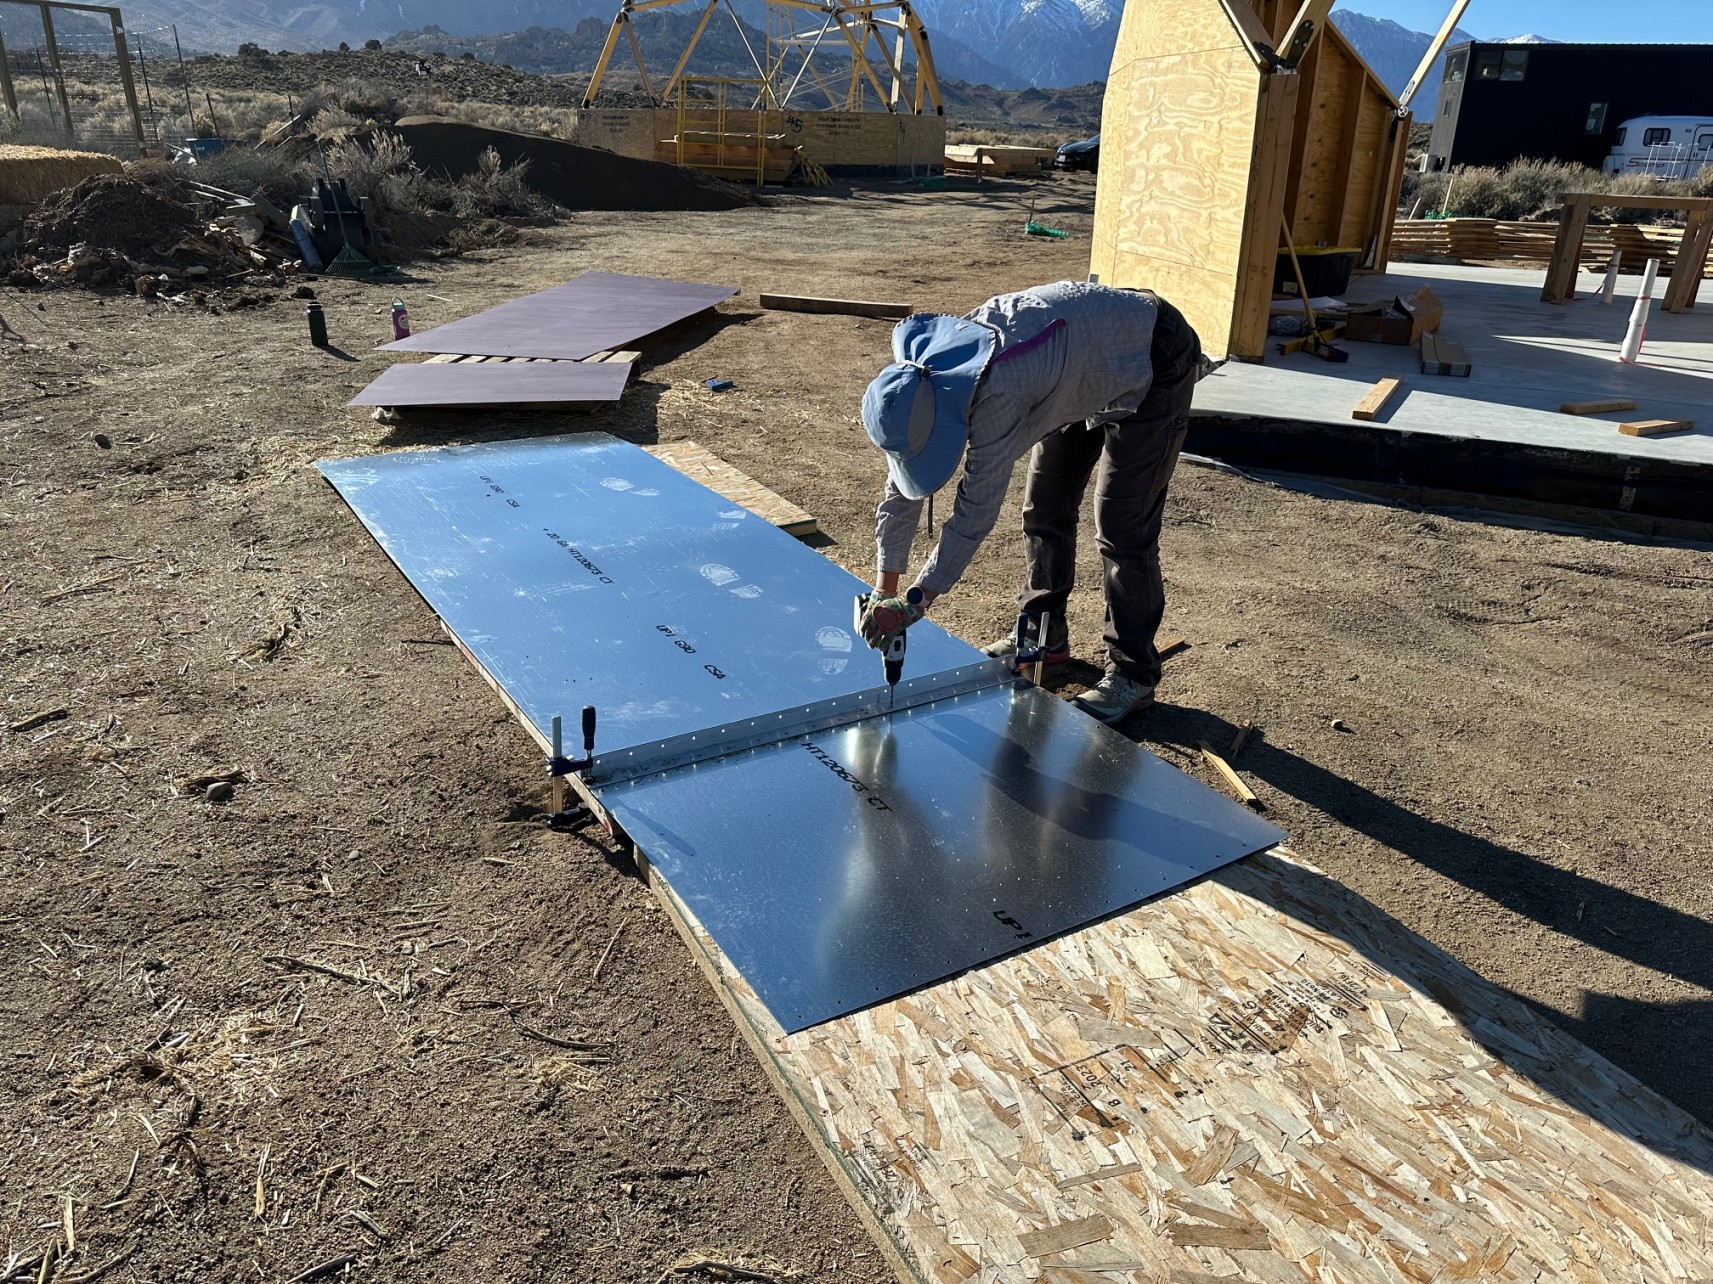
Then we covered the riser walls with a roll of sheet metal. The only difficult part was fitting it around the junction box.
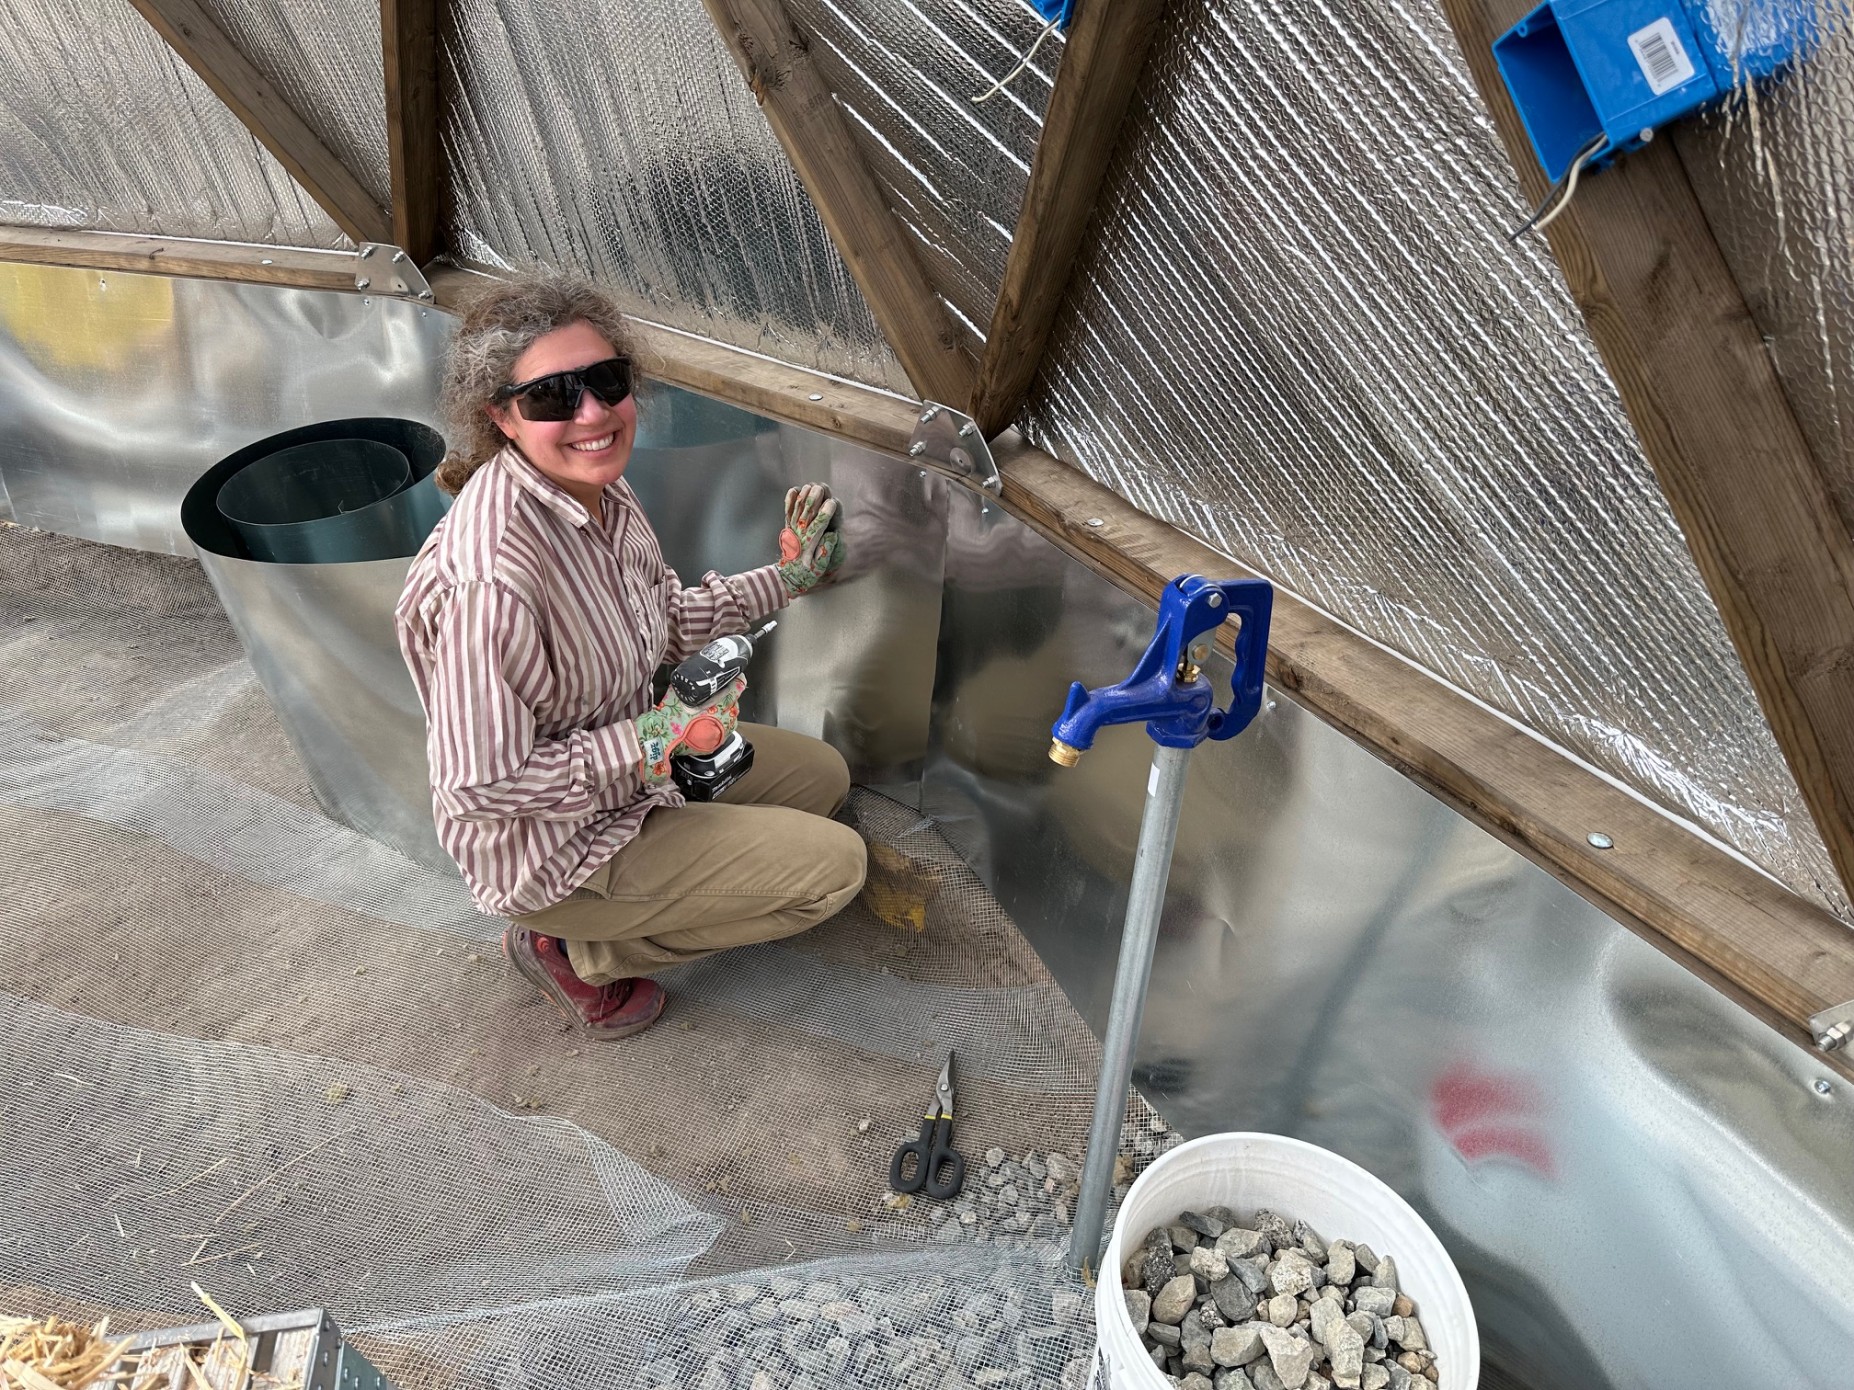
And don’t forget the flashing to protect the riser walls from condensation drips. We didn’t forget. 🙂
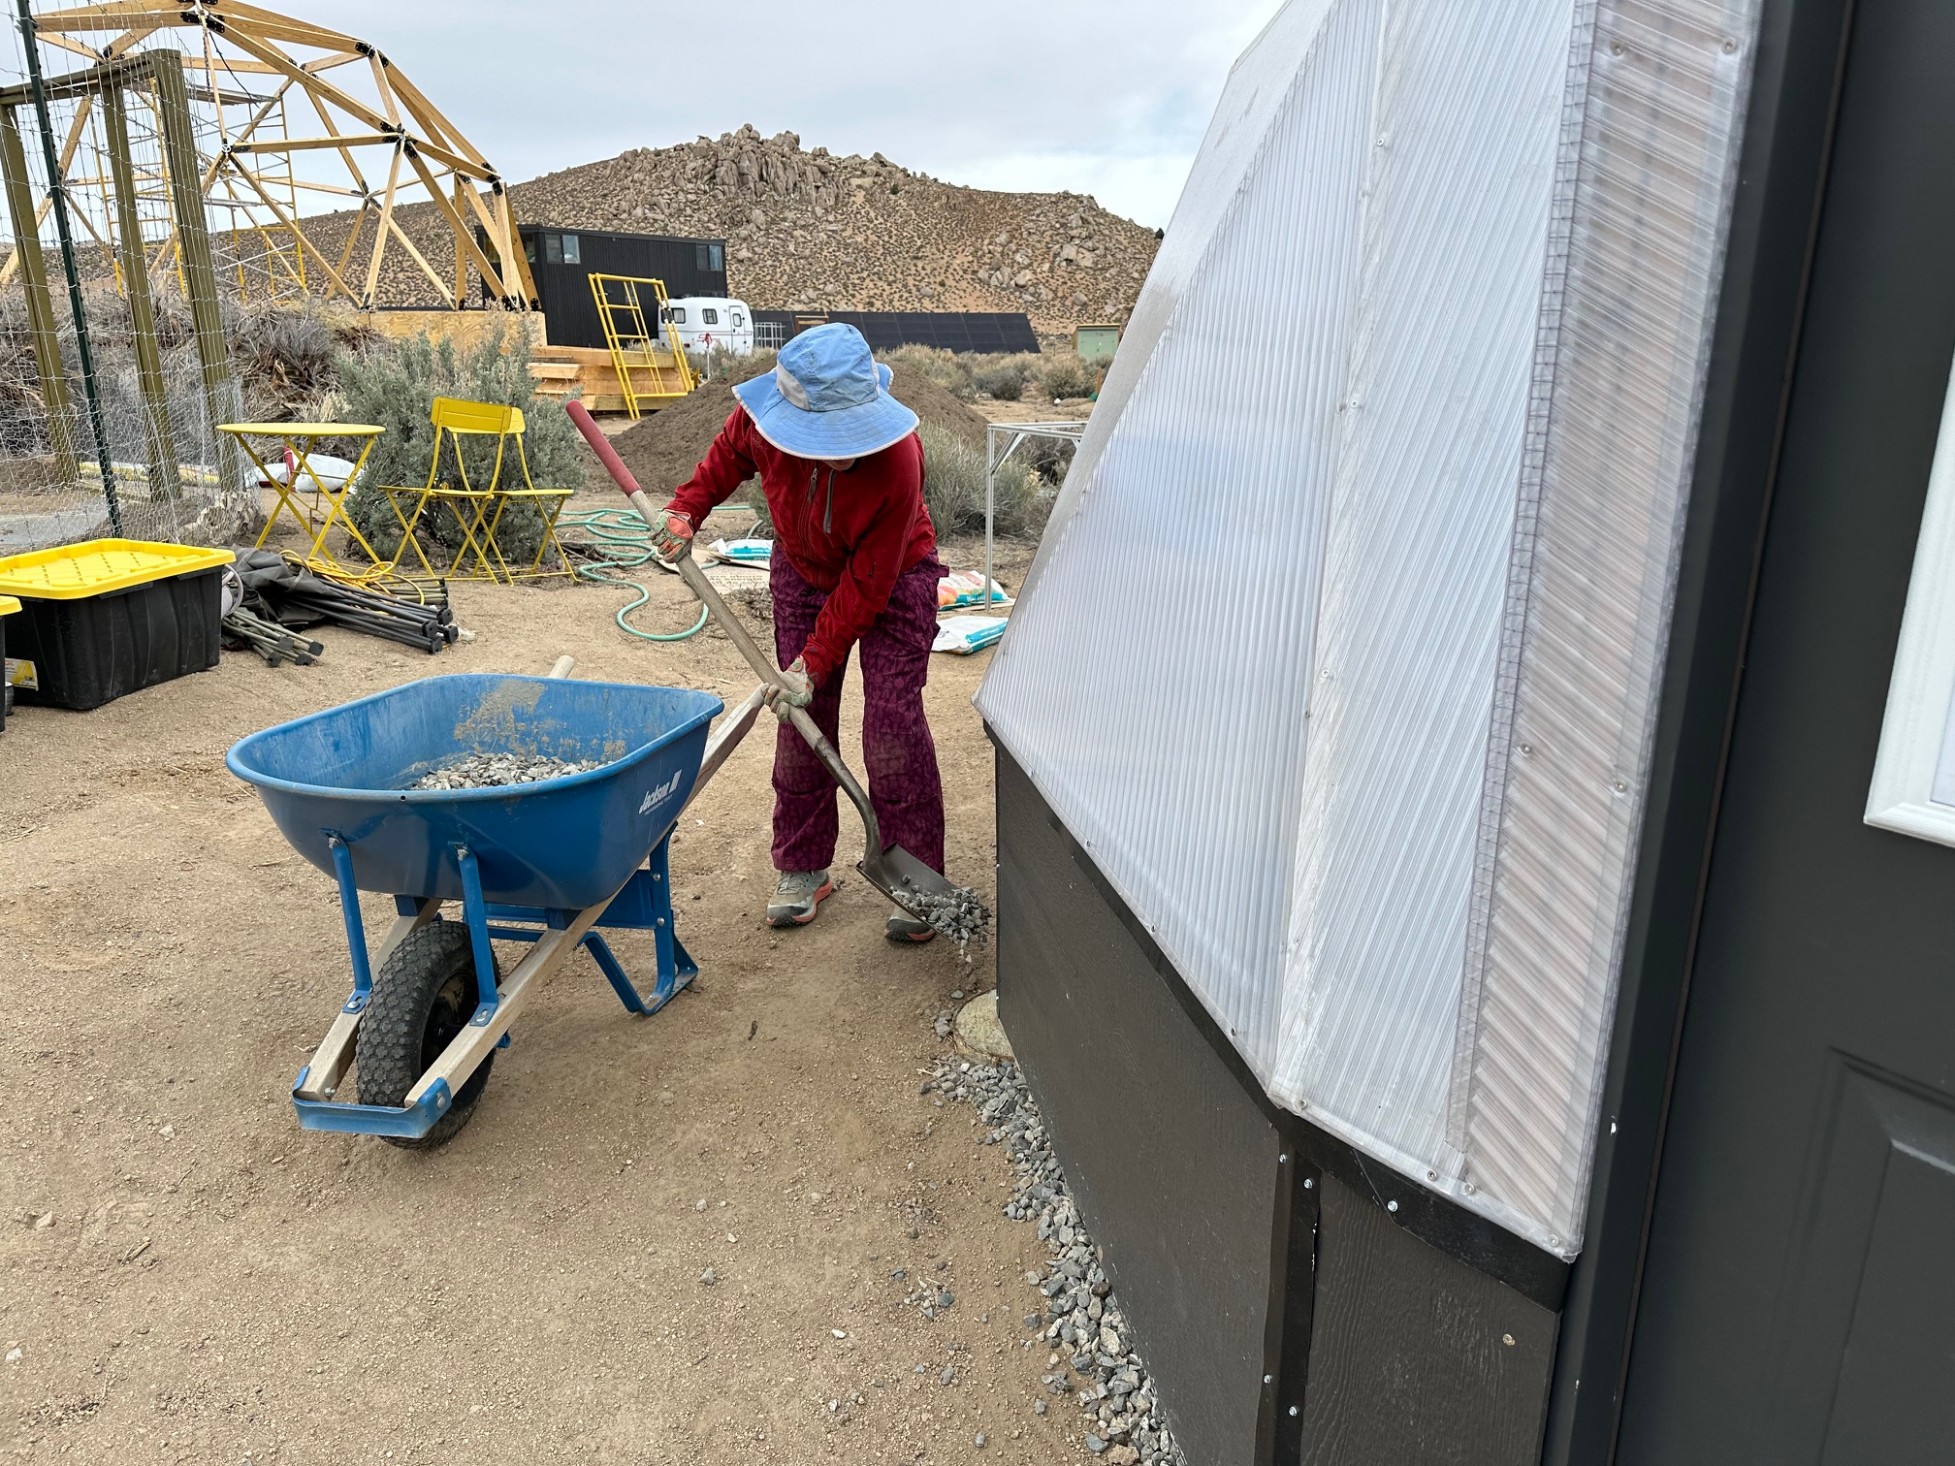
We decided to cover the hardware cloth floor with leftover 7/8″ crushed aggregate. I also stuffed the same rock under the riser walls for a capillary break.
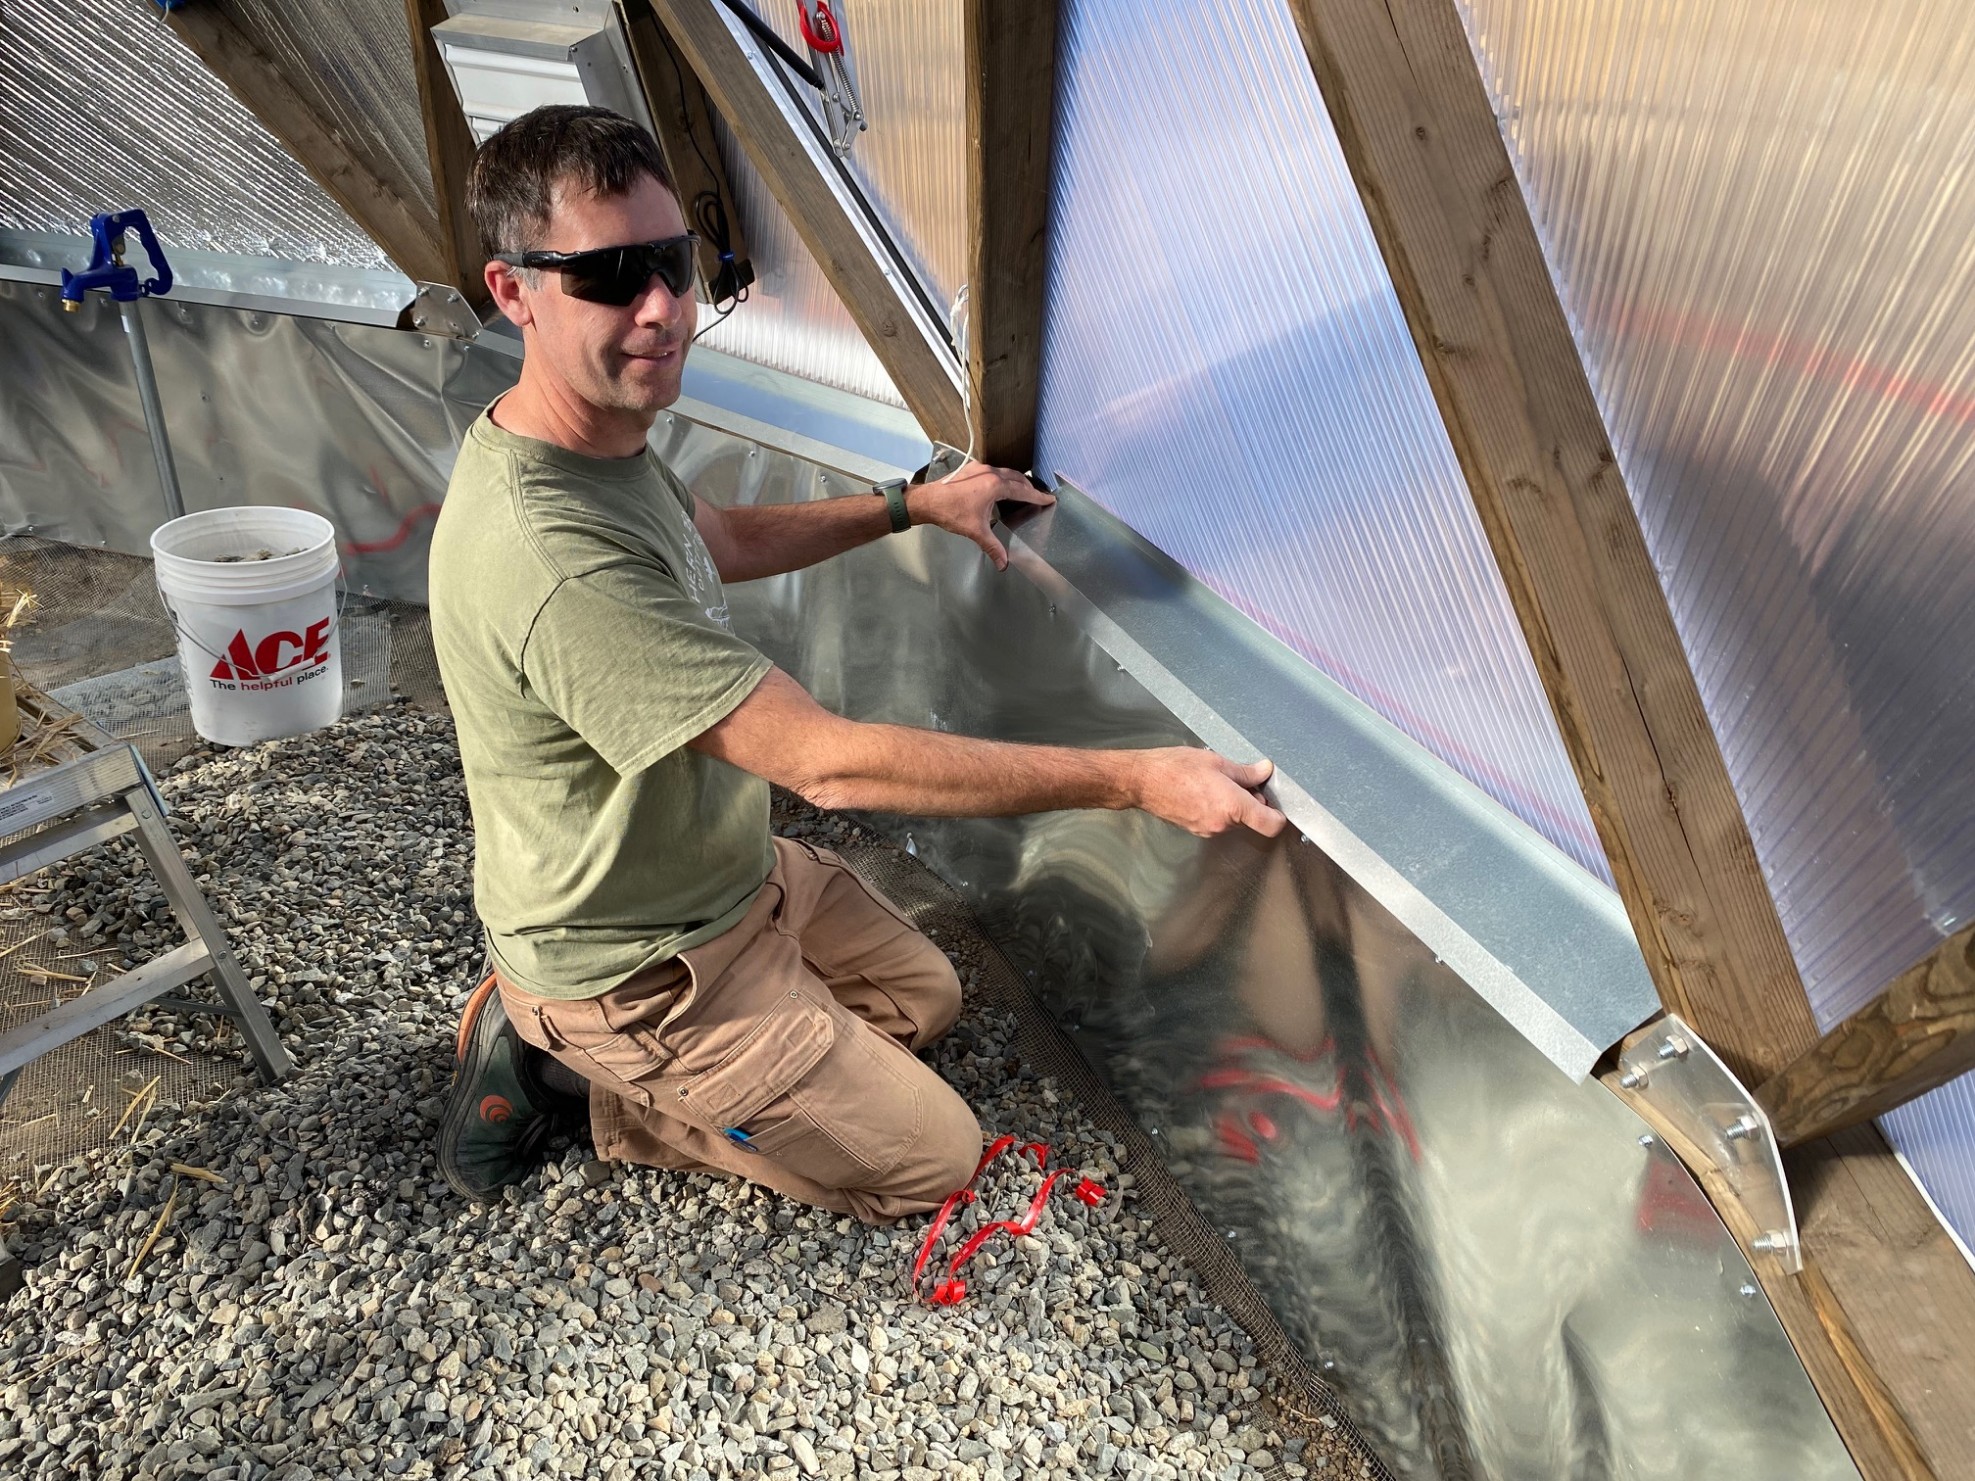
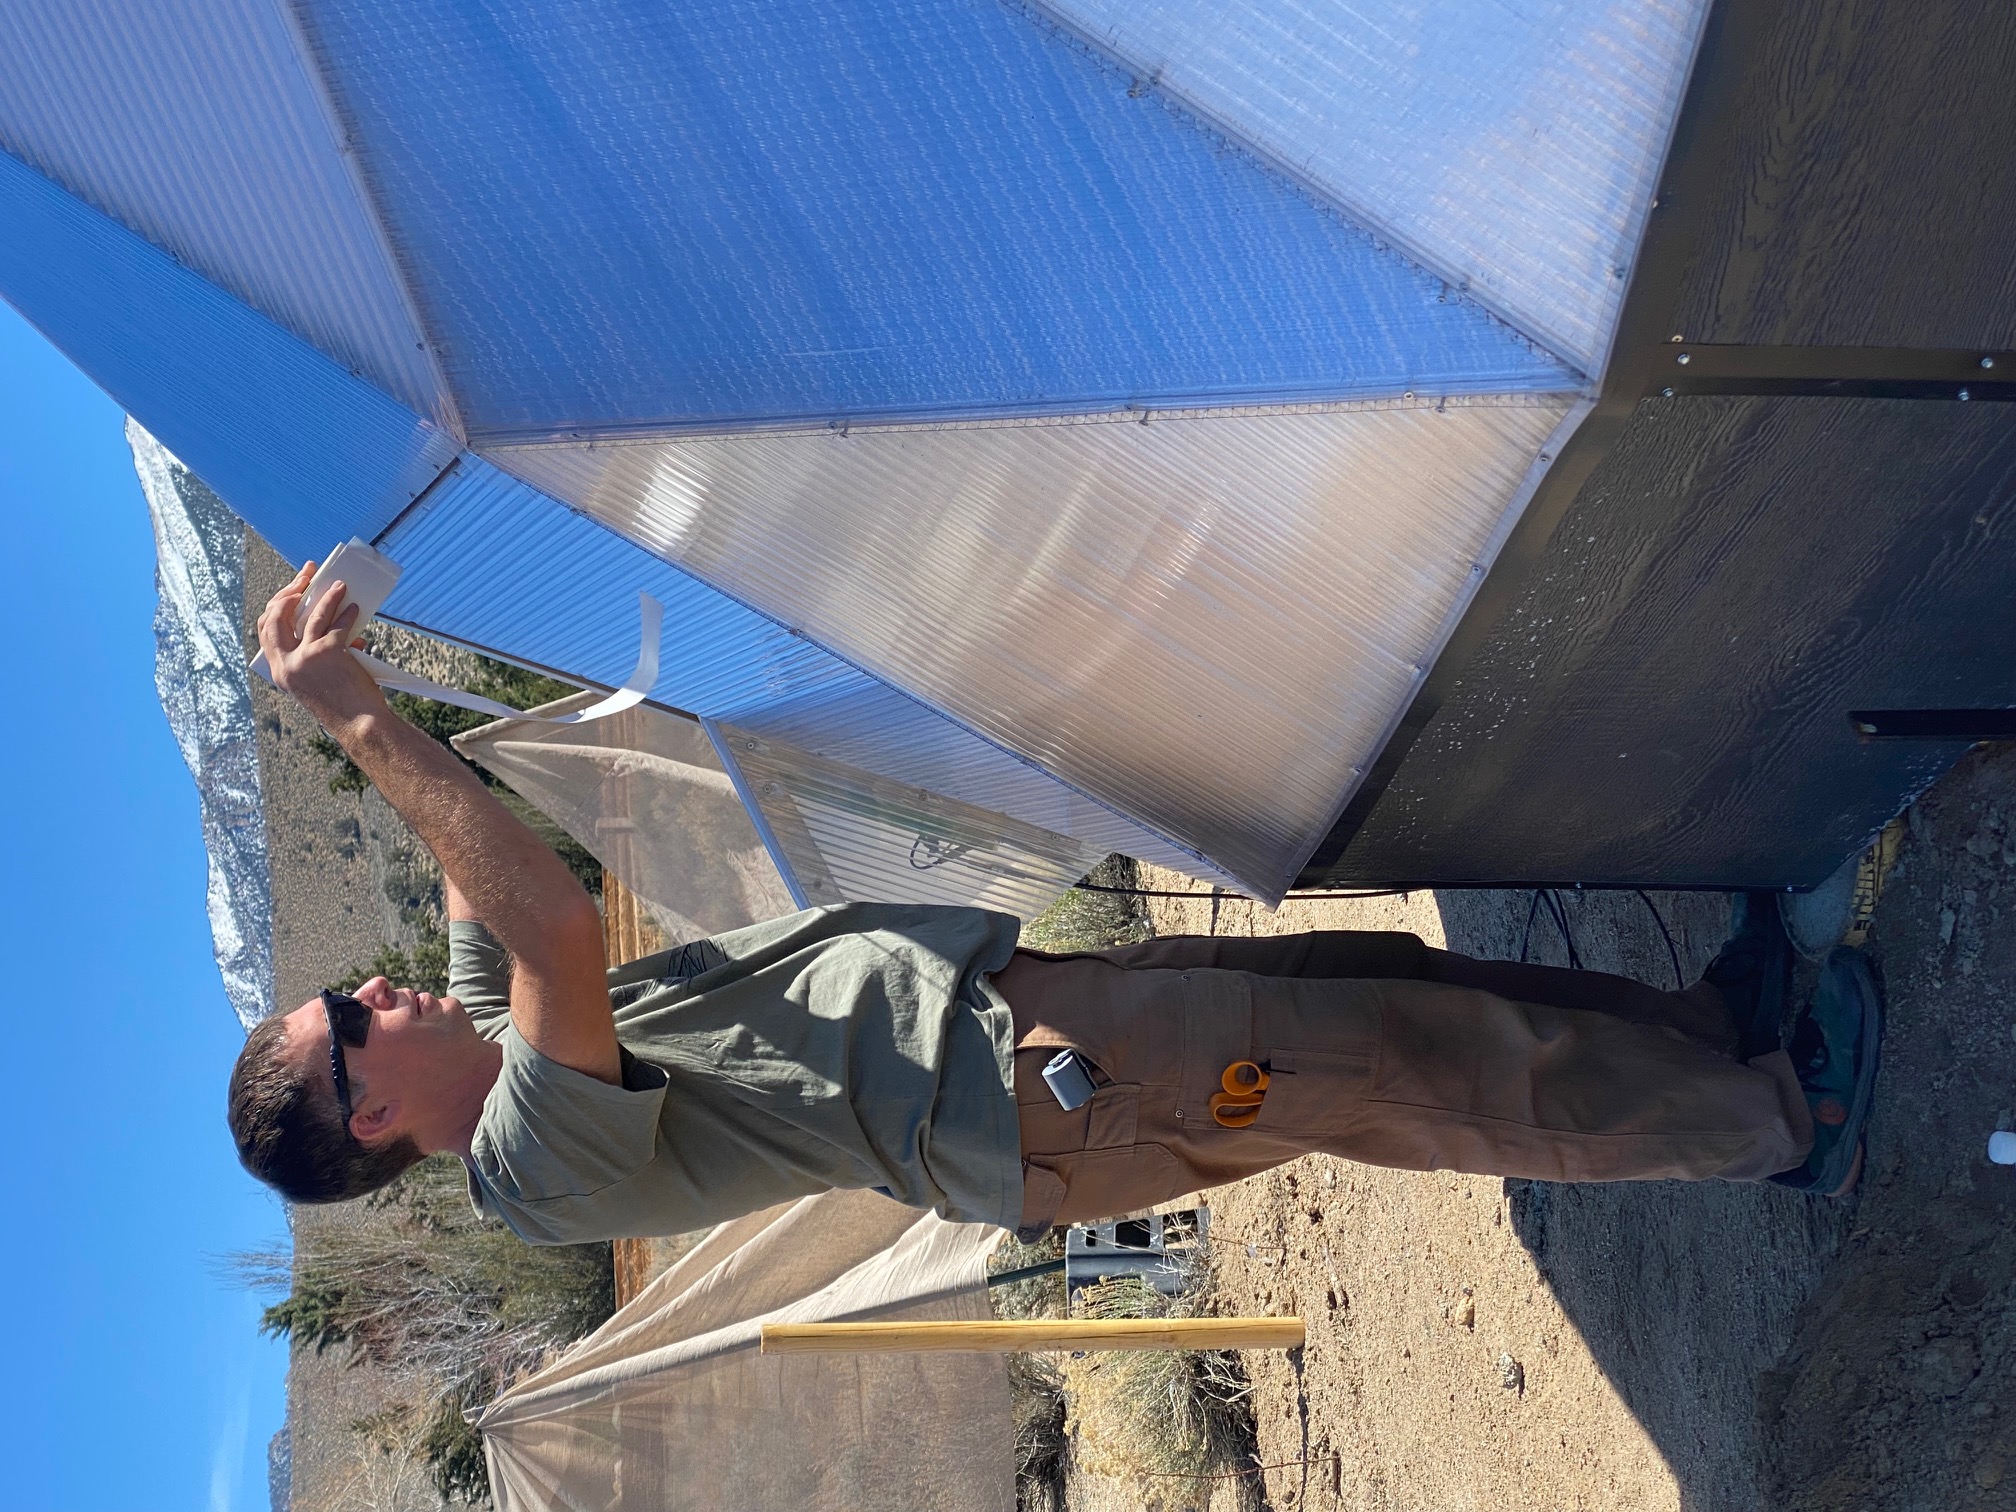
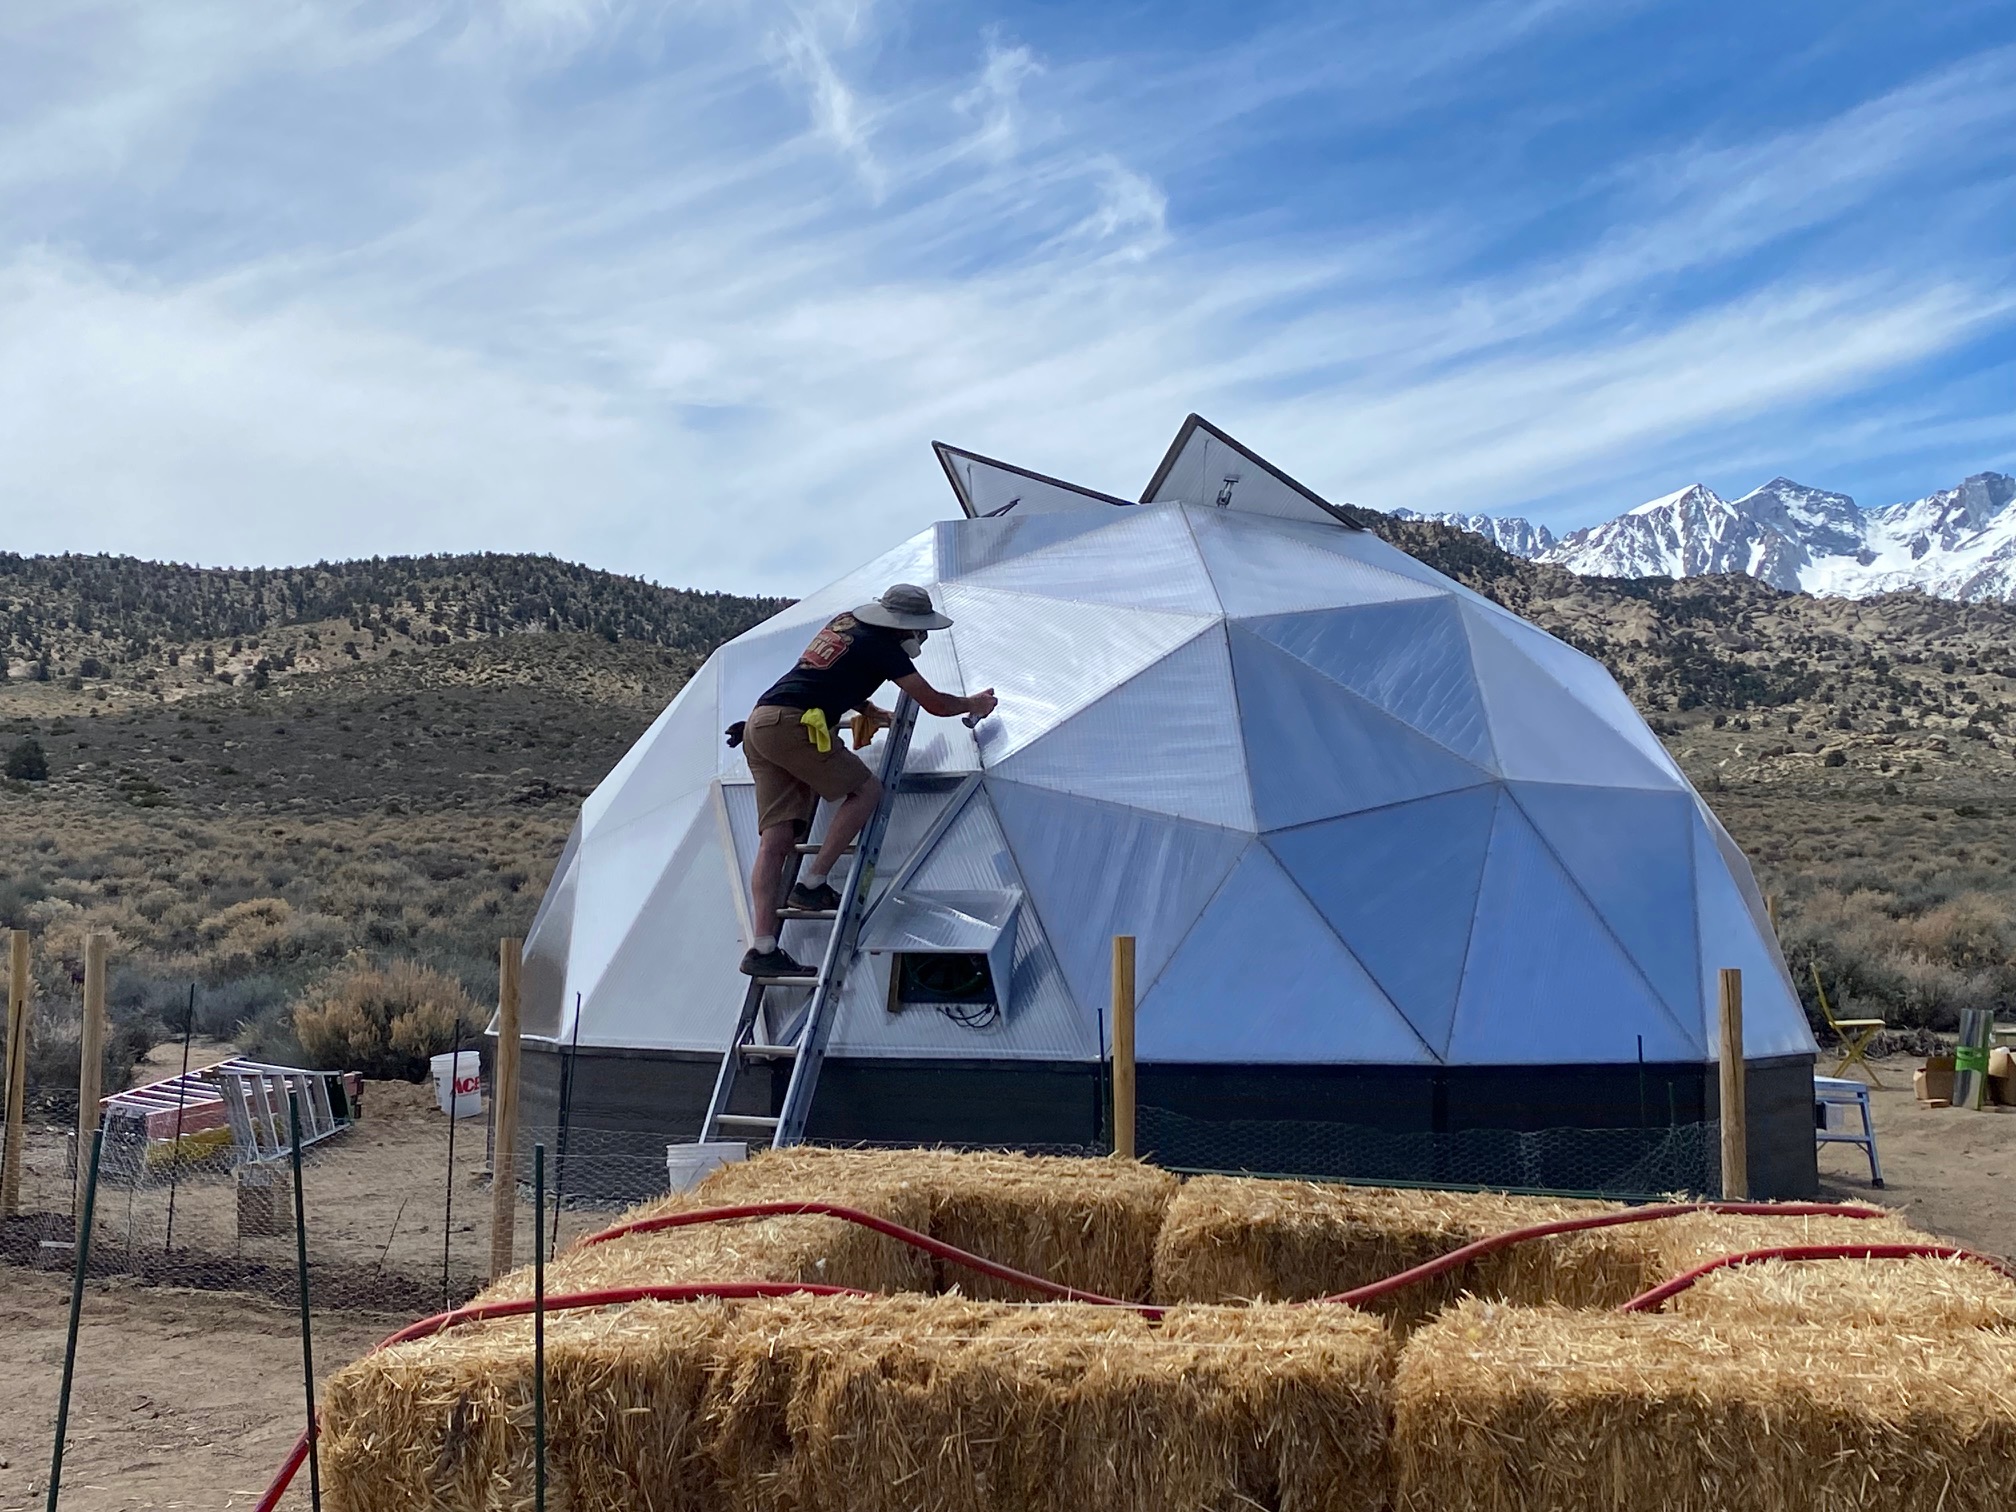
The temperature warmed up, so we could apply the tape to the external seams. It is aircraft leading edge tape, according to Jon, and we rolled it on with a wallpaper seam roller.
The kit was pretty complete, but one of the “owner supplied components” on the list was sheet metal for the thermoregulating pond. Yes, we have a pond in our greenhouse! We bought 3 sheets of 4′ tall 20 gage galvanized sheet metal from a local Heating/AC company and they cut the 3rd sheet to size for us.
We slathered it with Hydrochloric Acid to slightly etch it, then painted it dark purple. It needs to be dark to absorb solar radiation from the day and transmit it to the water, so it can release the heat back into the greenhouse during the night. We didn’t following the Rolling Stones’ advice to “Paint it Black,” nor did we do as Metallica recommends and “Fade to Black,” although the ombre look would be nice with the purple.
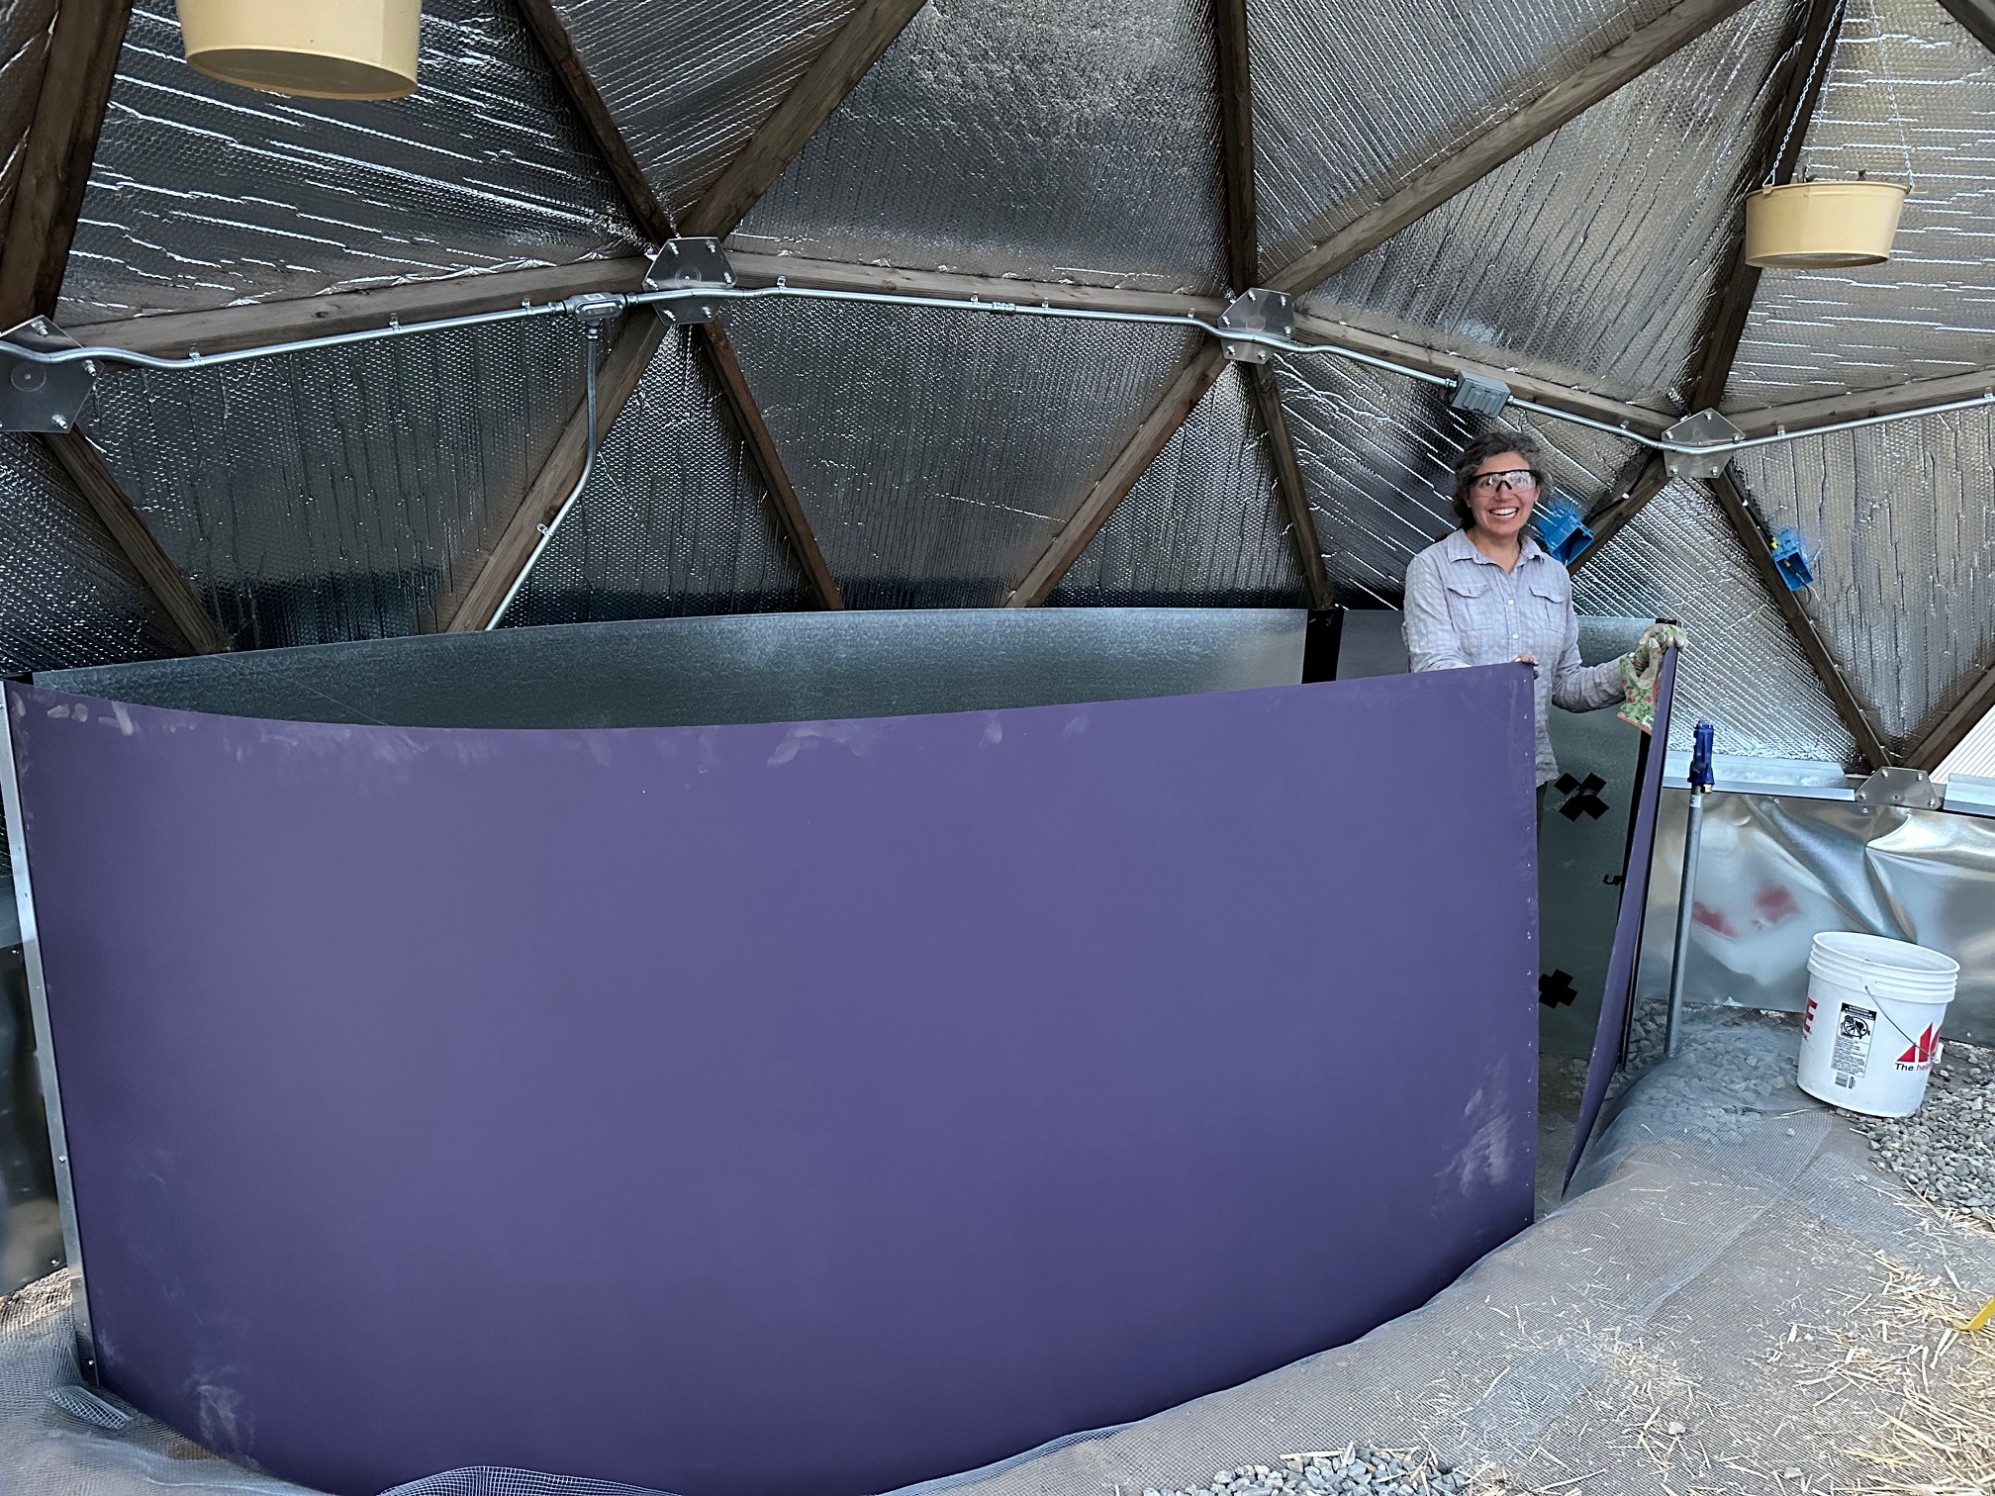
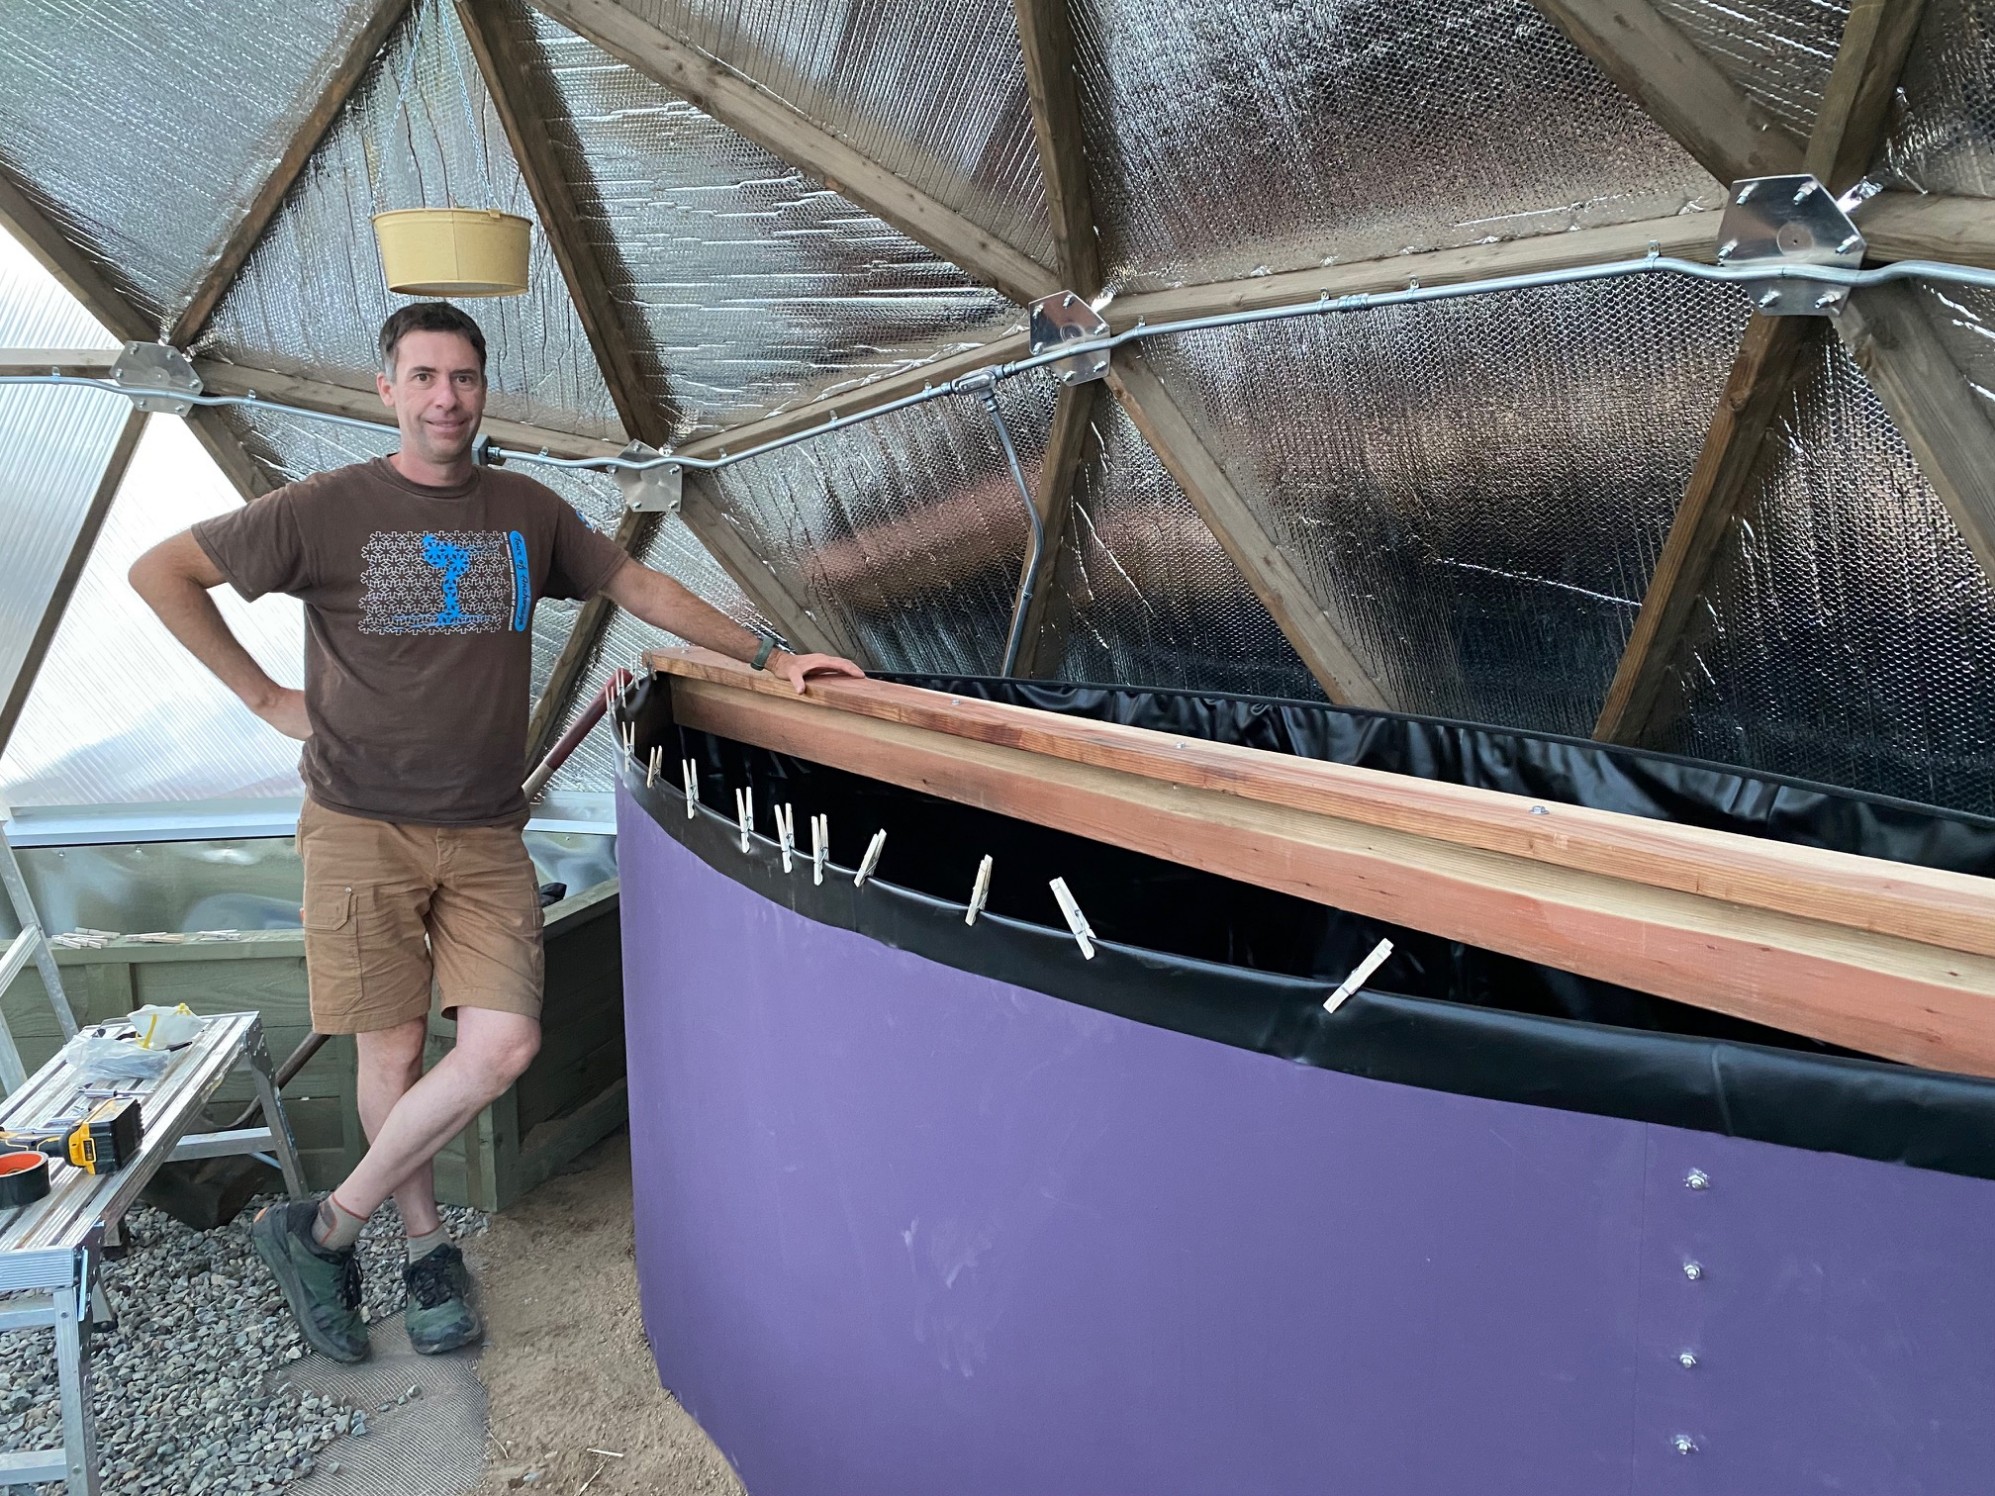
We fabricated the pond with edges and screws provided in the kit, and put duct tape over all the potential liner puncturers, per the instructions. Jon stuffed some scraps of insulation behind the pond. There is a treated 2×8 at the bottom to keep the pond shape from collapsing at the bottom. Then we filled in and smoothed sand at the bottom before installing the thick pond liner.
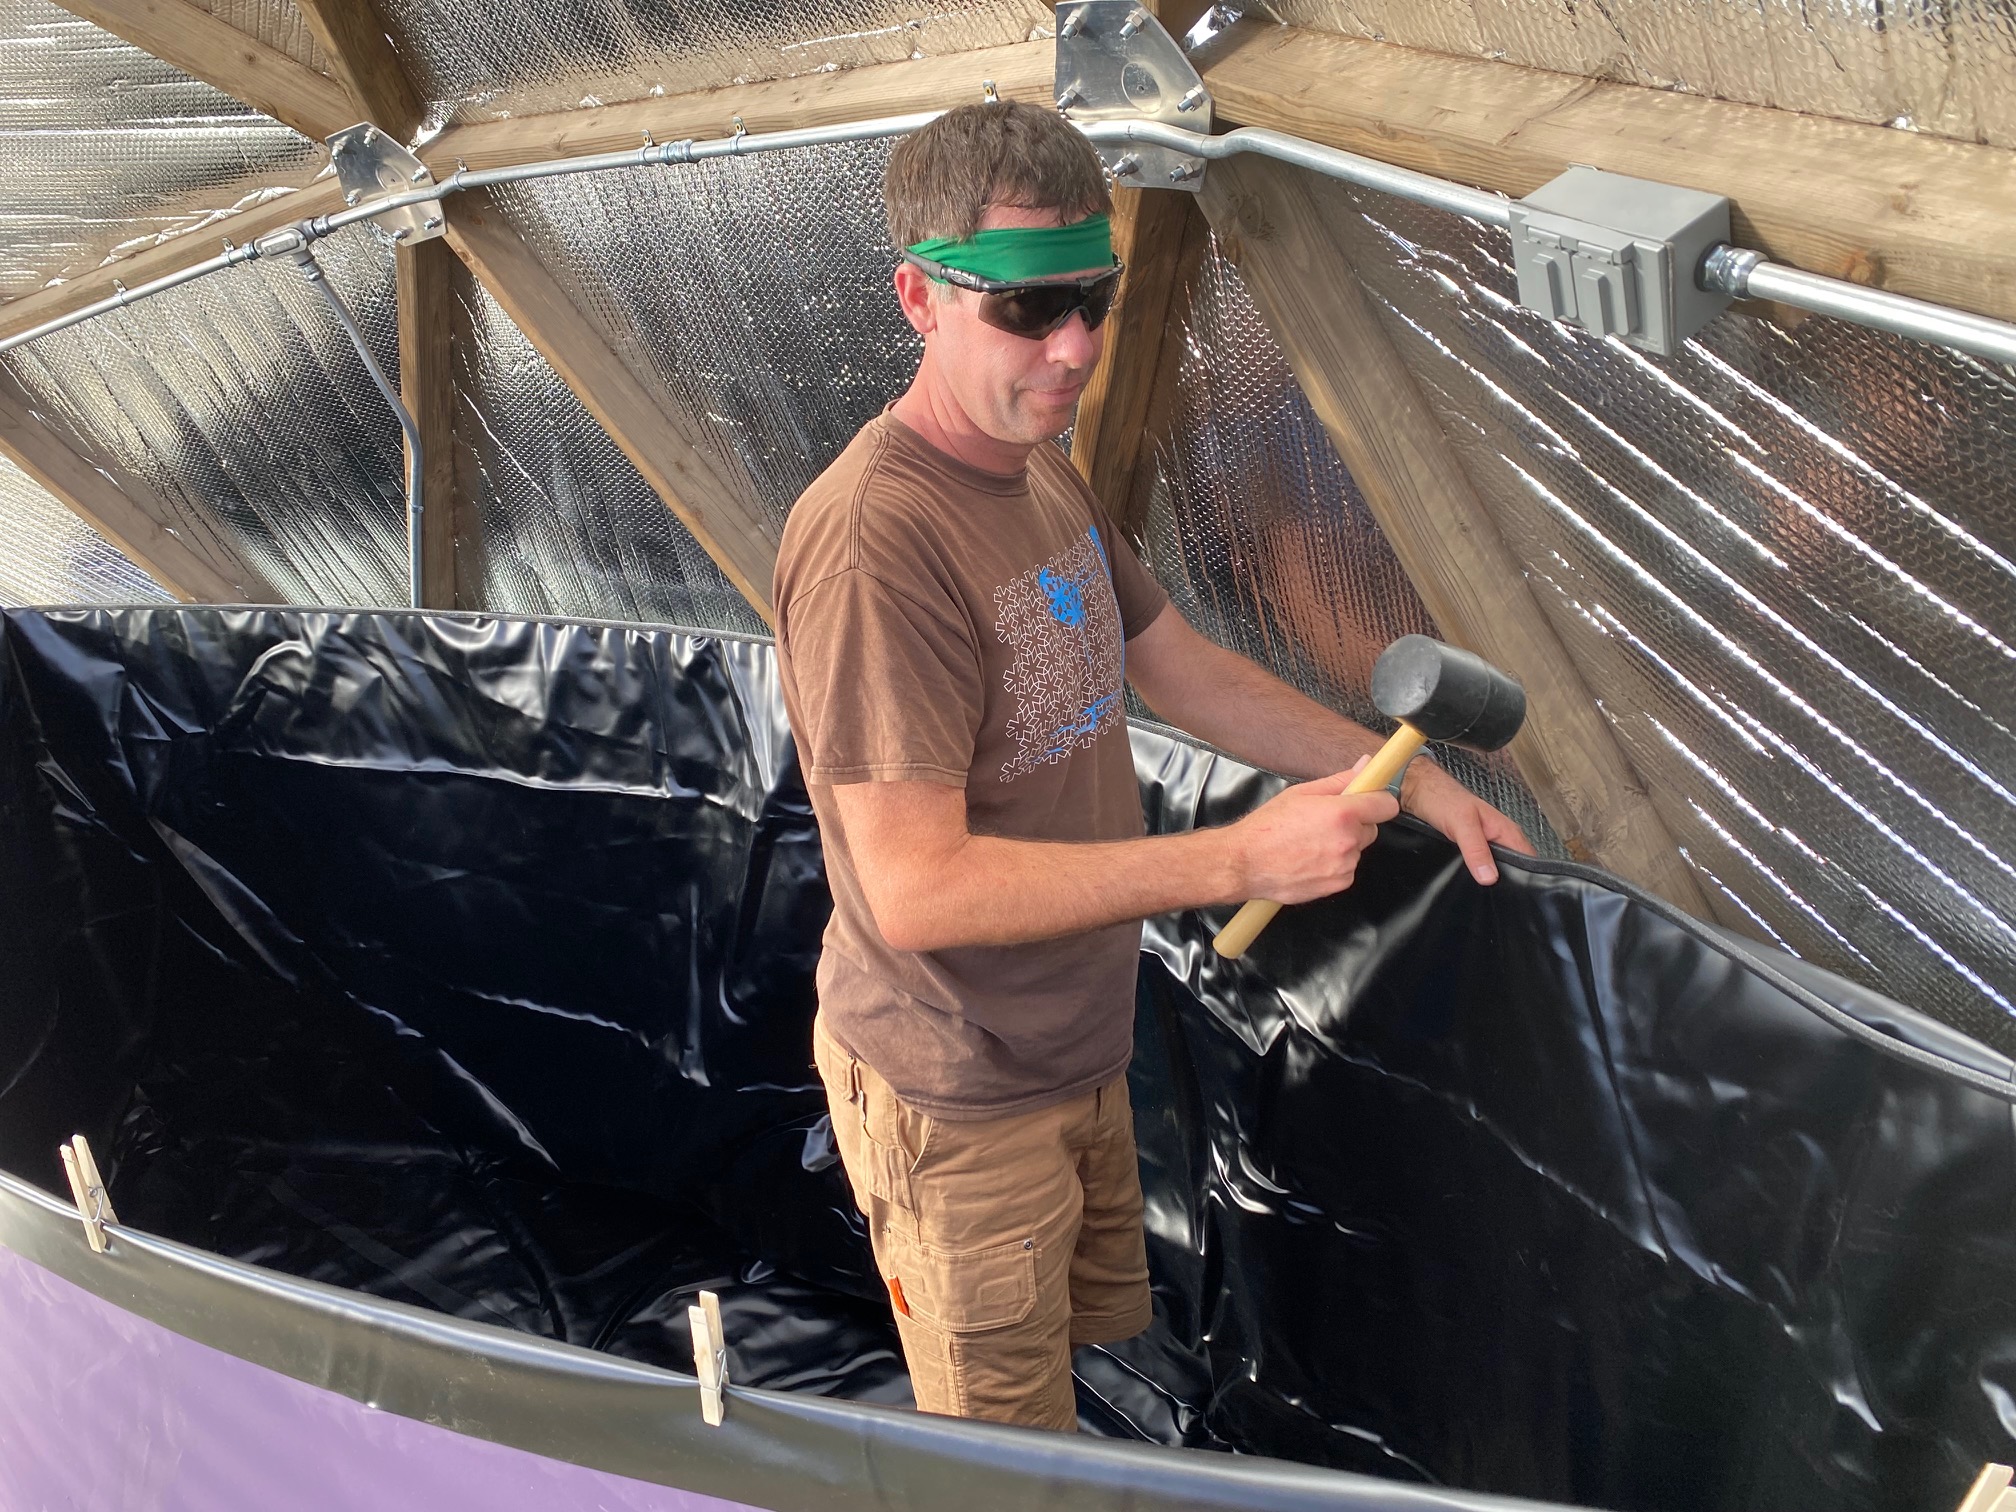
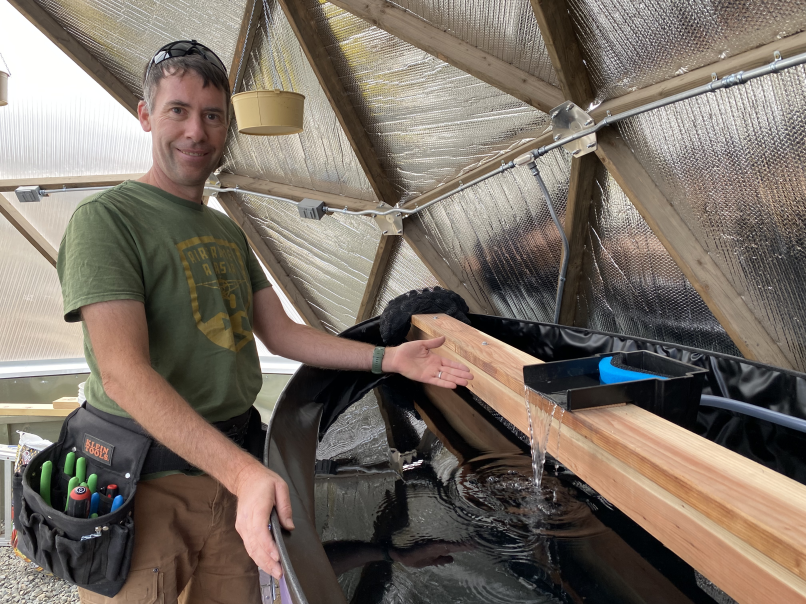
Similar to the bottom board, there is an owner provided redwood top board to keep the pond from collapsing into a circle once it is full of water.
A solar powered pump leads to a humidifying water fall feature that we can eventually decorate with rocks.
There is a shade cloth to hang in the hotter part of the year.
Also part of the Desert Cooling Package is a mister set. It helps a lot, but I wonder how mature tomato plants will react to having their leaves moistened. We’ll see!

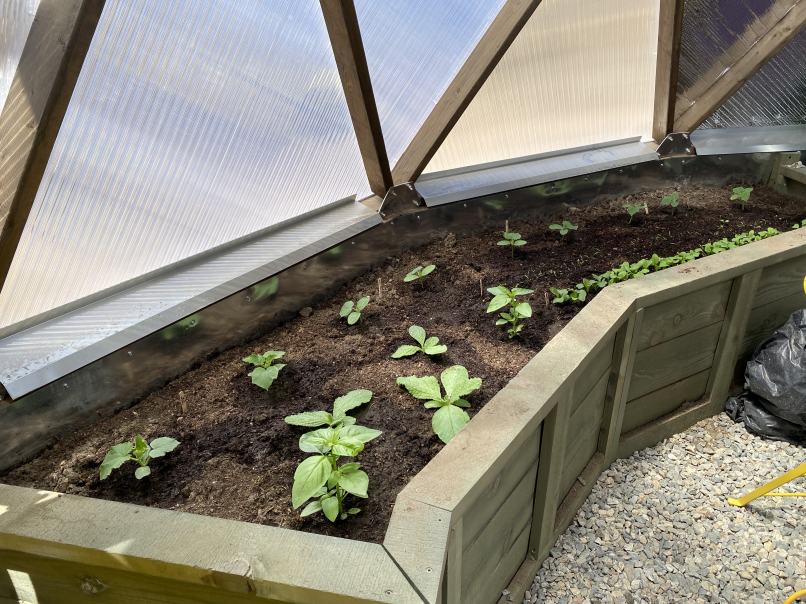
So I’ve shown you a ton of work that we did even before we could install the garden beds with soil for the plants to grow! We’re really glad we bought the prebuilt dome garden beds from Backyard Boxes. Jon went surveying one day and I put them all together before he got home. It was so simple and they’re beautiful. After working with several kits and also buying wood for other projects, I think kits are a really good deal because manufacturers are able buy better quality wood than I can find and also they buy wood in large quantities, so their prices are pretty good. Food for thought!
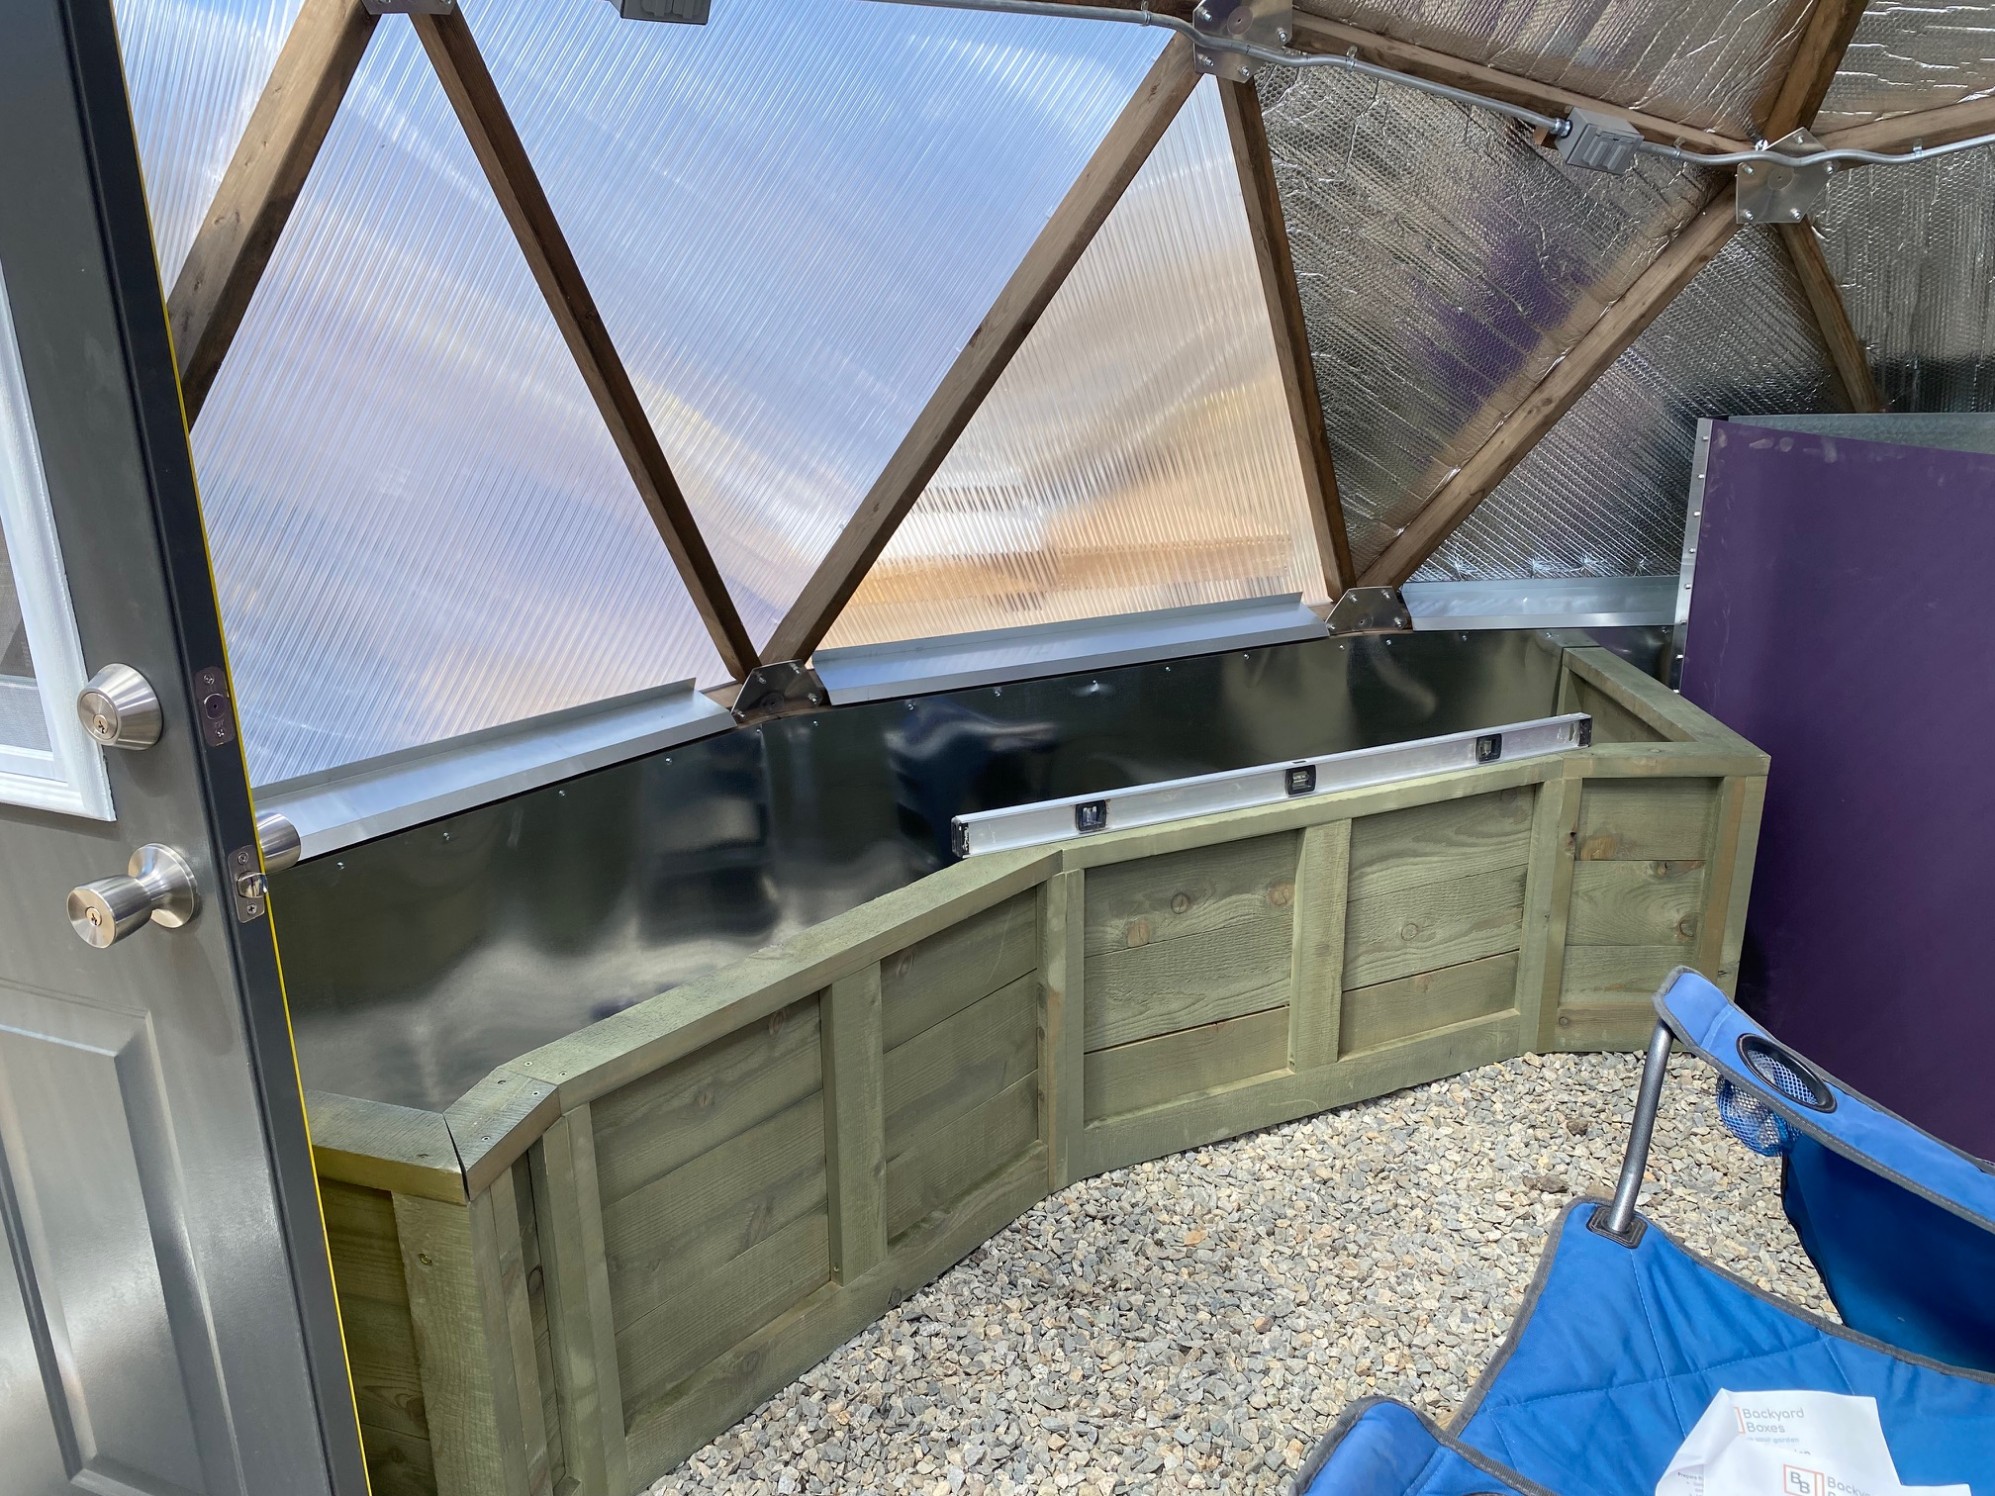
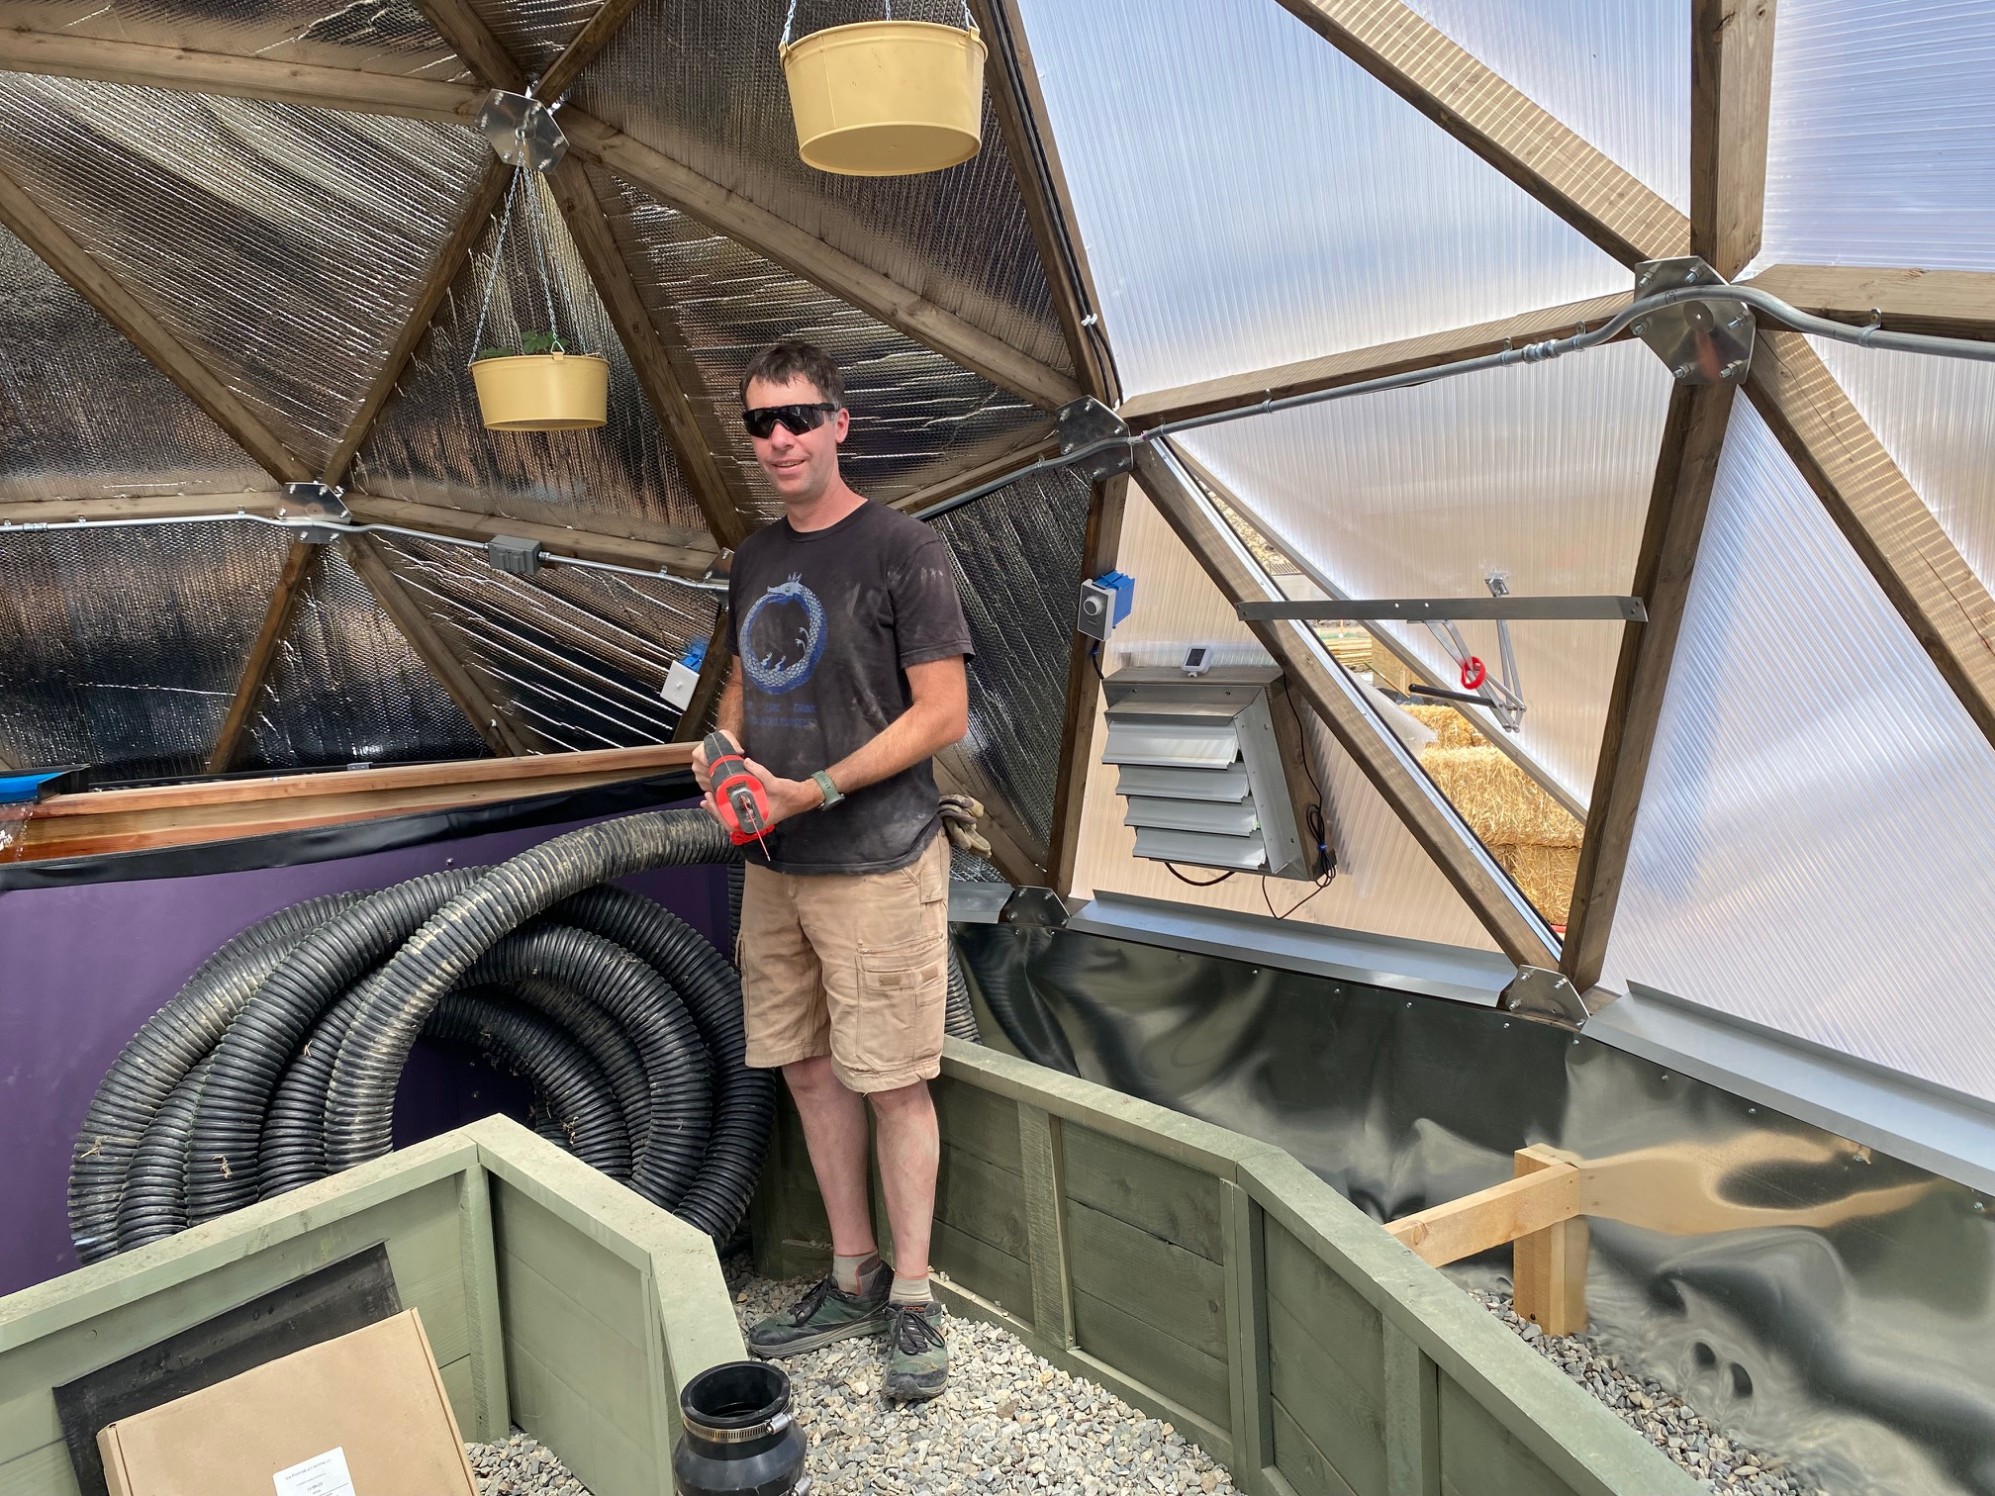
The beds have some interior supports and are attached to the riser walls. Another fancy item from the kit is a solar powered fan hooked up to 3″ black storm water hose that runs at the bottom of the largest bed to warm/cool the soil, depending on the season. Details!
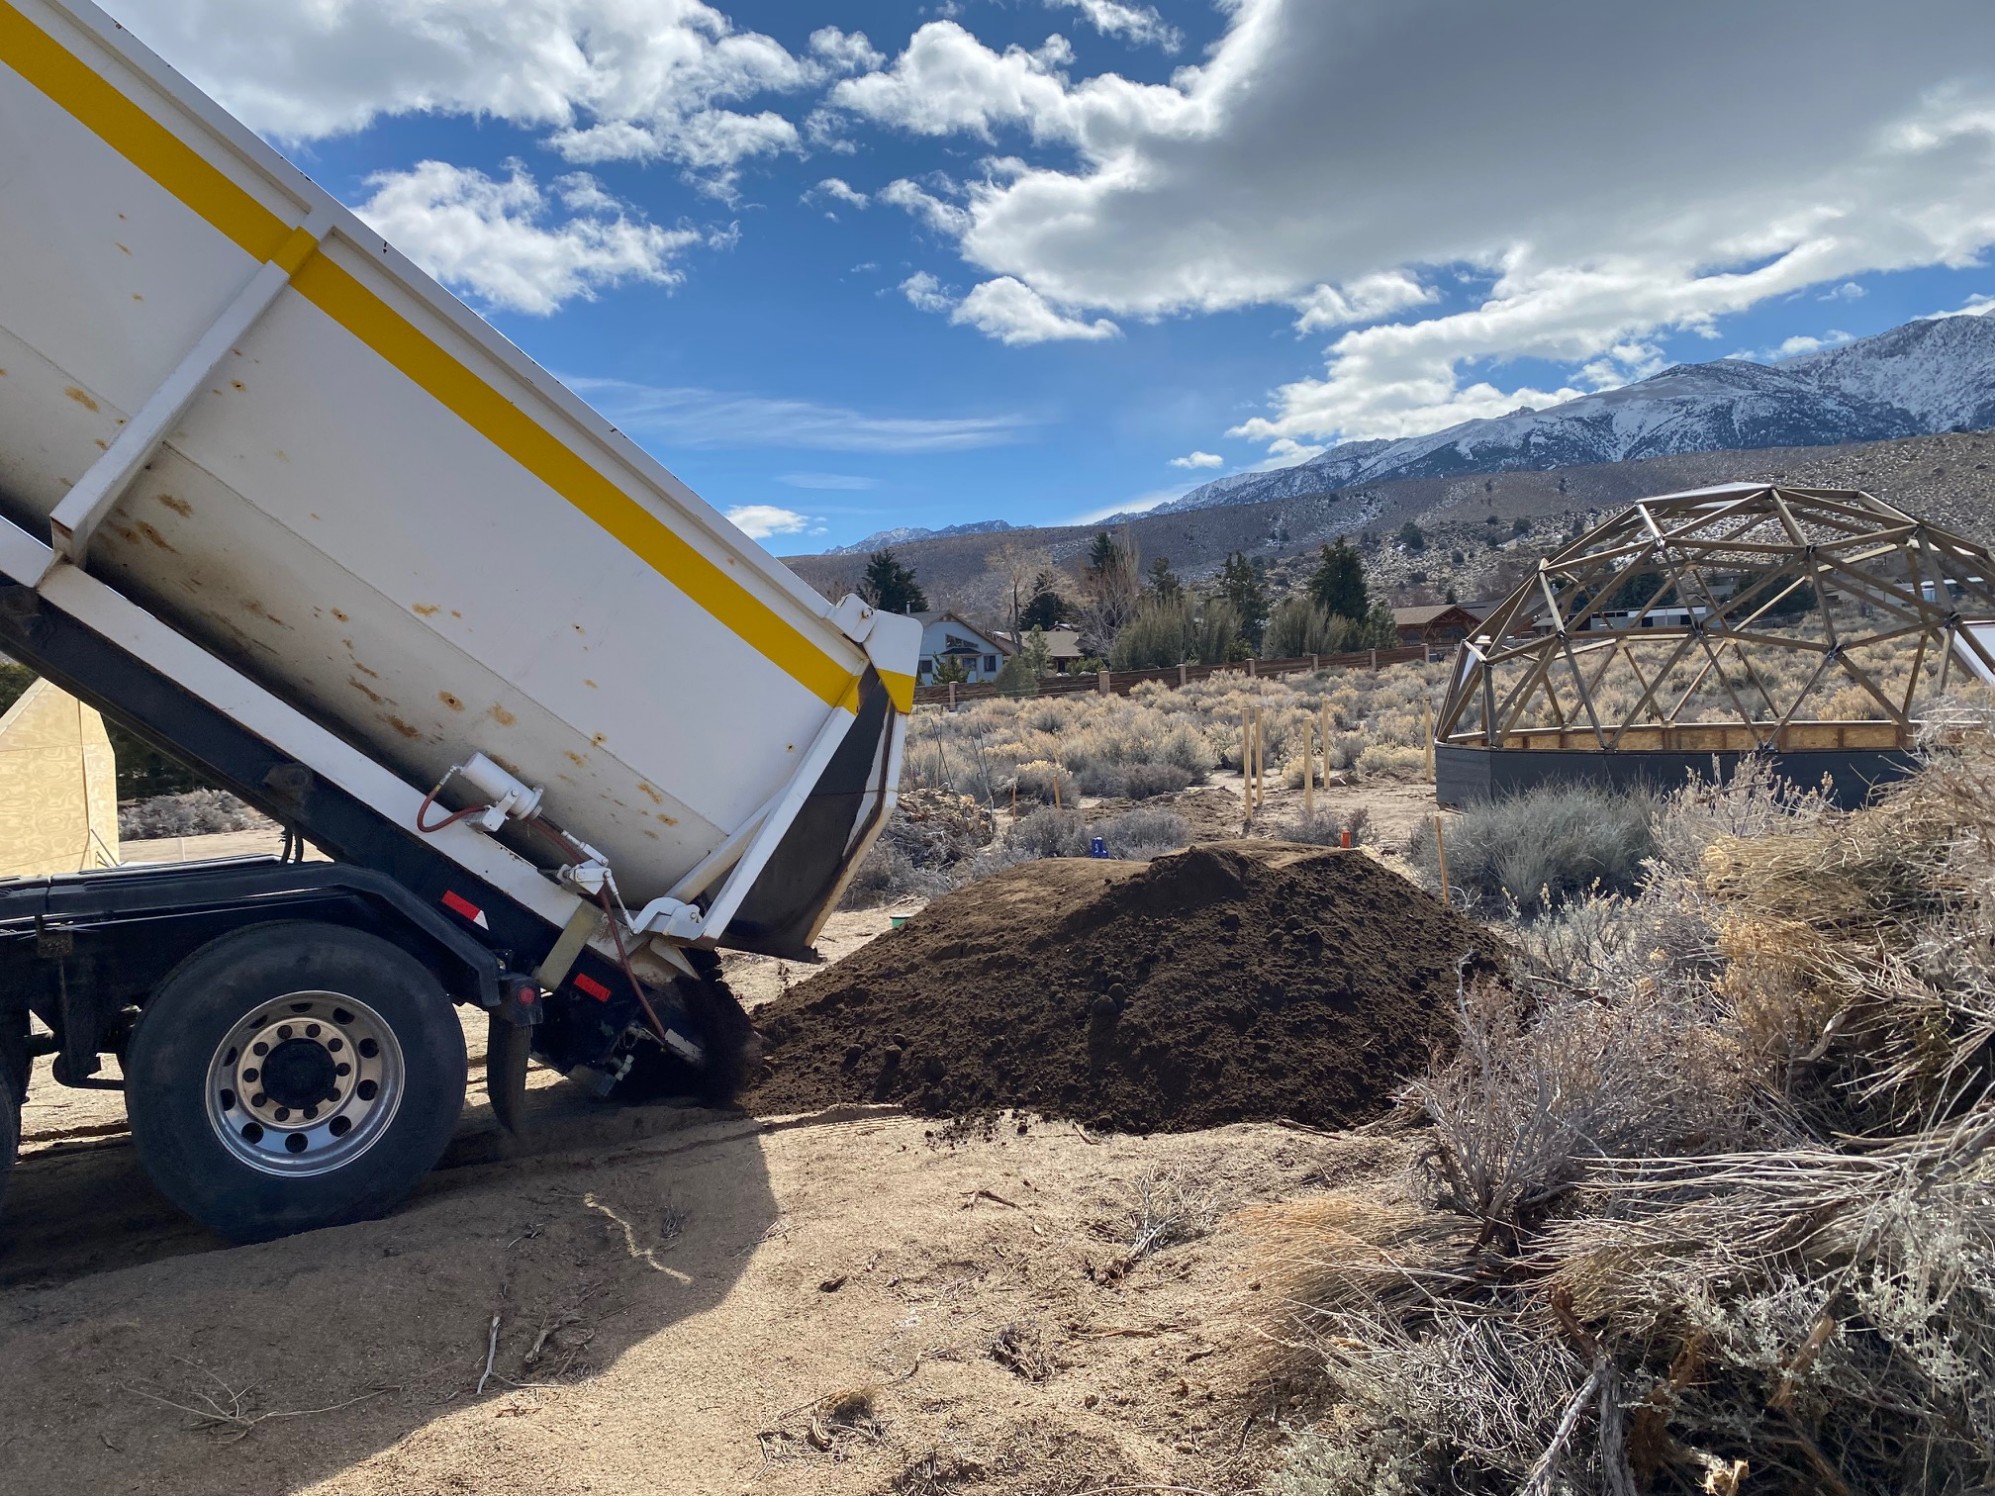
For the outside garden and greenhouse beds, I ordered 21 yards (in 3 loads) of topsoil. Shoveling and wheelbarrowing and raking are a fantastic upper body workout, I must say!
I began with the outside garden and only made the beds that I needed right away. My friend Carolyn gave us some lovely lettuce and kale plants that I wanted to get in the ground. I also wanted to direct sow snap peas and carrots.
The climate here is interesting. We’re at almost 6,000′ elevation, so there is a late Average Last Frost. But it gets very hot in the summer. I’m going to attempt 3 mini seasons outside, probably with some overlap. I feel like I got a late start on my spring season of snap peas, lettuce, kale, radishes, and quick little carrots. I transplanted some more brassica starts like broccoli, brussel sprouts, and red cabbage, but they aren’t growing very fast and I hope they’ll be ok to finish growing when it gets hot. Update: They’re growing fast now!
I made the beds high outside for the spring, to help them get more solar radiation. I plan to fill the paths with mulch as high as the beds or higher to help cool them for the summer season, when I plant the tomatoes, peppers, beans, eggplant, squash, and melons. Hopefully, the mulch will have worn down a bit in time for the end of the fall season, when the beds need more heat. It is all a grand experiment, as I’ve heard people say.
The polycarbonate is really shiny in our bright, desert sun. It was a surprise to us because the domes looked less reflective on the website. Our closest neighbors told us that the brightness really bothered their eyes, even when inside their house! So we put up some fence posts and hung shadecloth as a visual block while we tried to figure out a solution. I asked the polycarb manufacterer and they suggested a particular product: a matte spray. Jon sprayed it on the triangles that faces our poor neighbors when there was a less windy day.
Then filling the greenhouse beds. I finished the small westerly one first, so planted the 2 basil plants Jon’s mom gave me on my visit. They are very happy!
My parents visited at this time, so my dad raked the beds perfectly smooth and my mom helped with water hose management. And it was great to chat with them both about gardening. Someday I’ll set up a drip watering system, but it is nice to check on every little plant every day while I’m learning about gardening here.
Outside, I finally finished all the beds. They are laid out for summer crops, so it will be funny when I plant more lettuce and kale starts in the individual mounds I made for squash and melons. Jon’s mom visited and helped by spreading straw in the paths. When we have cold snaps, I can quickly cover the delicate plants with some straw for the night.
All the berries and fruit trees that Jon tends are showing life with many leaves. It is pretty exciting!
And now back to constructing the house and utility domes!